1. Introduction
1.1 What is the Palixo App?
Palixo is a cloud-based photo management service for businesses that need to capture, organise and share work-related images. The Palixo app for iPhone and Android is the on-site companion to the Palixo website: it puts a purpose-built camera, your albums and your tags in your pocket, and it keeps working when you have no signal.
Key characteristics:
- Built for the job site — a fast camera with tags applied as you shoot, short video clips, and a drawing tool for marking up photos.
- Offline first — every album you can see is catalogued on your phone. You can browse, tag, edit, capture and import without a connection; the app uploads and downloads in the background when it can.
- One library, everywhere — photos you take in the app appear on the Palixo website, on your other devices and in Salesforce as soon as they upload. Photos your team adds elsewhere arrive on your phone with the next sync.
- Secure cloud storage — your photos are stored privately on Amazon Web Services (AWS) infrastructure. On the phone, the app can be locked behind Face ID, Touch ID or your fingerprint.
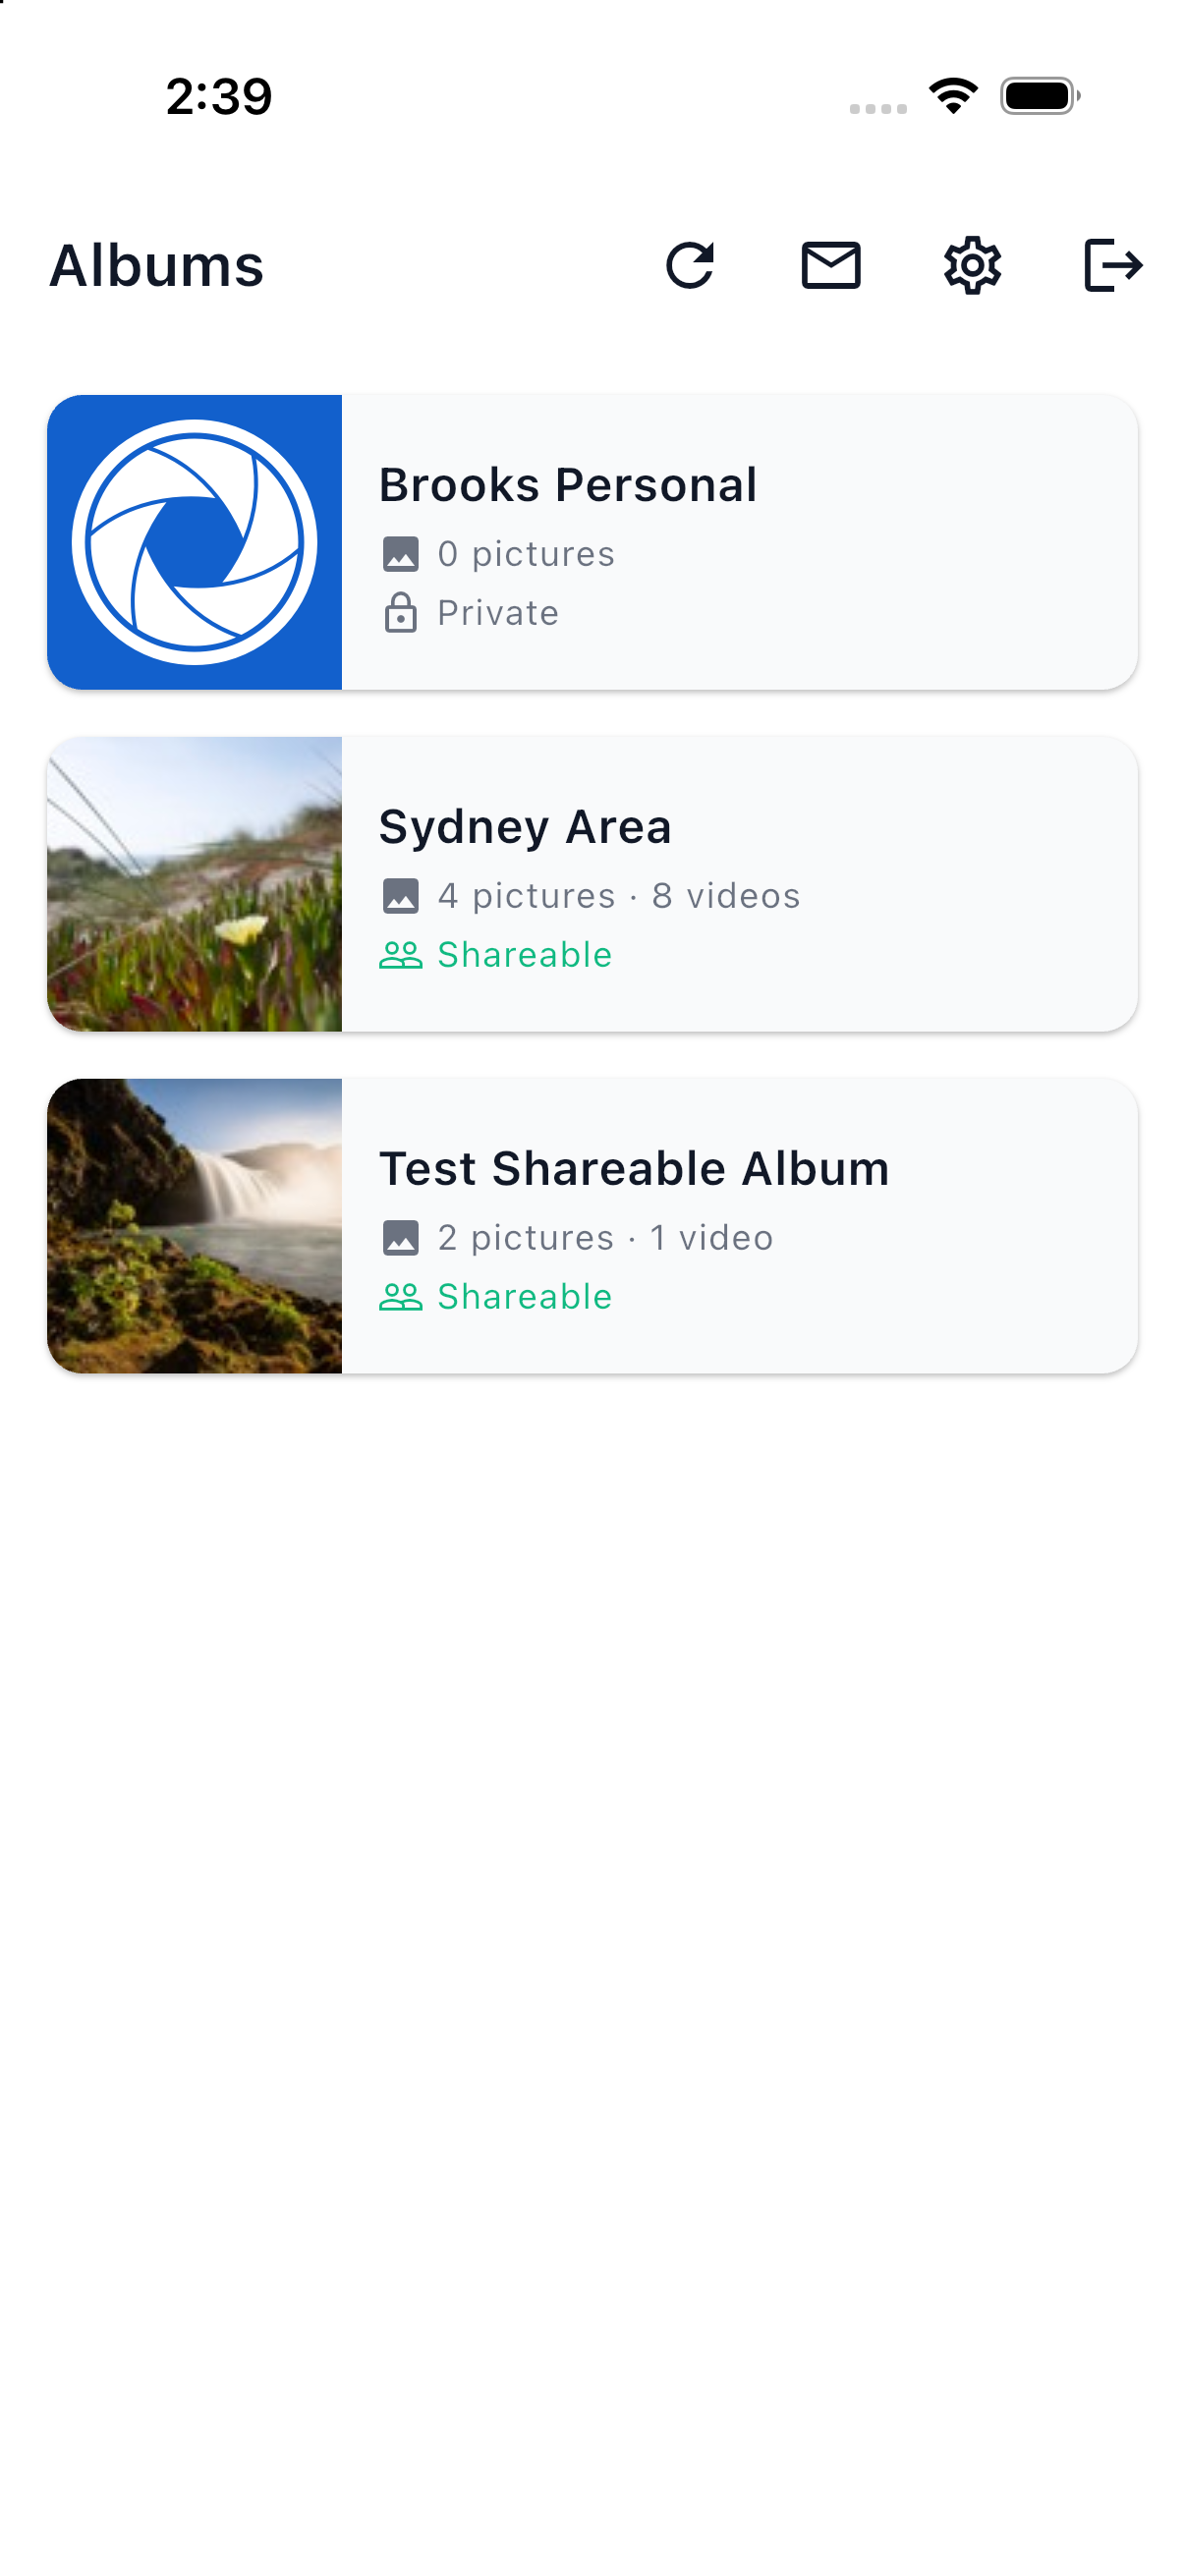
The Albums screen on an iPhone
1.2 Key Features Overview
Camera with tags Add tags before you shoot and every photo in the session carries them. The camera has a queued shutter, a three-tier auto flash that switches on the torch in the dark, pinch zoom and a front/rear lens switch.
Short videos Record clips of up to ten seconds straight into an album. Clips carry tags like photos, play on your phone immediately and upload in the background.
Draw on a photo (Markup) Add arrows, lines, shapes and text to a photo, then save it as a copy beside the original or, if you could delete the photo, over the original.
Tag-based organisation All photos are organised by tags rather than folders. Filter any album by one or many tags, and switch between matching any or all of them.
AI Tagging (System Tags) Photos can be tagged automatically by Palixo. In the app these System Tags appear in their own purple section on each photo, can be used as filters, and can be removed one at a time.
Collaborators and invitations Album owners can invite people, grant or revoke access per album and remove collaborators from the app. Invitations you receive appear in an inbox in the app, and invitation links in email open the app directly.
Plan and usage visibility A Plan & Usage screen shows your media items, storage and collaborator slots against your plan, and a colour-coded banner warns you as you approach a cap.
Storage you control Choose, per album or for the whole app, whether full-size photos are kept on the phone for instant offline viewing or fetched only when you open them.
1.3 Supported Devices
| Platform | Requirement |
|---|---|
| iPhone | iOS 15 or later |
| Android phone | Android 7.0 (API 24) or later |
The app is designed for phones and is used in portrait. The camera screen works in landscape as well: its controls rotate to stay upright and landscape photos and videos are saved the right way up.
1.4 App or Website: Which to Use for What
The app and the website work on the same albums, but some features live in only one place.
| Feature | Palixo app | Palixo website |
|---|---|---|
| Take photos with tags | Yes | Yes (browser camera) |
| Record short videos | Yes (up to 10 s) | No |
| Import from your photo library | Yes (up to 100 at once) | Yes (file upload) |
| Browse, filter and tag photos | Yes, including offline | Yes |
| Rotate, rename, describe, delete | Yes | Yes |
| Draw on a photo (Markup) | Yes | No |
| Bulk actions (select many) | Yes | Yes |
| Download photos | Save to your camera roll | Download or ZIP |
| Invite collaborators and manage access | Yes | Yes |
| Accept invitations | Yes (Invitations inbox) | Yes (Profile page) |
| Share Collections (links for people without an account) | No | Yes |
| Turn AI Tagging on or off | No (website setting) | Yes |
| Change your name | Yes | Yes |
| Change password | Use Forgot password? on the sign-in screen | Yes |
| Plan & usage | Yes | Yes |
| Salesforce Cloud Images component and emails | Opens the app from links | Yes |
2. Quick Start
Get up and running with the Palixo app in a few minutes. This guide assumes you already have a Palixo account; if not, see section 3.2.
Step 1: Install and Sign In
- Install Palixo from the App Store (iPhone) or Google Play (Android).
- Open the app. You will see the Sign in to your account screen.
- Enter your email address (or username) and password, then tap Sign In.
- If your phone offers it, choose Enable on the Enable Biometric Unlock? prompt so you can unlock the app with Face ID, Touch ID or your fingerprint next time.
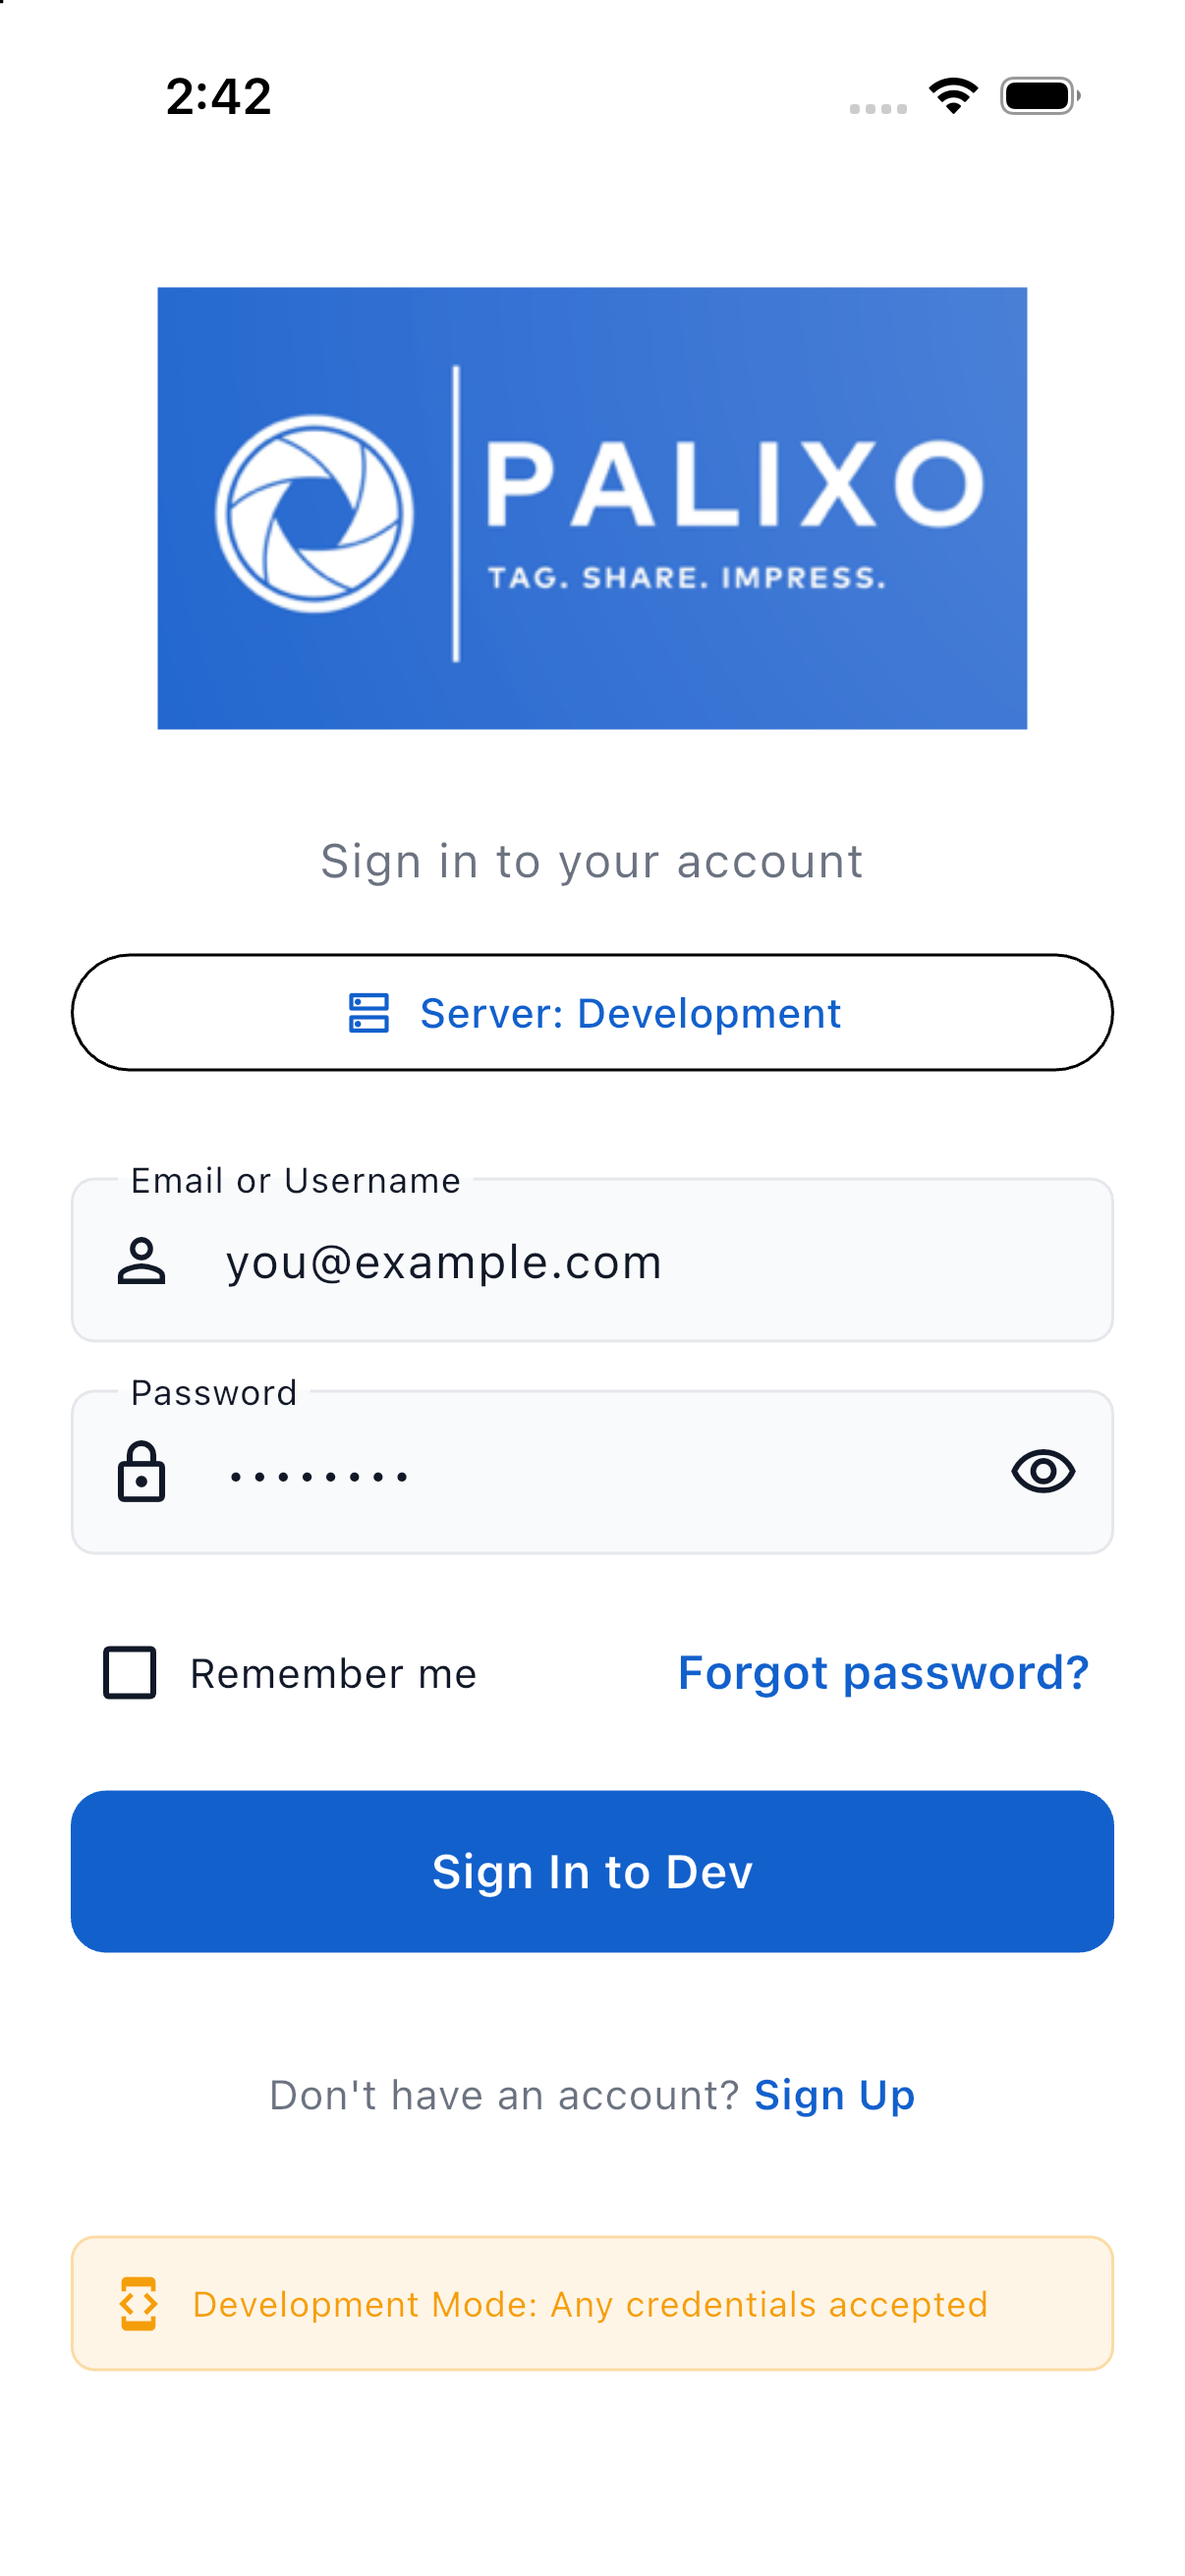
The sign-in screen
Step 2: Open an Album
- After signing in you land on Albums, which lists every album you own or have been invited to.
- Tap an album to open it. If you have only one album, the app opens it for you.
- You will see the album's photo grid and, above it, the tag filter bar.
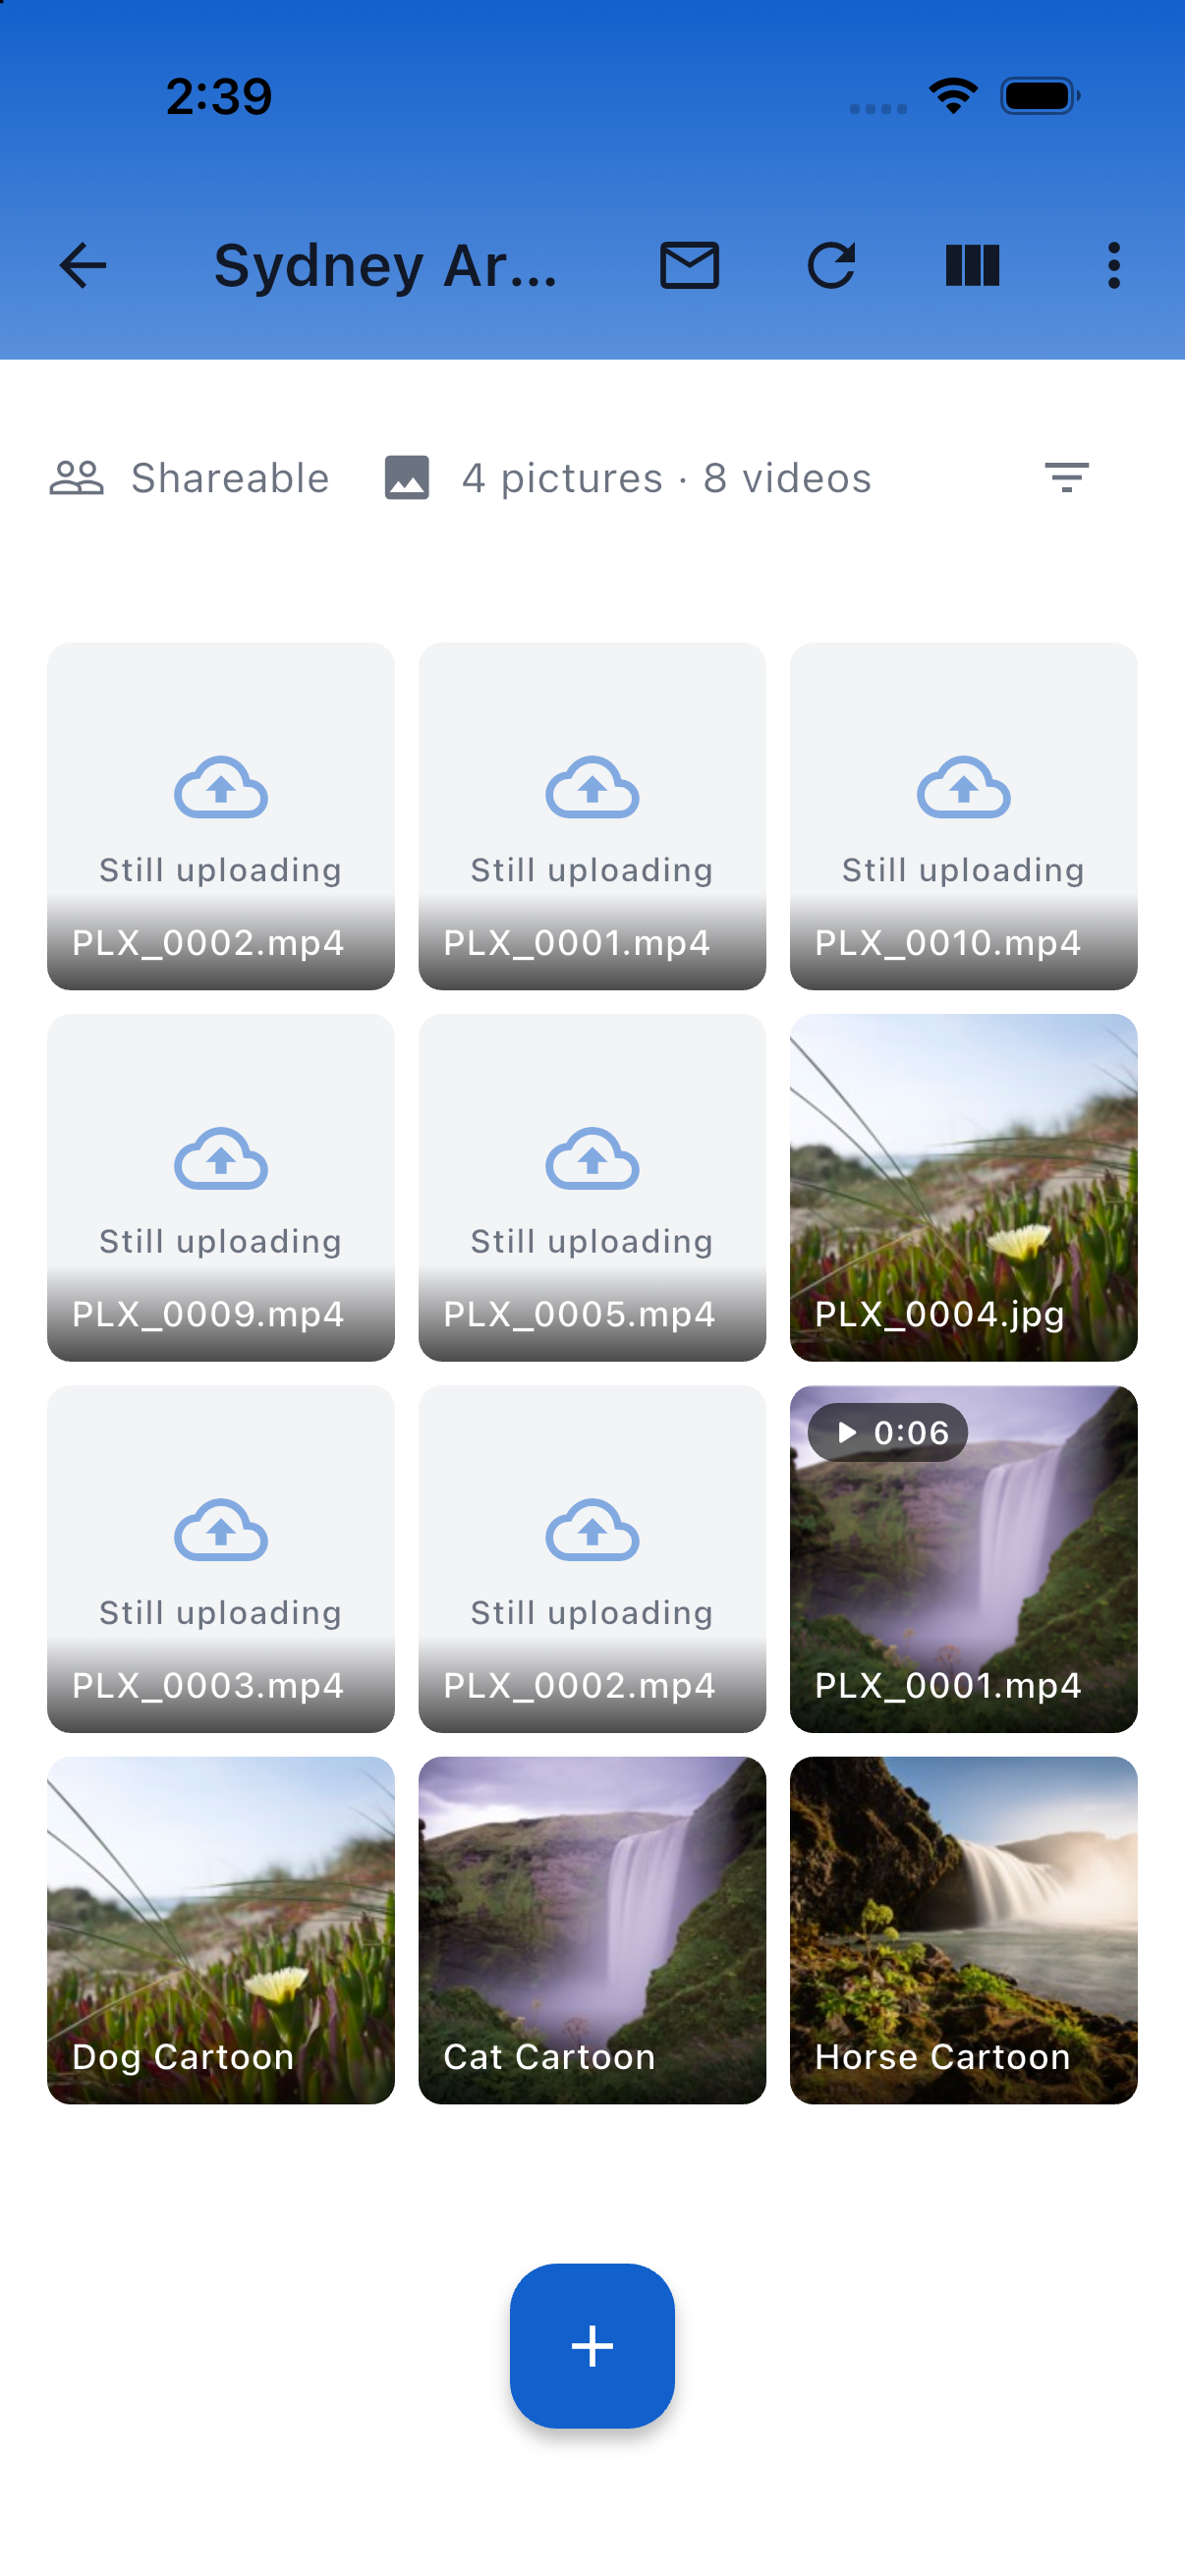
An album's photo grid
Step 3: Take Your First Photo
- Tap the blue + button at the bottom right of the album.
- If asked, allow Palixo to use the camera.
- Tap the + chip above the shutter to open the tag bar, type a tag such as
test-photoand tap the tick. - Tap the white shutter button. The preview blips and a thumbnail of your photo appears at the bottom left.
- Keep shooting: every photo in this session gets the same tags. The badge at the top counts them.
- Tap the back arrow to return to the album.
Step 4: View Your Photo
- Your new photo is at the top of the album grid (the default sort is newest first).
- Tap it to open the viewer. Swipe left and right to move between photos, and swipe down to close.
- The panel under the photo shows its file name, date, name, description, location and tags.
The photo uploads in the background. Until it does, a pill on the Albums screen shows how many photos are waiting.
Congratulations, you have taken your first photo with the Palixo app. Read on to learn about everything else the app can do.
3. Getting Started
3.1 Installing the App
Search for Palixo in the App Store on iPhone or in Google Play on Android and install it. The app needs the following permissions, which it asks for the first time each feature is used:
| Permission | Used for |
|---|---|
| Camera | Taking photos and recording videos |
| Microphone | Recording sound with videos (asked when you first switch to Video) |
| Photos / Photo library | Importing pictures from your library, and saving photos to your camera roll |
| Face ID / Biometrics | Unlocking the app (optional) |
| Notifications | Showing the number of pending invitations on the app icon (optional) |
You can change any of these later in your phone's Settings app.
3.2 Signing Up
If you do not have a Palixo account yet:
- On the sign-in screen, tap Sign Up.
- Fill in First name, Last name, Username, Email, Password and Confirm Password.
- Tick I agree to the Terms of Service and Privacy Policy and tap Create Account.
- Palixo emails you a six-digit verification code. Enter it on the Verify Email screen and tap Verify Email. Use Resend if it does not arrive (check your spam folder first).
- Sign in with your new details.
Rules for the form
- Username: 3 to 20 characters using letters, numbers,
_and-. - Password: at least 8 characters with an uppercase letter, a lowercase letter, a number and a special character.
- Your email address is your account identifier and cannot be changed later.
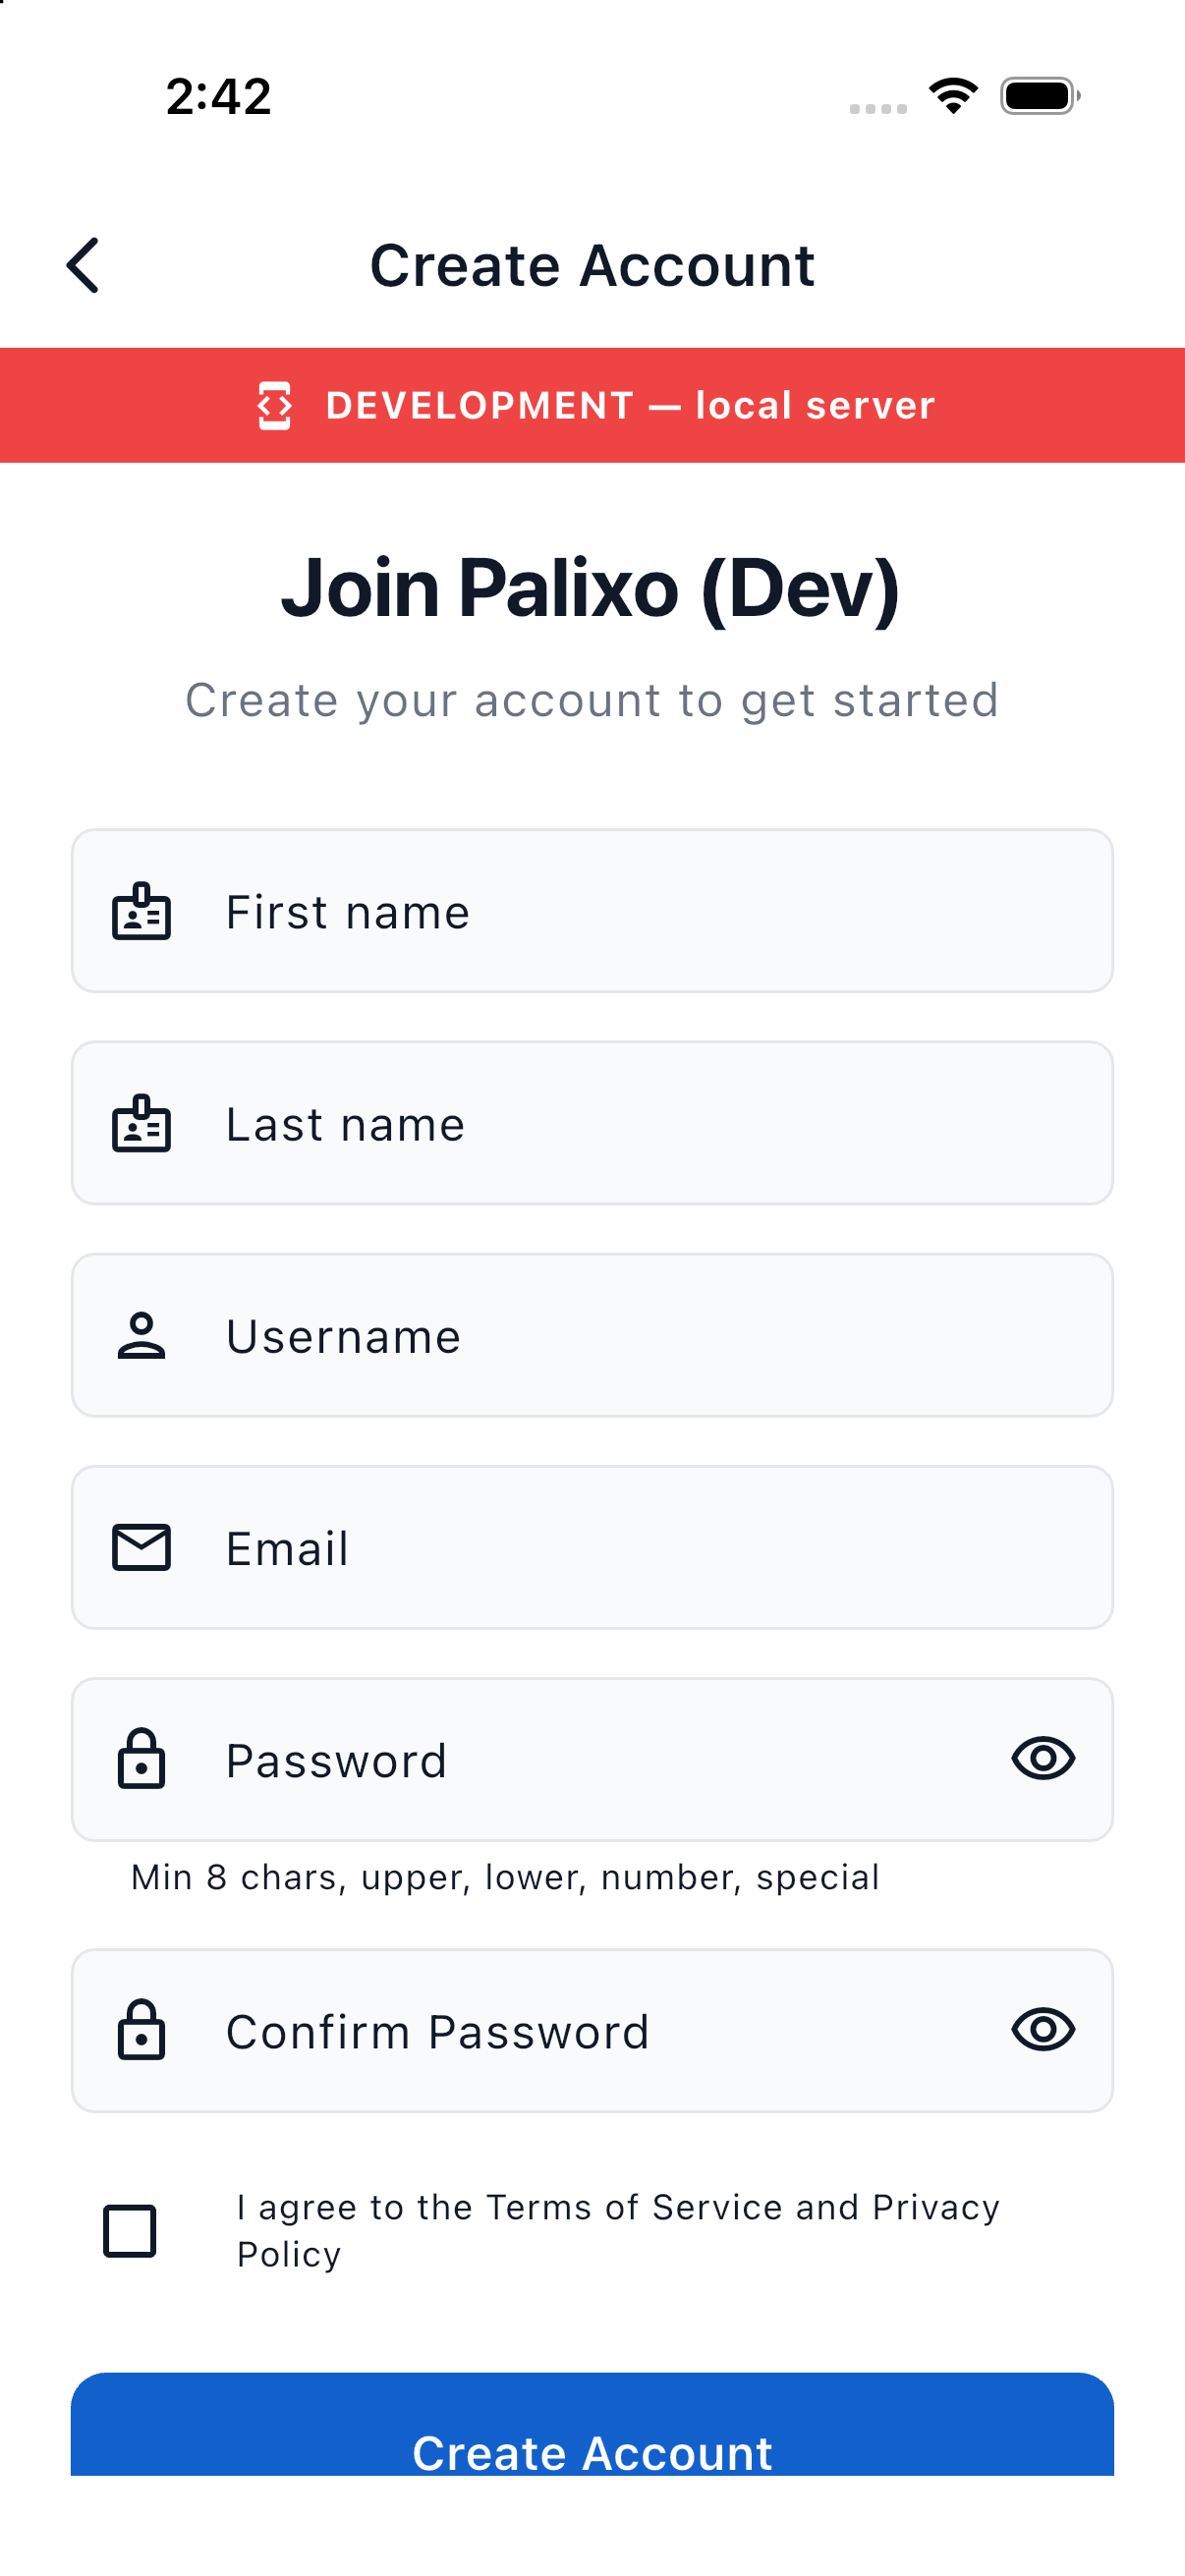
The Create Account screen
New accounts start on a 30-day free trial. See section 3.5.
Invited by a colleague? Open the Accept Invitation link in the email on your phone. If the app is installed it opens and accepts the invitation for you; if you are not signed in, sign in (or sign up) first and then open the link again. See section 8.6.
3.3 Signing In
- Enter your Email or Username and Password.
- Tick Remember me to have your username filled in next time.
- Tap Sign In.
The first time you sign in successfully on a phone with Face ID, Touch ID or a fingerprint reader, the app asks Enable Biometric Unlock?. Choose Enable to lock the app behind biometrics, or Not Now.
If you see This account has been deactivated., an administrator has disabled your account. Contact support@palixo.media.
3.4 App Lock and Biometrics
When biometric unlock is enabled, the app shows Palixo Locked when you come back to it after the Lock Timeout has passed, and every time the app starts. Tap Unlock and authenticate with Face ID, Touch ID, your fingerprint or your phone's passcode. Sign Out on the lock screen signs you out without unlocking.
Choose how long the app can sit in the background before it locks in Settings → Security → Lock Timeout (from 30 seconds to 24 hours, or Never). Even with Never, the app asks for biometrics after it restarts. See section 10.6.
3.5 Your 30-Day Trial
New accounts start on a 30-day free trial on the Personal plan, with the full Personal feature set and no card required.
Where to see days remaining
- Settings → Plan & Usage shows Billing: Trial and a Trial ends row with the countdown, for example 12 days left.
When the trial ends
If your trial runs out before you have accepted an album invitation from someone else, the app shows Trial expired — Your trial has ended. Contact sales to continue. with a button that copies the sales email address. Your account and photos are preserved; nothing is deleted. Accepting an invitation to someone else's album converts the trial to a free Personal plan automatically.
The Plan & Usage screen showing the trial countdown
3.6 Finding Your Way Around the App
Albums screen
The home screen lists your albums. Each card shows the album name, a Private or Shareable chip, and a count such as 3 pictures · 1 video. Pull down to sync now. The top bar has:
- Sync (circular arrow) — starts a sync; a badge shows how many changes are waiting to upload, and the icon turns into a warning if the last sync failed.
- Invitations (envelope) — your invitation inbox, with a red badge when invitations are pending.
- Settings (gear).
- Sign Out.
Above the list you may see the plan usage banner (section 10.3) and the upload pill (section 7.2).
Album screen
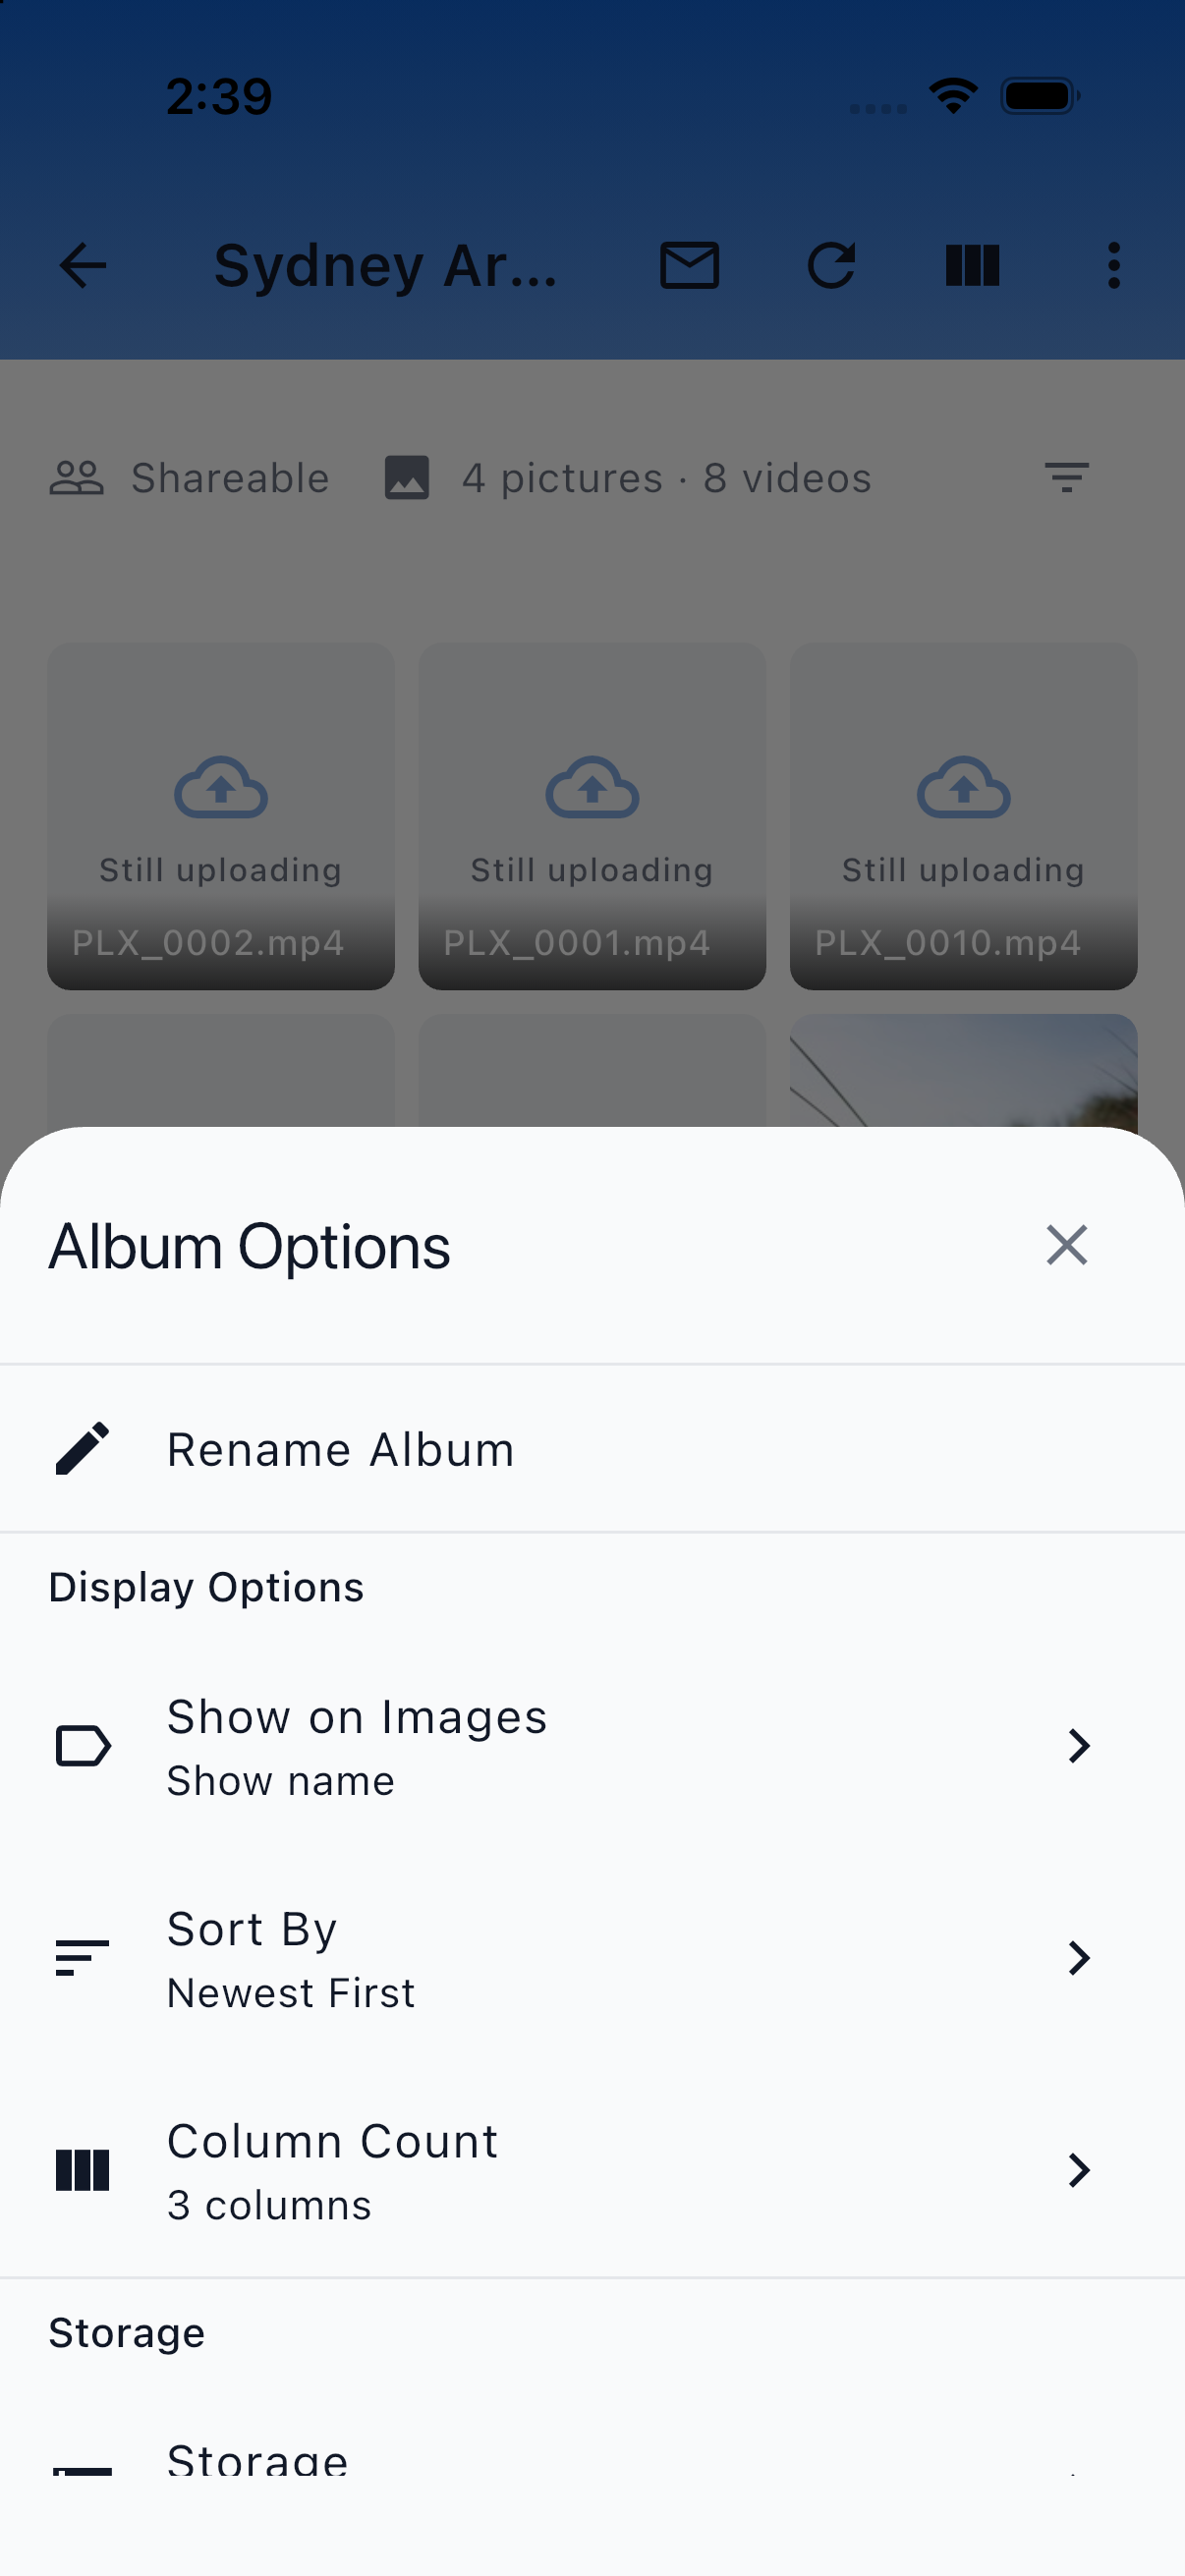
Opening an album shows its photos and videos in a grid. The top bar has Sync, a column count menu and a ⋮ menu with Album Options. Below it, an info row shows whether the album is private or shareable, how many items it holds and a filter button, then the tag filter bar and the grid. The blue + button opens the camera.
Viewer
Tap any photo or video to open it full width, with an information panel underneath and a toolbar of actions. Swipe sideways to move through the album and down to go back.
Settings
Everything about your account, plan, storage, sync, camera, security and appearance is in Settings (section 10).
The album screen with the Album Options menu open
4. Taking Photos and Videos
This section covers the app's camera: tags, photos, videos and importing from your photo library.
4.1 Allowing Camera Access
The first time you open the camera the phone asks for permission. Tap Allow.
If you declined, the camera screen shows Camera access needed with an Open Settings button that takes you straight to the app's permissions. You can still Import from Gallery while camera access is off.
- iPhone: Settings → Apps → Palixo → turn on Camera (and Microphone for video).
- Android: Settings → Apps → Palixo → Permissions → allow Camera (and Microphone for video).
4.2 Adding Tags on the Camera
Tags are the foundation of organisation in Palixo, and the camera is the best place to add them because every photo and video you capture in a session gets the tags shown in the tag bar.
Opening the tag bar
- On the camera screen, tap the + chip above the shutter row. The tag field opens with the hint Add tags to photos....
- Type a tag. As you type, matching tags you have used before drop down; tap one to select it.
- Tap + to add what you typed, or the tick (Done adding tags) to add it and close the field.
- Tags appear as chips. Tap the × on a chip to remove it from the session.
Tag rules
- Tags are stored in lowercase;
Deck-Repairbecomesdeck-repair. - A space starts a new tag, so you can type several at once:
before deck-repair job-12345makes three tags. - Use hyphens to join words:
deck-repair, notdeck repair. - Duplicate tags are ignored.
Landscape
Turn the phone sideways and the tag strip moves to the bottom edge of the screen. Tags already added stay in force, but you cannot type new ones in landscape; the strip reads Rotate to portrait to add tags.
4.3 Taking Photos
Controls, top to bottom
- Back arrow — returns to the album.
- Session badge — appears after your first shot and counts what you have captured in this camera session: 3 photos, 2 photos, 1 video. Imports are not counted.
- Flash — cycles Off → Auto → On. In Auto, the app watches the scene: in the dark it switches on the torch so you can frame the shot, and the icon turns amber. Tap the amber icon once to put the torch out (the mode stays on Auto). If the torch cannot light the scene, the flash fires when you shoot.
- Viewfinder — a 4:3 frame with corner markers. Pinch to zoom; the area outside the frame darkens when zoomed.
- Thumbnail (bottom left) — the last photo you took. Tap it to open that photo. Before you have taken anything, it opens your photo library for importing.
- Shutter (centre) — the large white button.
- Lens switch (bottom right) — front or rear camera.
- Photo | Video — switches the camera mode (section 4.4).
Taking a photo
- Make sure your tags are set in the tag bar.
- Frame the shot and tap the shutter. The preview blips briefly and the phone gives a short buzz.
- The thumbnail updates when the photo is saved. You can tap the shutter again immediately; taps are queued, and a small count appears on the shutter if several photos are still being saved.
- Every photo is saved to the album with your tags, the time and, if available, the location, and is queued for upload.
Landscape photos
Simply turn the phone. The controls rotate to stay upright and the photo is saved the right way up.
Save to camera roll
Photos are stored inside the app. If you also want them in your phone's Photos or Gallery app, turn on Settings → Camera → Save to Camera Roll (section 10.5).
PLX_0001.jpg, PLX_0002.jpg and so on in a sequence that is unique to your account on this phone. You can give a photo a friendlier name afterwards (section 5.5).
4.4 Recording Videos
Albums can hold short videos alongside photos. Videos can only be recorded in the app; the website plays them but cannot record or upload them.
- On the camera screen, tap Video under the shutter. The viewfinder changes to a taller frame and the phone asks for microphone access the first time.
- Set your tags as you would for a photo; they apply to the clip.
- Tap the red record button. A ring fills around it and a timer counts up, for example 0:04 / 0:10. In the last three seconds the timer turns red.
- Tap again to stop, or let it run: recording stops on its own at ten seconds and the app shows Clip stopped at its 10s limit.
- The clip is saved immediately and its cover frame appears in the thumbnail. Tap Photo to go back to taking photos.
Clips are recorded at 1080p with sound. Landscape recordings play the right way up. A clip you recorded plays on your phone straight away, even offline; it uploads in the background with your photos, and other people see a grey Still uploading placeholder until the upload finishes.
If you switch away from the app or back to Photo while recording, the clip is stopped and kept.
4.5 Importing Photos From Your Photo Library
You can add existing photos from your phone's library to an album.
- Open the album and tap + to open the camera.
- Add any tags you want applied to the imported pictures.
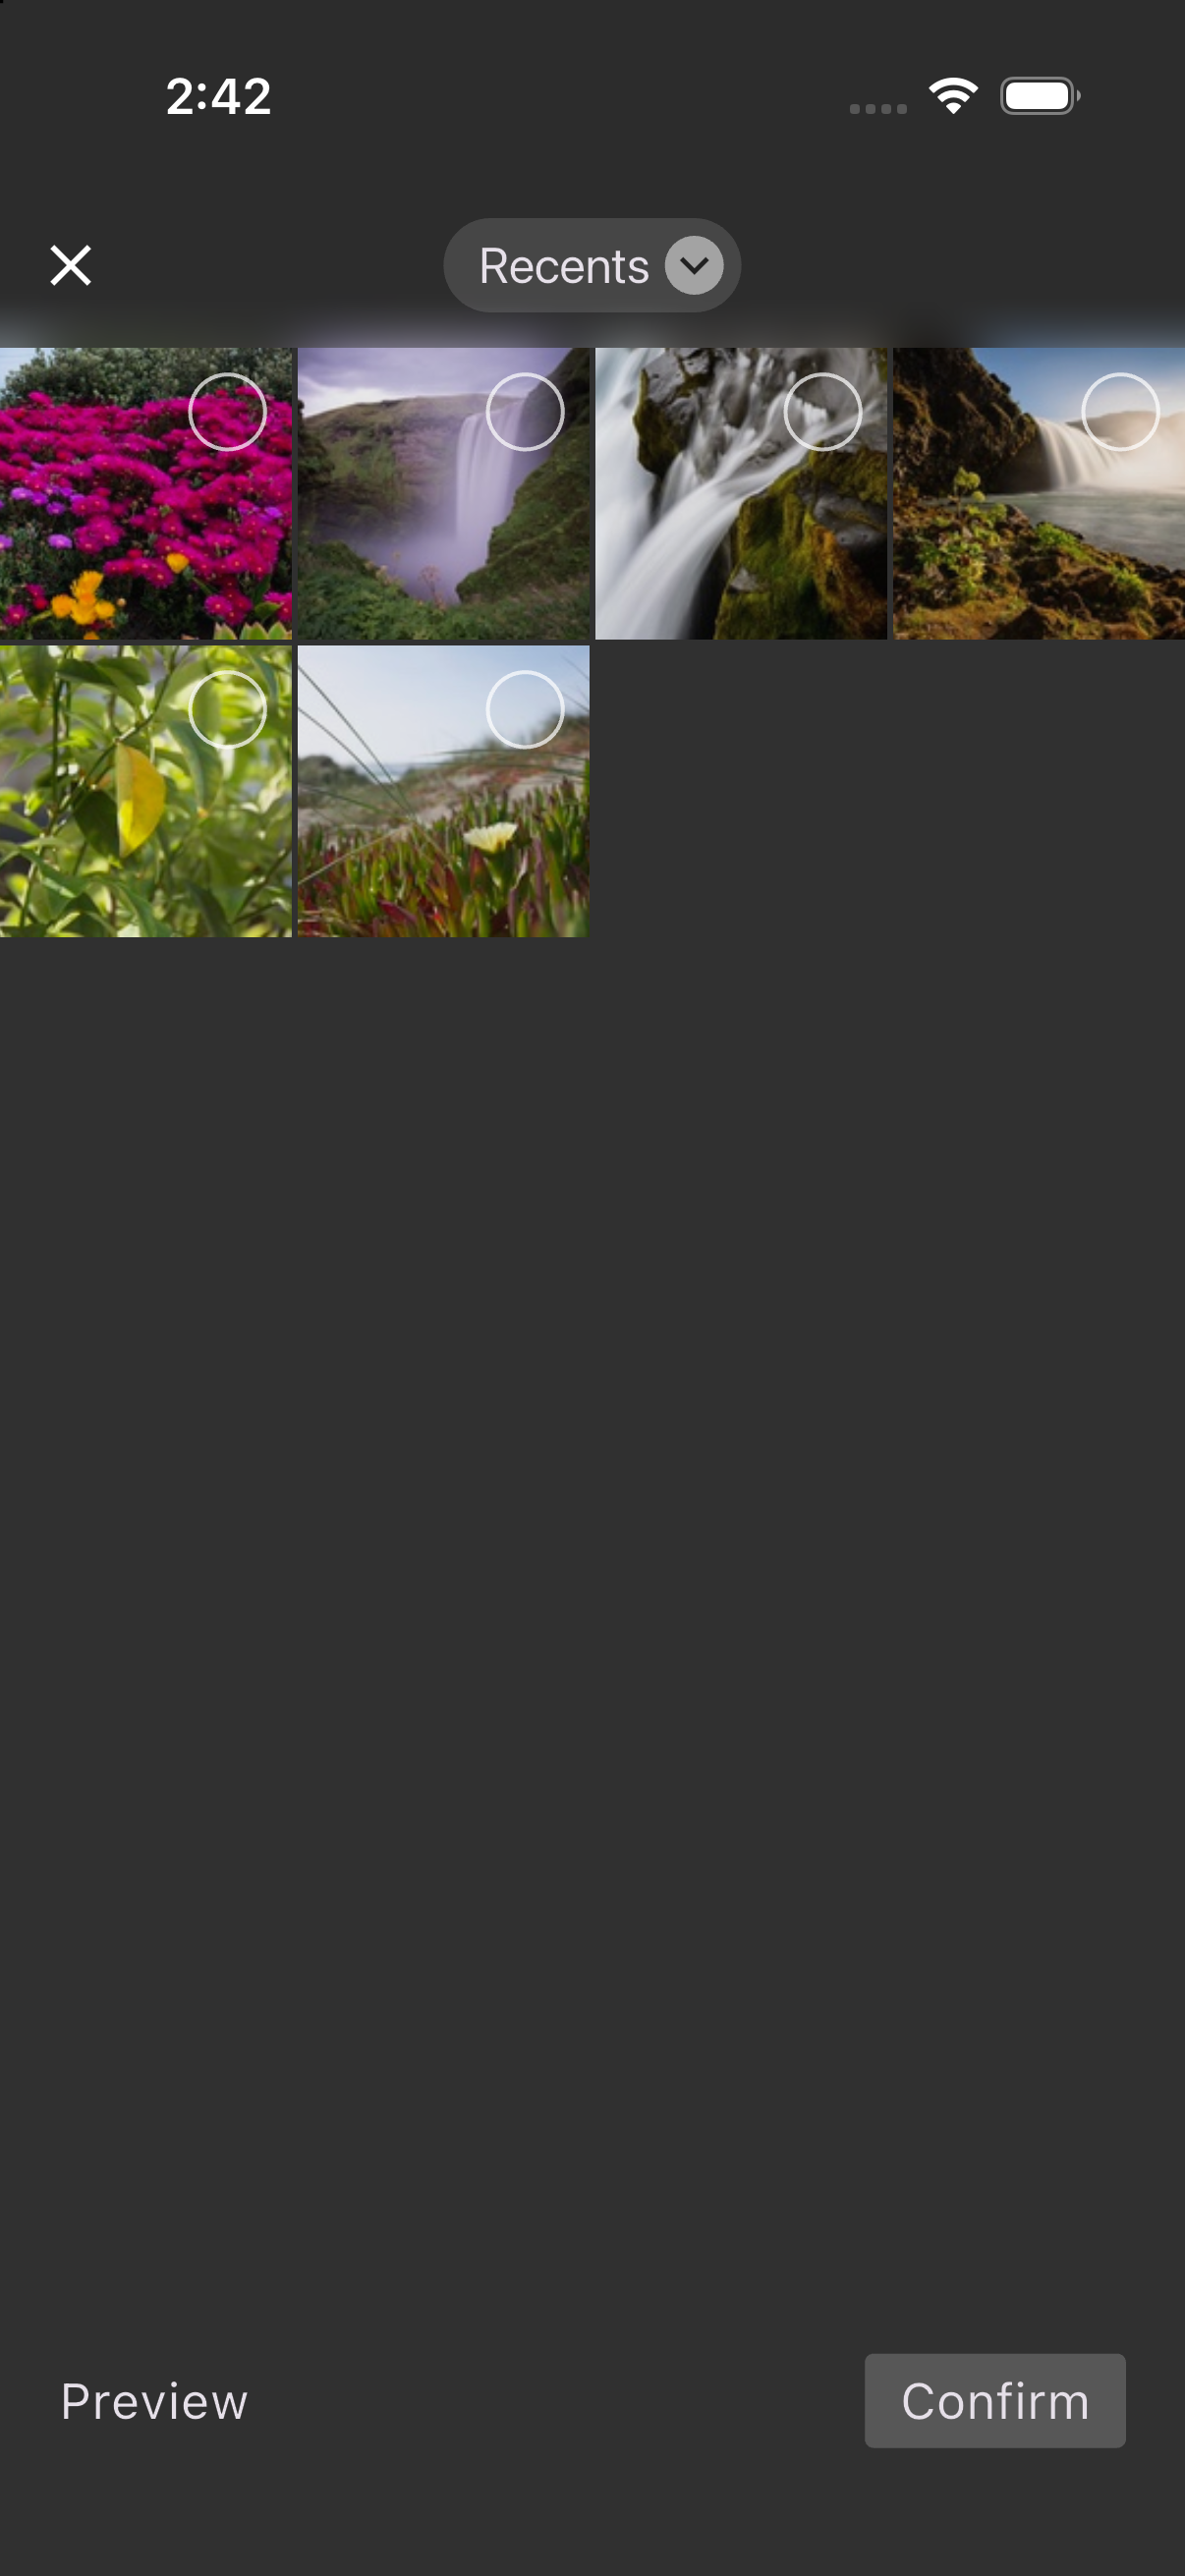
- Tap the thumbnail button at the bottom left (it opens the picker while you have not taken a photo yet). If the camera cannot start, use the Import from Gallery button instead.
- Select up to 100 pictures. You can drag across the picker to select several at once.
- Confirm. A progress overlay shows the import; keep the app open until it finishes.
- The app reports Imported 12 pictures (or Imported 10 of 12 pictures if some could not be read).
What is imported
- Images only: JPEG, PNG and HEIC/HEIF. Videos in your library cannot be imported.
- HEIC and PNG pictures are converted to JPEG on the phone before upload.
- The date taken and orientation are read from the picture where present.
The photo library picker (iOS)
4.6 Working Offline and Uploading
You do not need a connection to use the camera. Photos and videos are saved on the phone first and uploaded whenever the app has a connection, including while it is in the background or closed.
- Upload pill — on the Albums and album screens a pill reads Uploading 3 photos while uploads run, 3 photos to upload while waiting for a connection, or 3 photos not uploaded in amber if uploads have stalled. Tap a stalled pill to open Settings and see why.
- Sync badge — the circular arrow in the top bar shows how many changes are waiting.
- Retake banner — in rare cases a photo's image is lost before it finishes saving (for example the app was killed mid-capture). The album shows 1 photo needs retaking; open the photo and choose Remove & retake (section 5.9).
Photos waiting to upload are never removed by the app's storage clean-up. See section 7 for everything about sync, storage and the sync queue.
4.7 Opening the Camera From a Link (Salesforce and Other Apps)
Other systems can open the Palixo camera with tags already filled in. The Palixo Cloud Images component in Salesforce Mobile does this, and so can any app or web page using a Palixo link.
- Tap the link, for example a Take Photos action on a Salesforce record.
- The Palixo app opens. If the link names an album it opens the camera there; otherwise the Select Album screen lists the shareable albums where you can add pictures (each with your role: Owner, Admin, Contributor). If only one qualifies, the camera opens straight away.
- The tags from the link (typically the record name) are already in the tag bar. Add more if you like and shoot as normal.
- Tap the back arrow when finished. The photos upload in the background and appear in Salesforce as they arrive.
Links can also open an album filtered by tags (View Photos in Salesforce) or accept an invitation. See section 9 for the full list.
4.8 AI Tagging (System Tags)
Palixo can automatically tag photos with descriptive labels so you can find them without remembering what you typed. These System Tags live alongside your own tags.
How System Tags appear in the app
- In the viewer, a collapsible System Tags section sits below My Tags. System Tags are purple; press and hold one to see its confidence, for example AI-generated tag (92% confidence).
- In the Filter by Tags dialog, System Tags have their own section so you can filter by them (section 5.2).
- System Tags are never offered as suggestions when you type your own tags.
Removing a System Tag
Album owners and admins can remove a System Tag from a photo: open the photo, expand System Tags and tap the × on the tag. The app confirms Tag removed.
Turning AI Tagging on or off
AI Tagging is a per-user setting that is changed on the Palixo website (Profile → Settings → AI Tagging). The app shows whatever tags the service has assigned.
The viewer's My Tags and System Tags sections
4.9 Guidelines and Plan Limits
Photos
- Photos are saved as JPEG. Full-resolution originals are uploaded; thumbnails are made by the server.
- HEIC/HEIF and PNG imports are converted to JPEG.
Videos
- Up to 10 seconds, 1080p, MP4. There is no import for videos.
If you are over your plan limits
When your account (or the album owner's account) is at its media item or storage cap, the app shows Upload blocked — You've reached your media item limit on your current plan. Free up space or contact sales to upgrade. with a View plan button. Nothing is uploaded until space is freed. A video recorded at the cap is kept on your phone but not added to the album, and the video page explains why (for example Not uploaded: the album owner has reached their storage limit).
Delete photos you no longer need (sections 5.6 and 6.7) or contact sales@palixo.media to upgrade.
5. Viewing and Editing Photos
5.1 The Album Grid
Open an album from the Albums screen to see its photos and videos as a grid, newest first by default. Videos show their cover frame with a play badge and the clip length, for example 0:09.
Changing the grid
- Pinch the grid to change the number of columns, or use the column count menu in the top bar (1 Column to 5 Columns).
- ⋮ → Display Options lets you choose what is written on each tile (Show on Images: None, filename, name or tags), the Sort By order (Newest First, Oldest First, Name A-Z, Name Z-A) and the Column Count.
Other things on the album screen
- Sync in the top bar and pull-to-refresh both start a sync.
- The info row shows Private or Shareable, the media count and the filter button.
- Album not available yet appears if you open an album you have just been invited to before its contents have synced; it fills in after the next sync.
- Photos whose full-size image is not on the phone show a small download indicator until they are fetched (section 7.3).
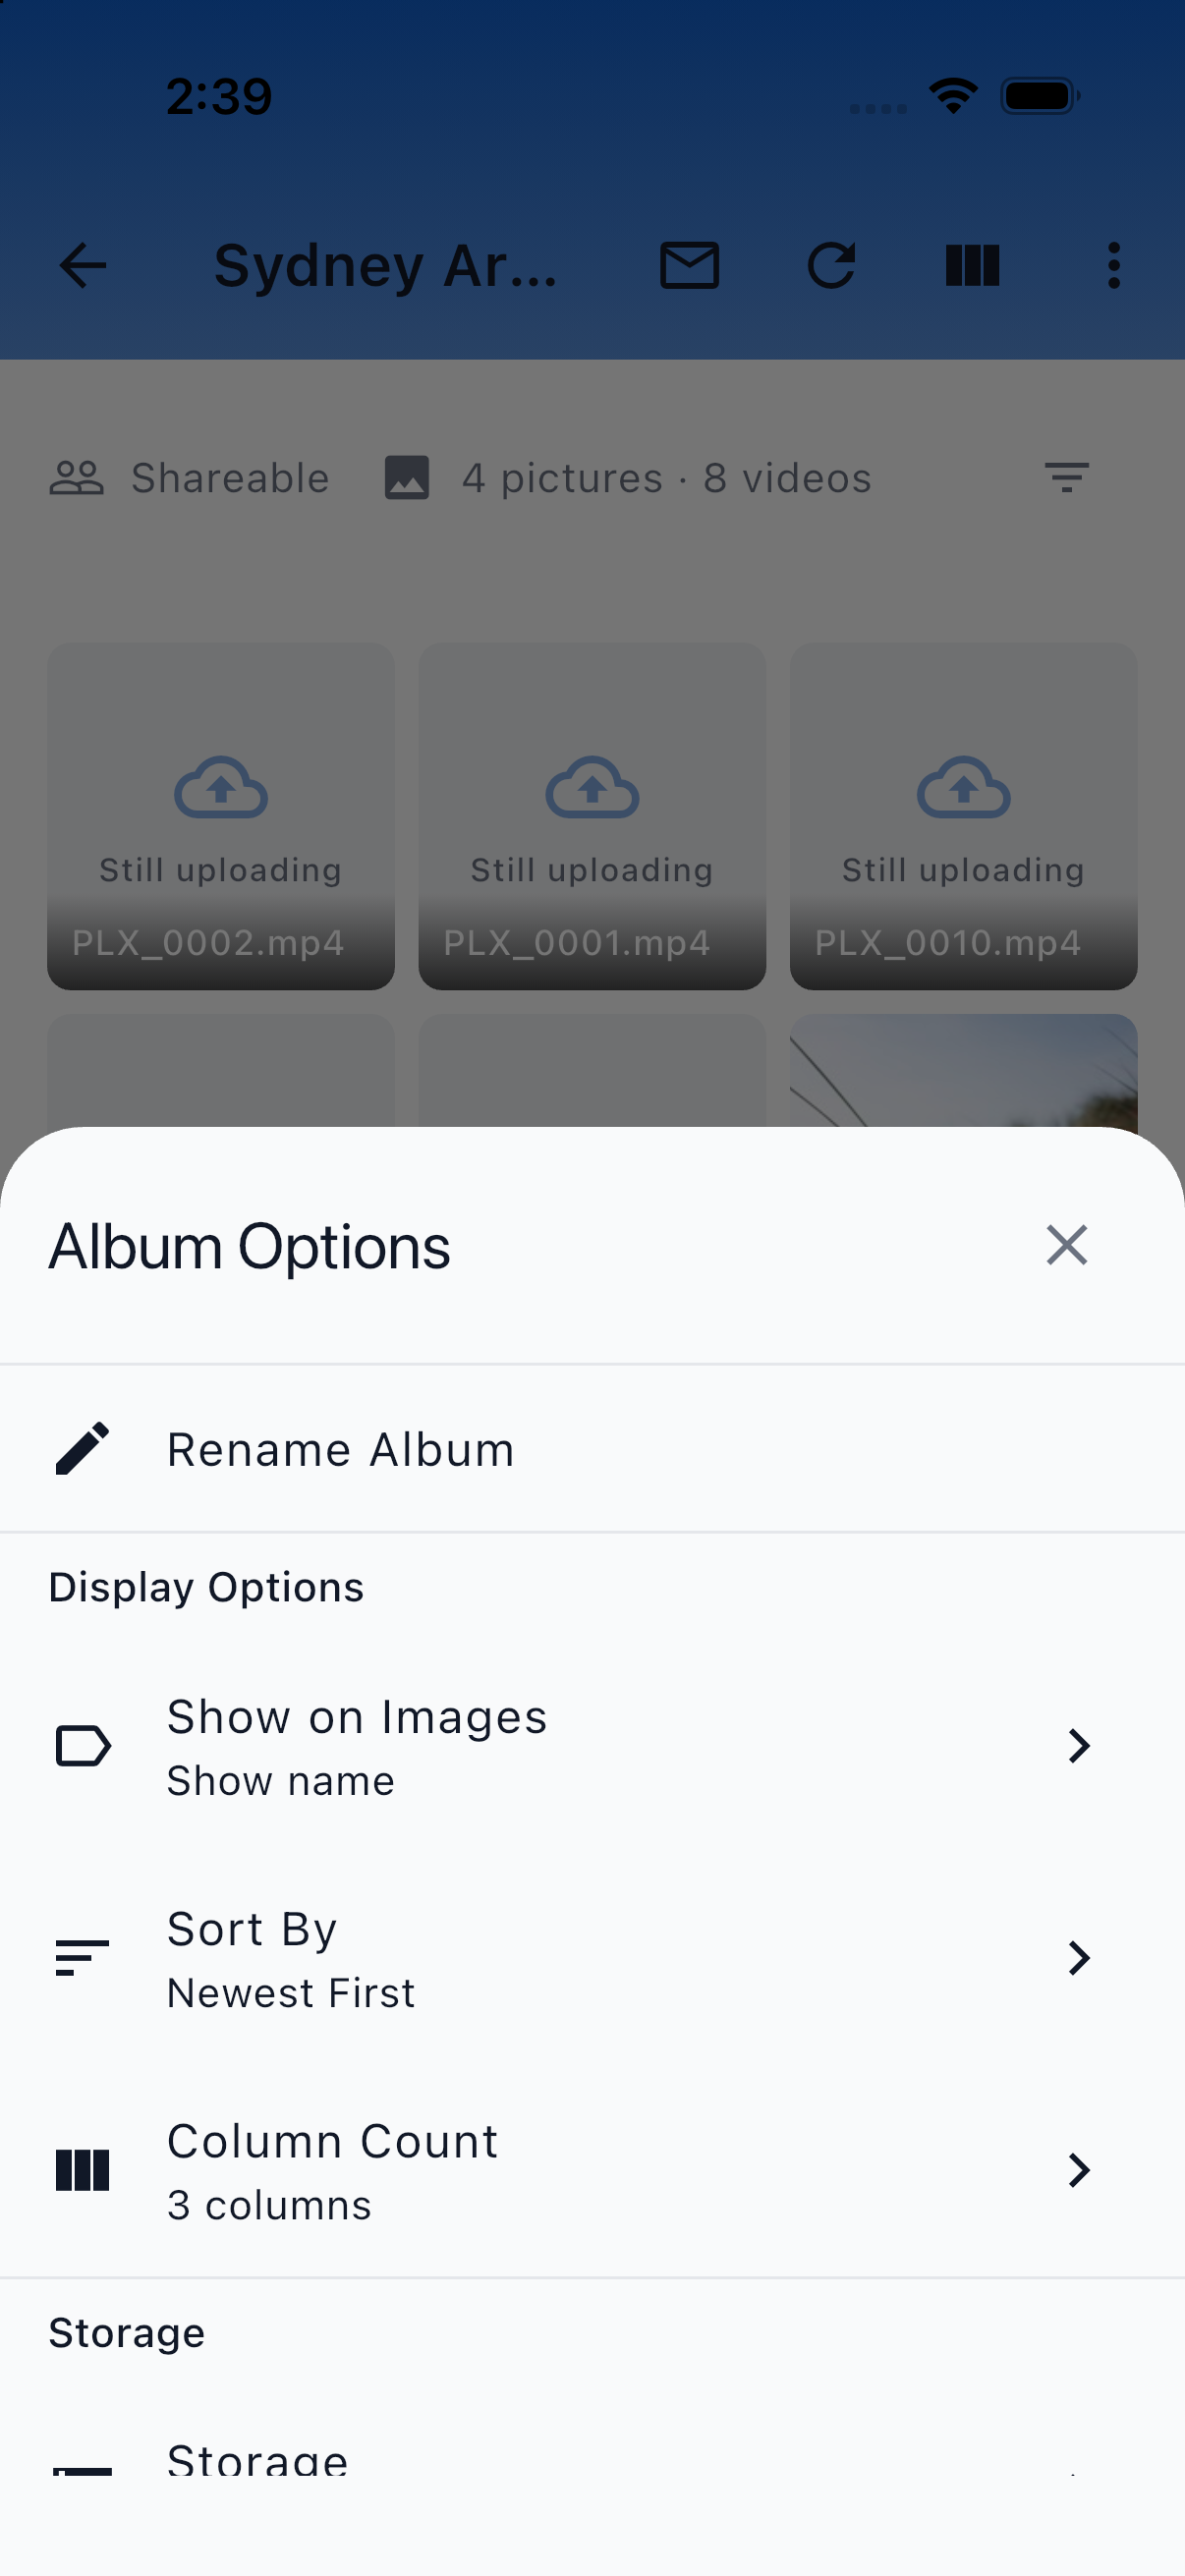
The Display Options sheet
5.2 Filtering an Album by Tags
Tags are the primary way to find photos.
- Tap the filter button in the info row (or Add filter in the bar). The Filter by Tags dialog opens.
- Use Search tags... to narrow the list, then tap the tags you want. My Tags lists tags people have added; System Tags lists the AI tags.
- Choose Match: ANY to show photos that have at least one of the selected tags, or ALL to show only photos that have every one of them.
- Close the dialog. The bar reads Filtered by: with the active tags as chips and the filter button shows a badge.
To remove a filter, tap the × on its chip. Clear removes them all.
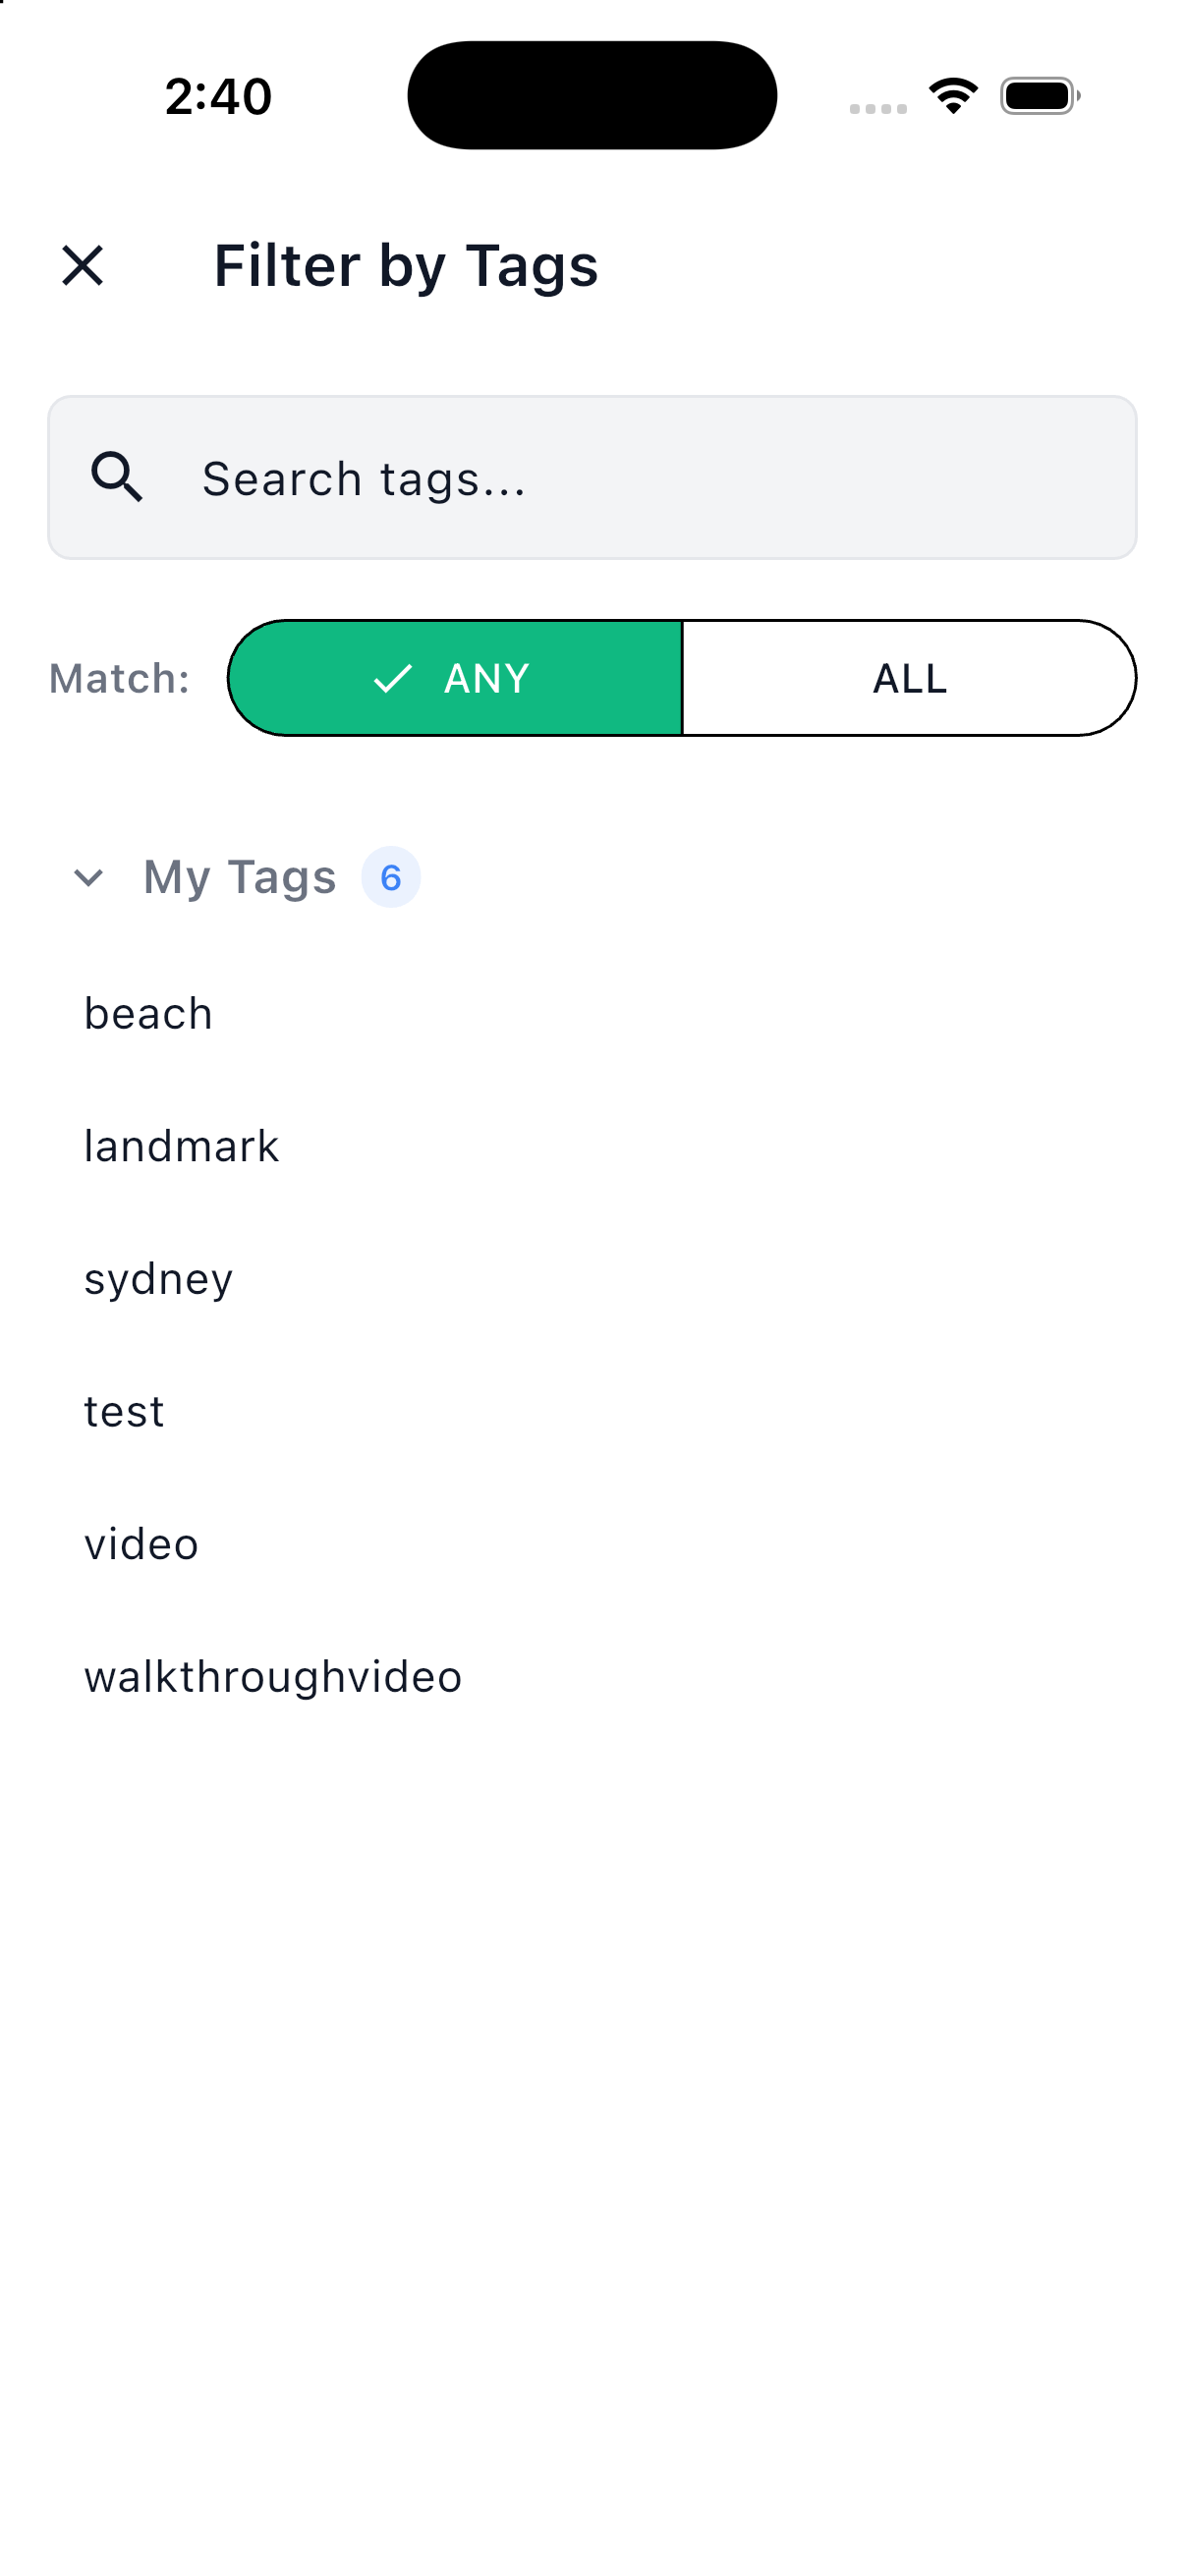
The Filter by Tags dialog
5.3 Viewing a Photo
Tap a tile to open the viewer.
- Swipe left or right to move to the next or previous item in the album, photos and videos alike.
- Tap the photo to hide the information panel and view it full screen; tap again or swipe up to bring the panel back.
- Pinch to zoom, then drag to pan.
- Swipe down to close the viewer and return to the grid.
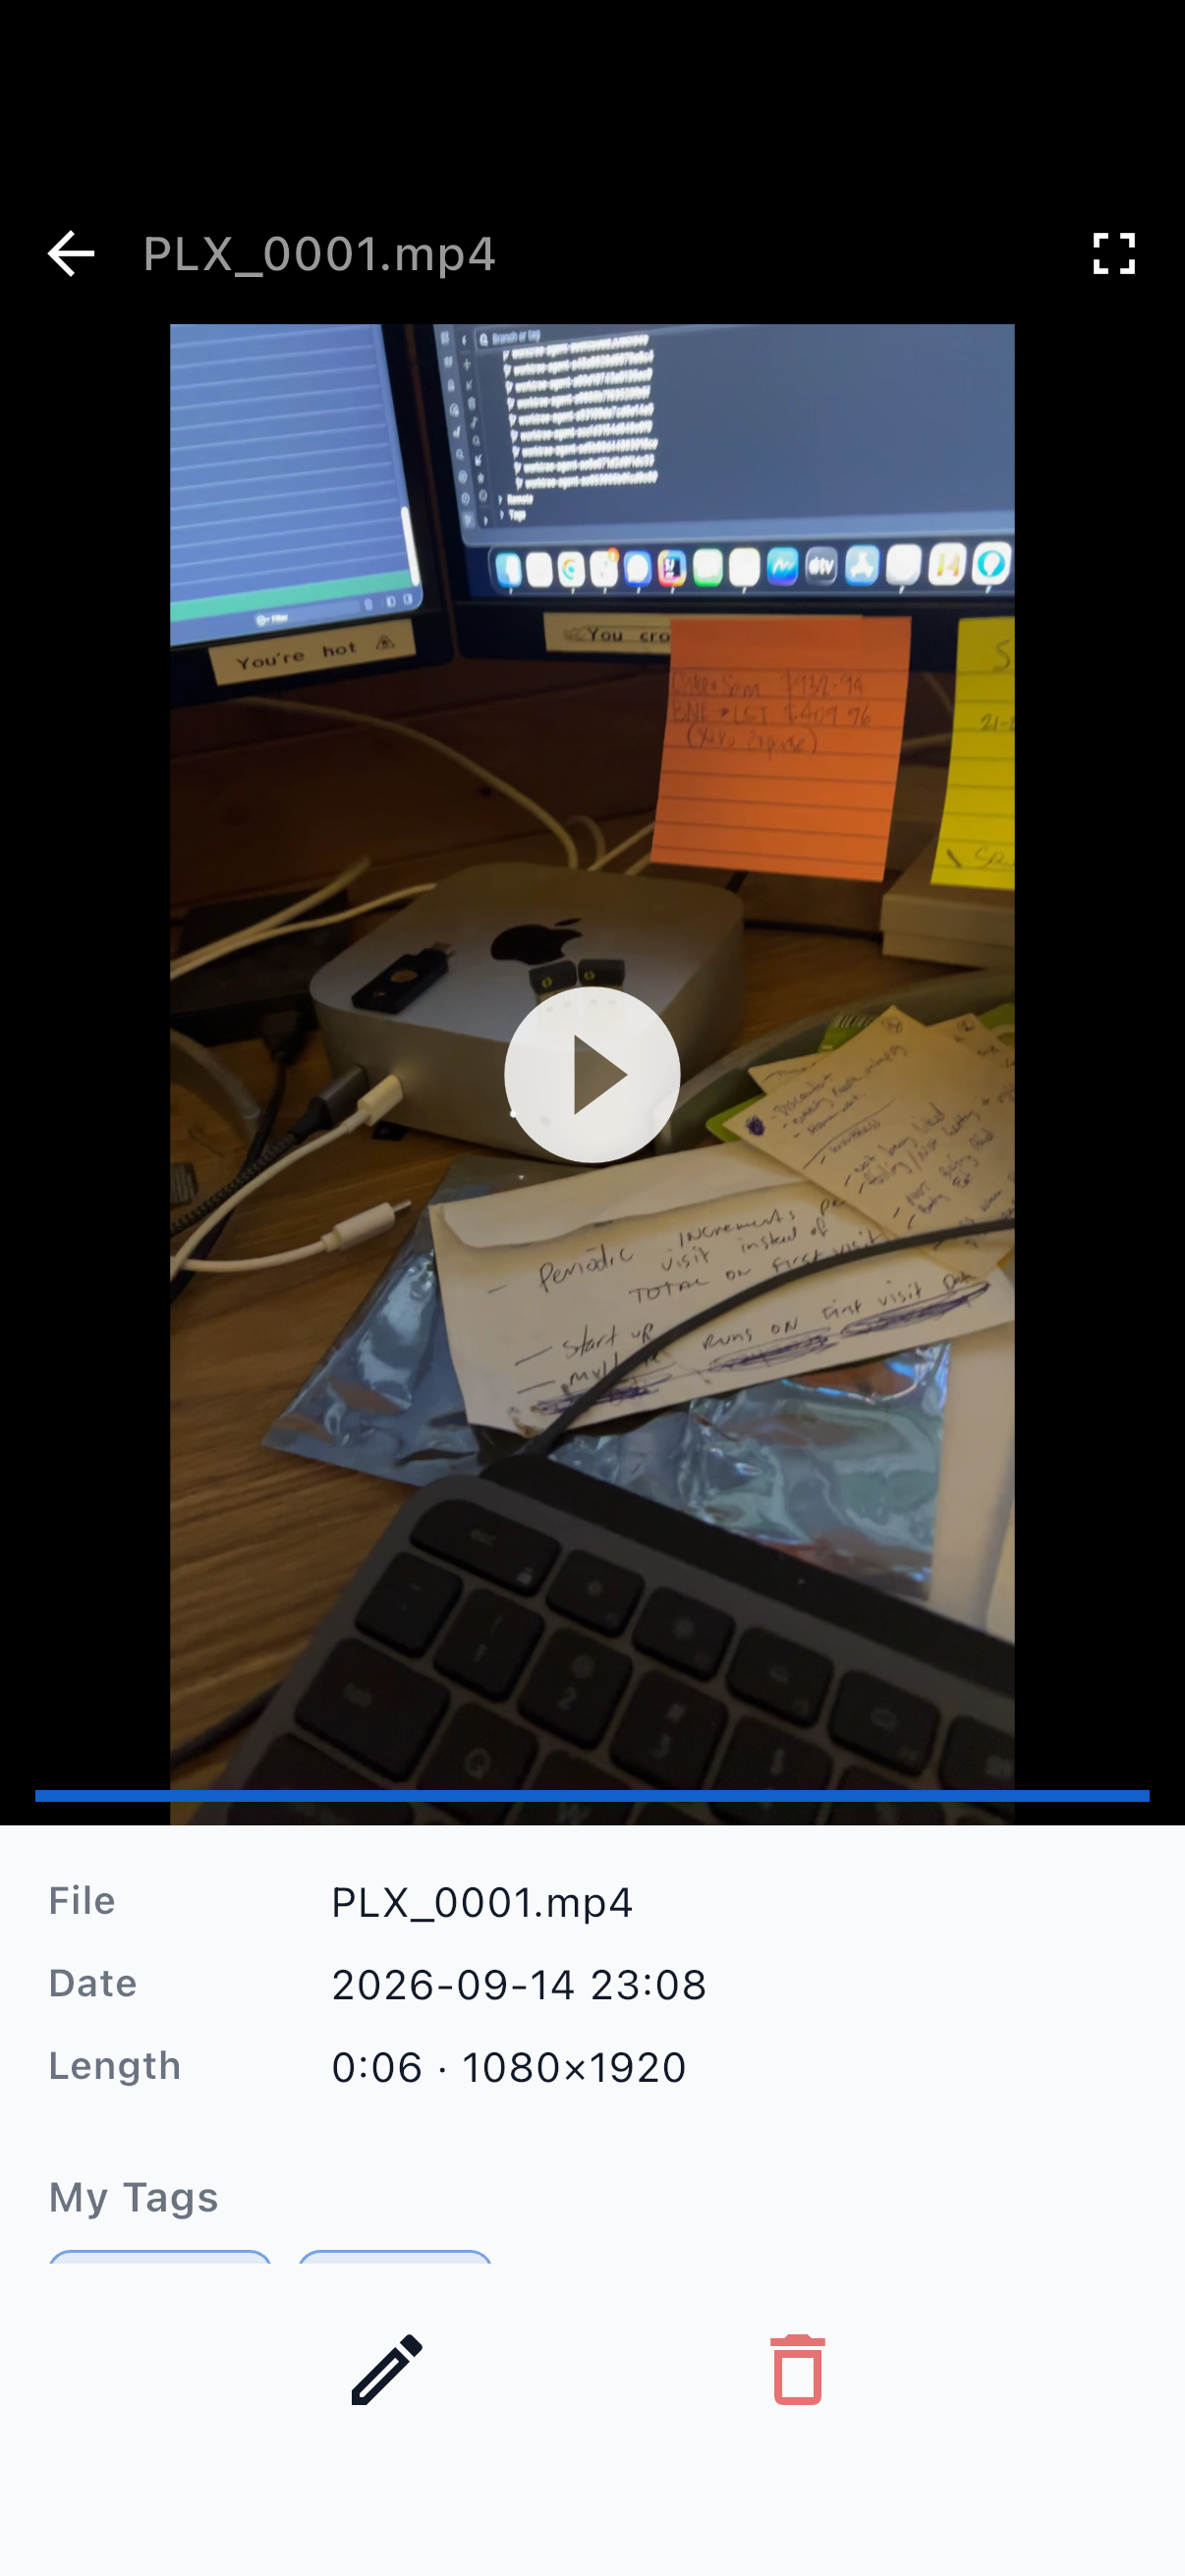
The information panel lists File (the file name), Date, Name (if one has been set), Description, Location, My Tags and System Tags. The toolbar at the bottom holds the actions described in the next sections: Edit details, Rotate 90°, Draw on picture, Save to camera roll and Delete. Actions you are not allowed to use in this album are not shown.
A photo whose full-size image is not yet on the phone opens as its thumbnail and sharpens when the download completes.
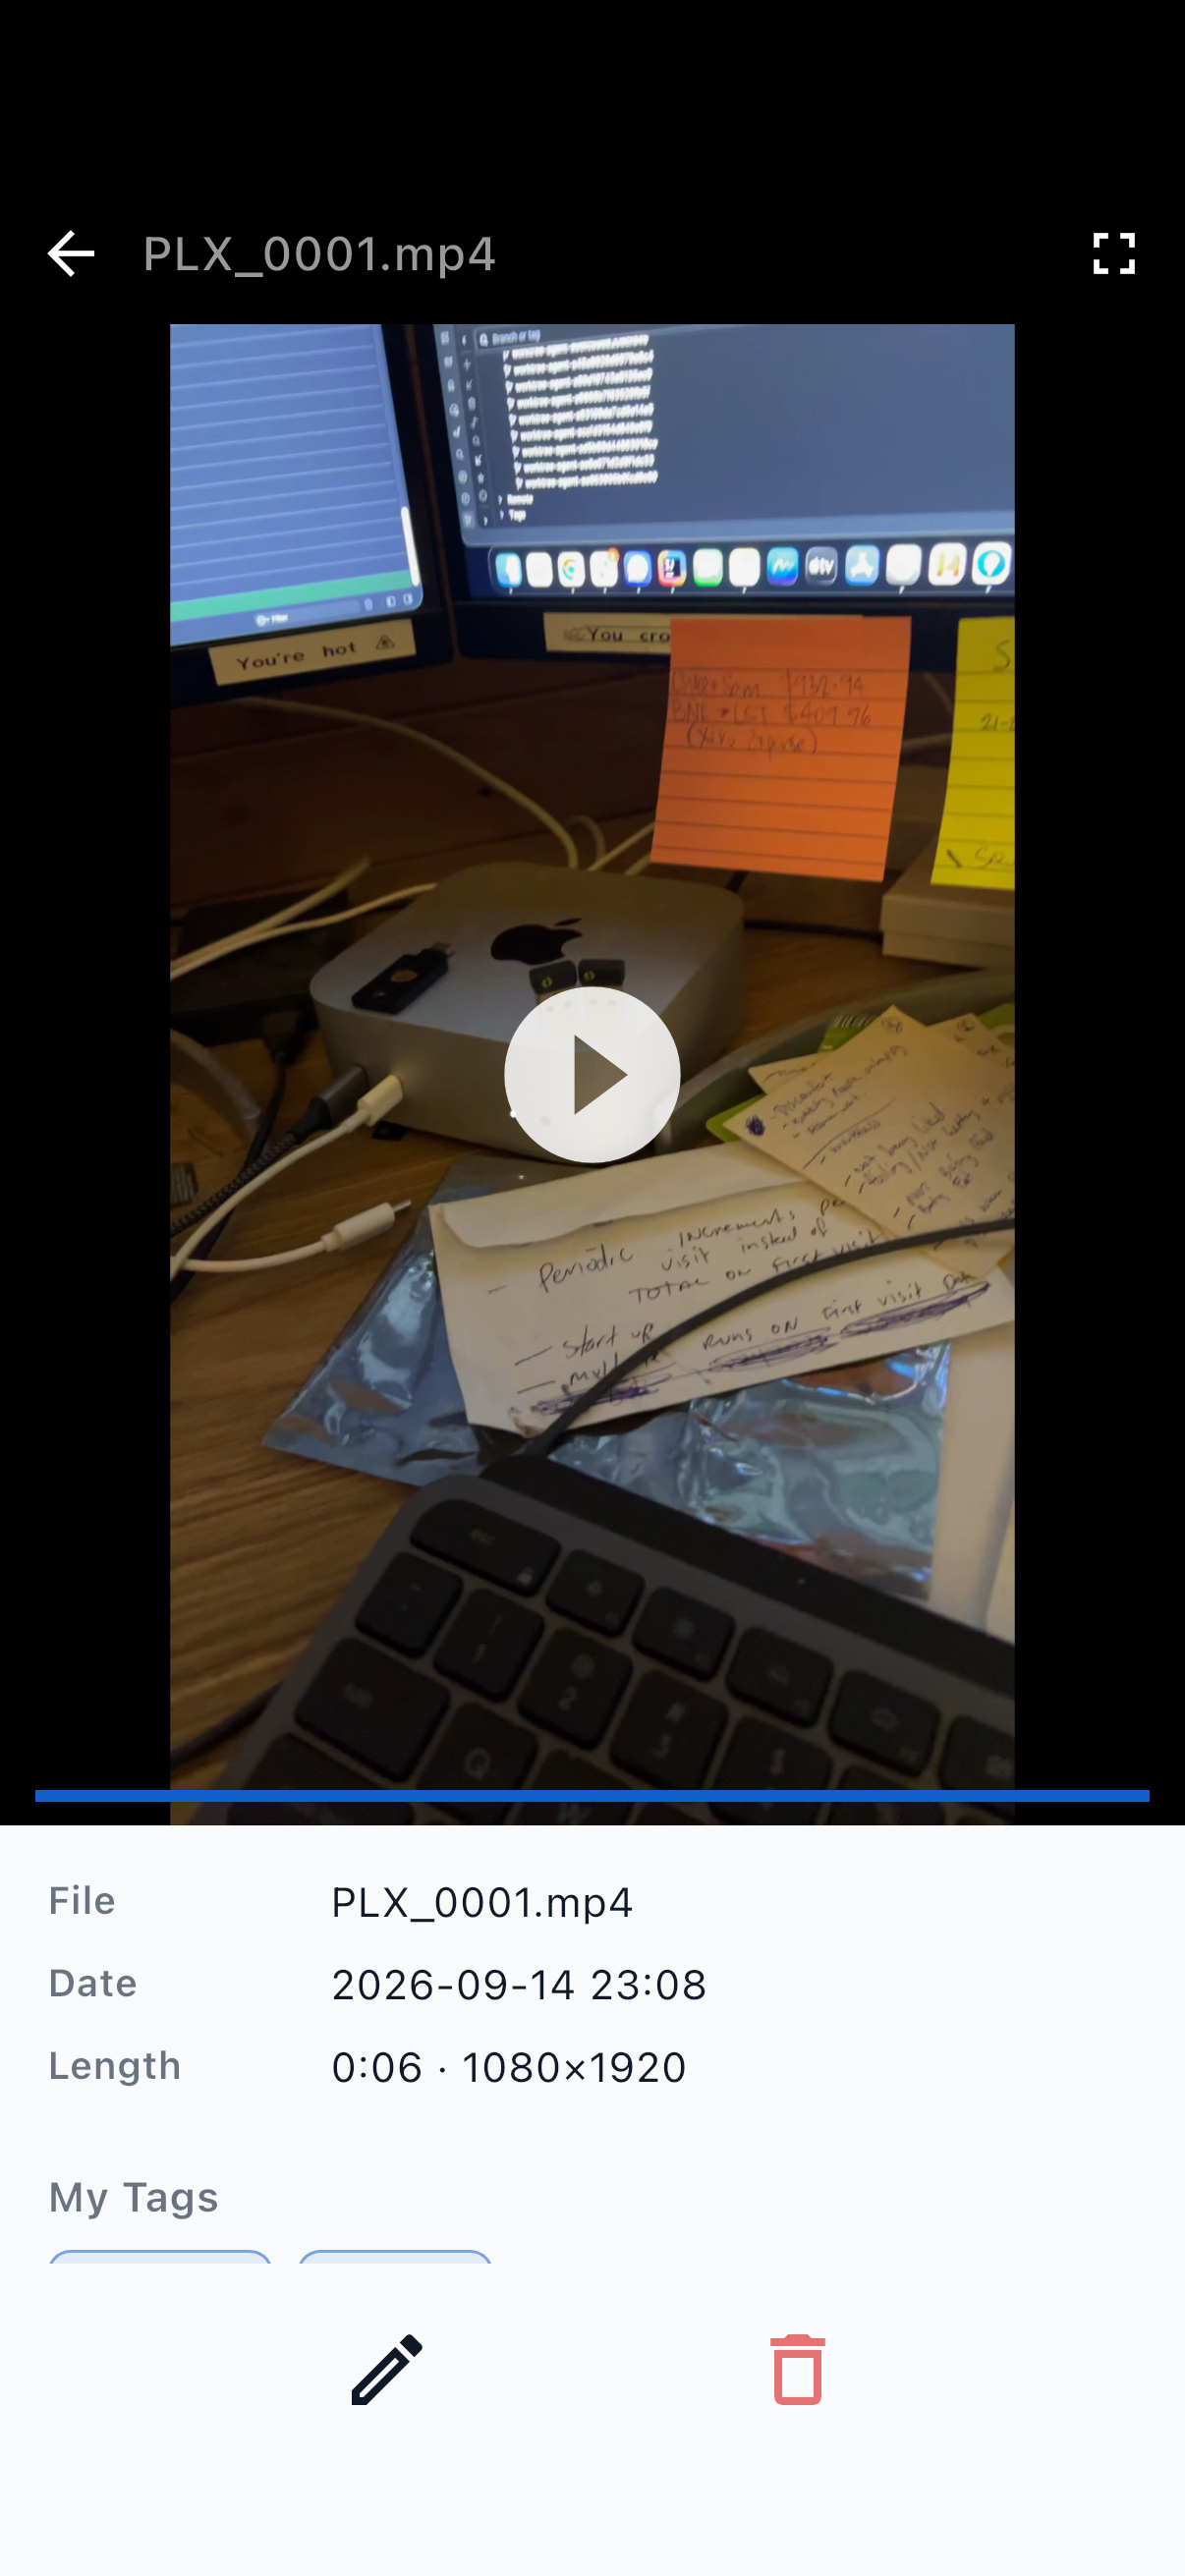
The photo viewer with the information panel
5.4 Editing Tags on a Single Photo
- Open the photo.
- Under My Tags, tap Add Tags (or Manage Tags if the photo already has some).
- Type a tag in Add tags... and press return, or pick a suggestion. A space starts a new tag.
- To remove a tag, tap the × on its chip. Removing tags needs Owner or Admin access; Editors can add tags but not remove them.
- Tap Done. Changes are saved immediately and sync in the background.
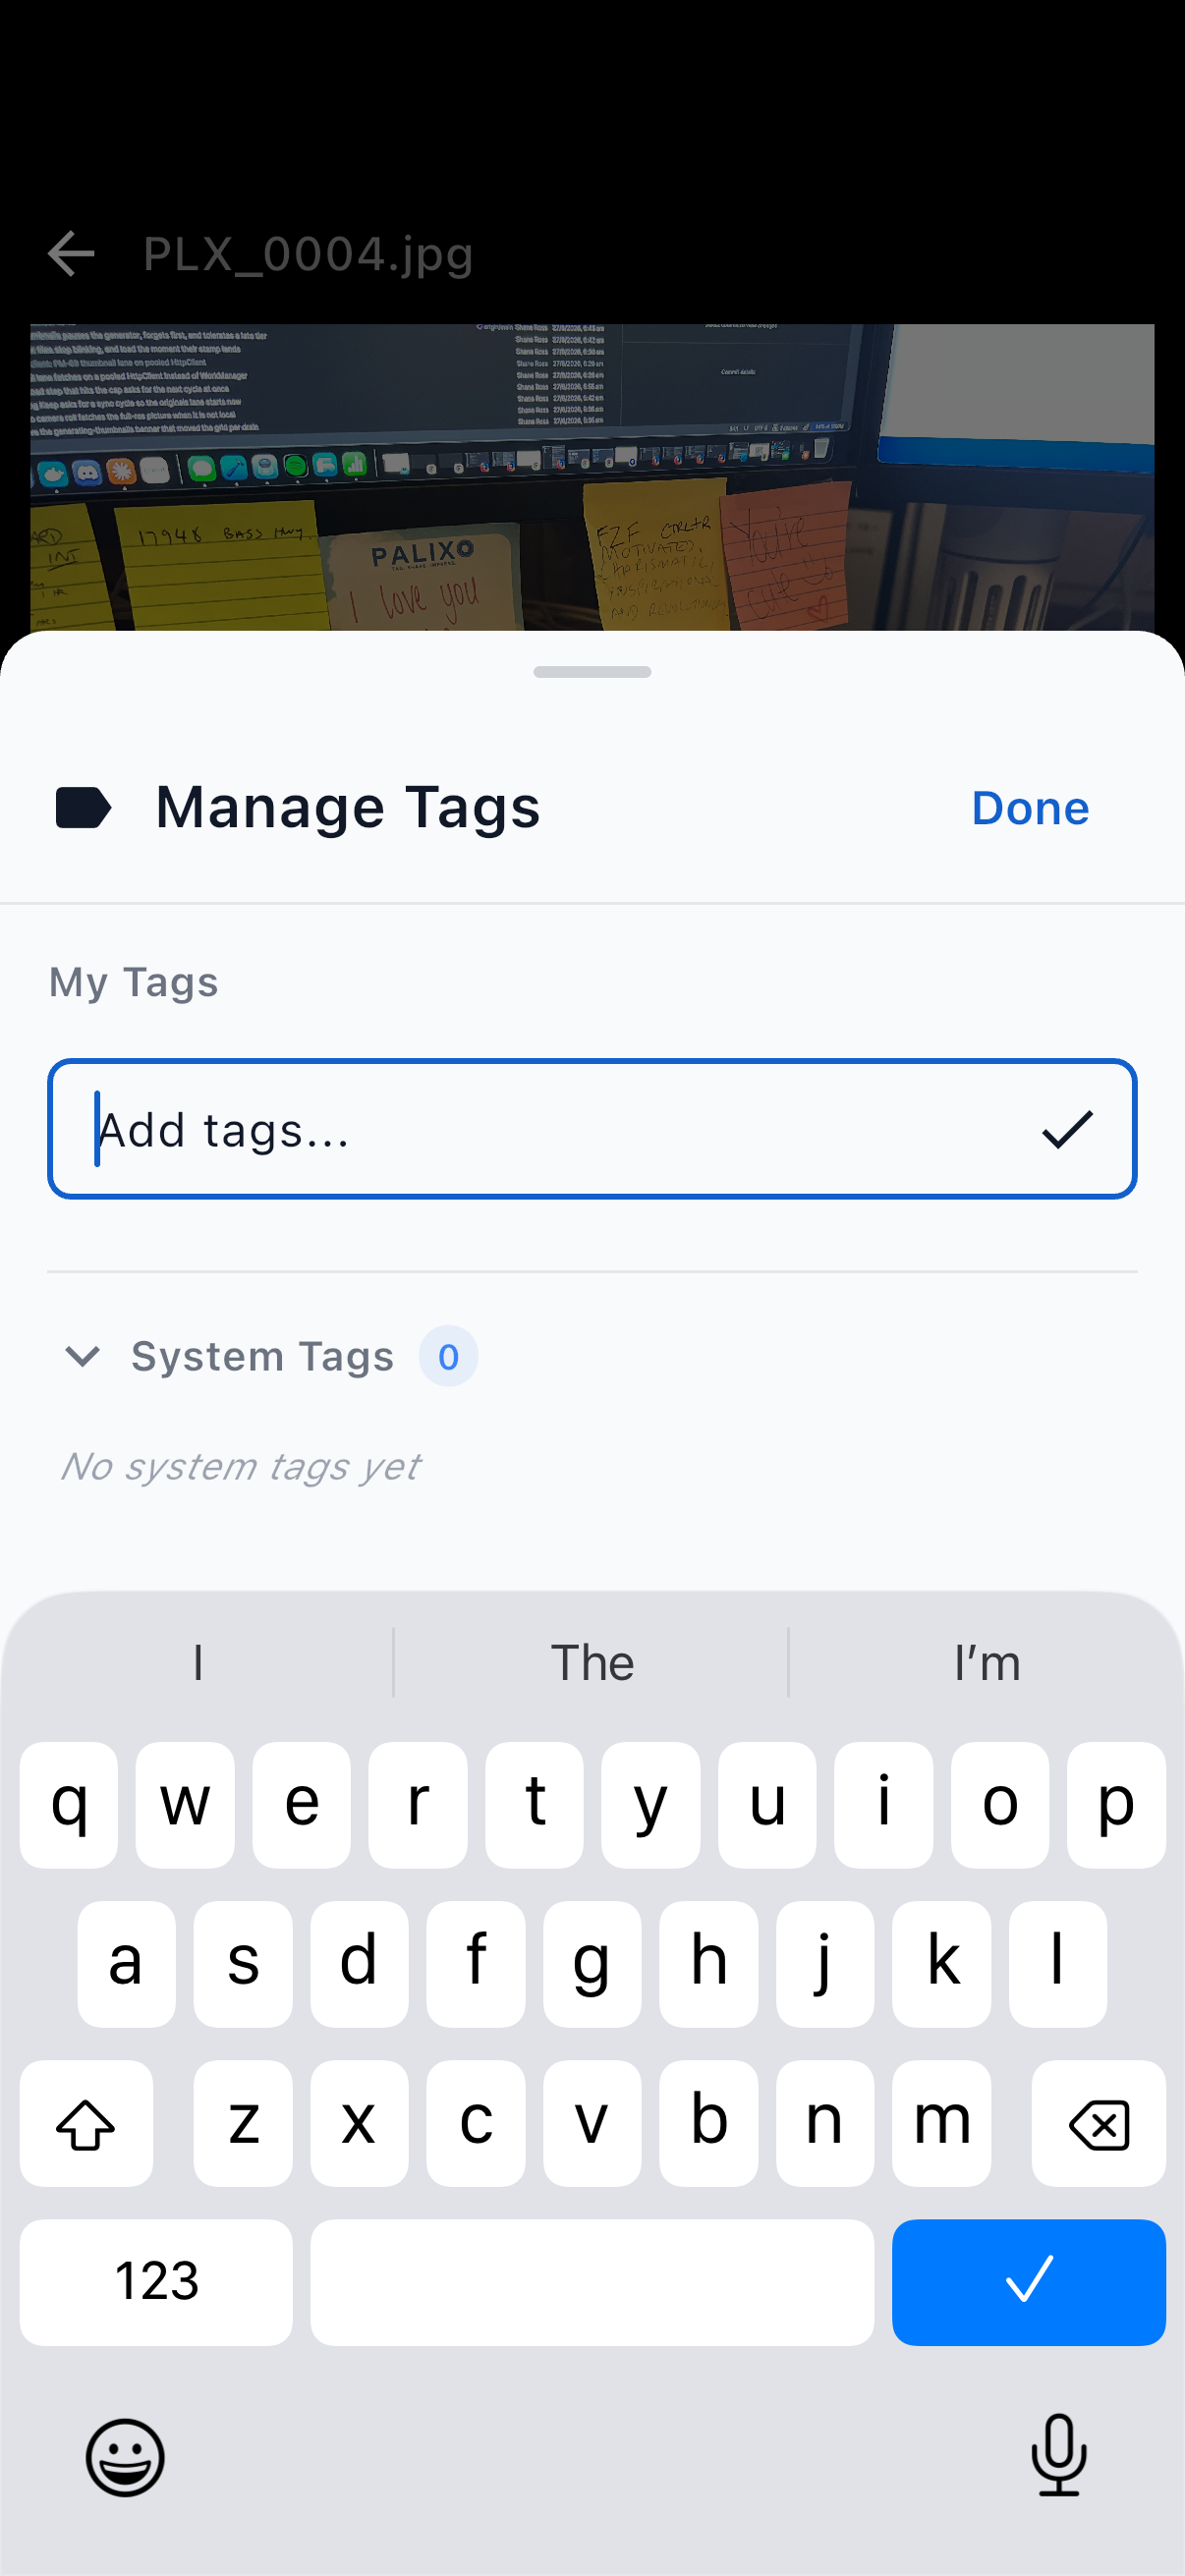
The Manage Tags sheet
5.5 Editing the Name and Description
Each photo can carry a name and a description in addition to its tags.
- Open the photo and tap Edit details (pencil) in the toolbar.
- Change Name and Description in the Edit Picture dialog.
- Tap Save. The app confirms Picture updated successfully.
For a video, the Edit Video dialog also lets you set the Location.
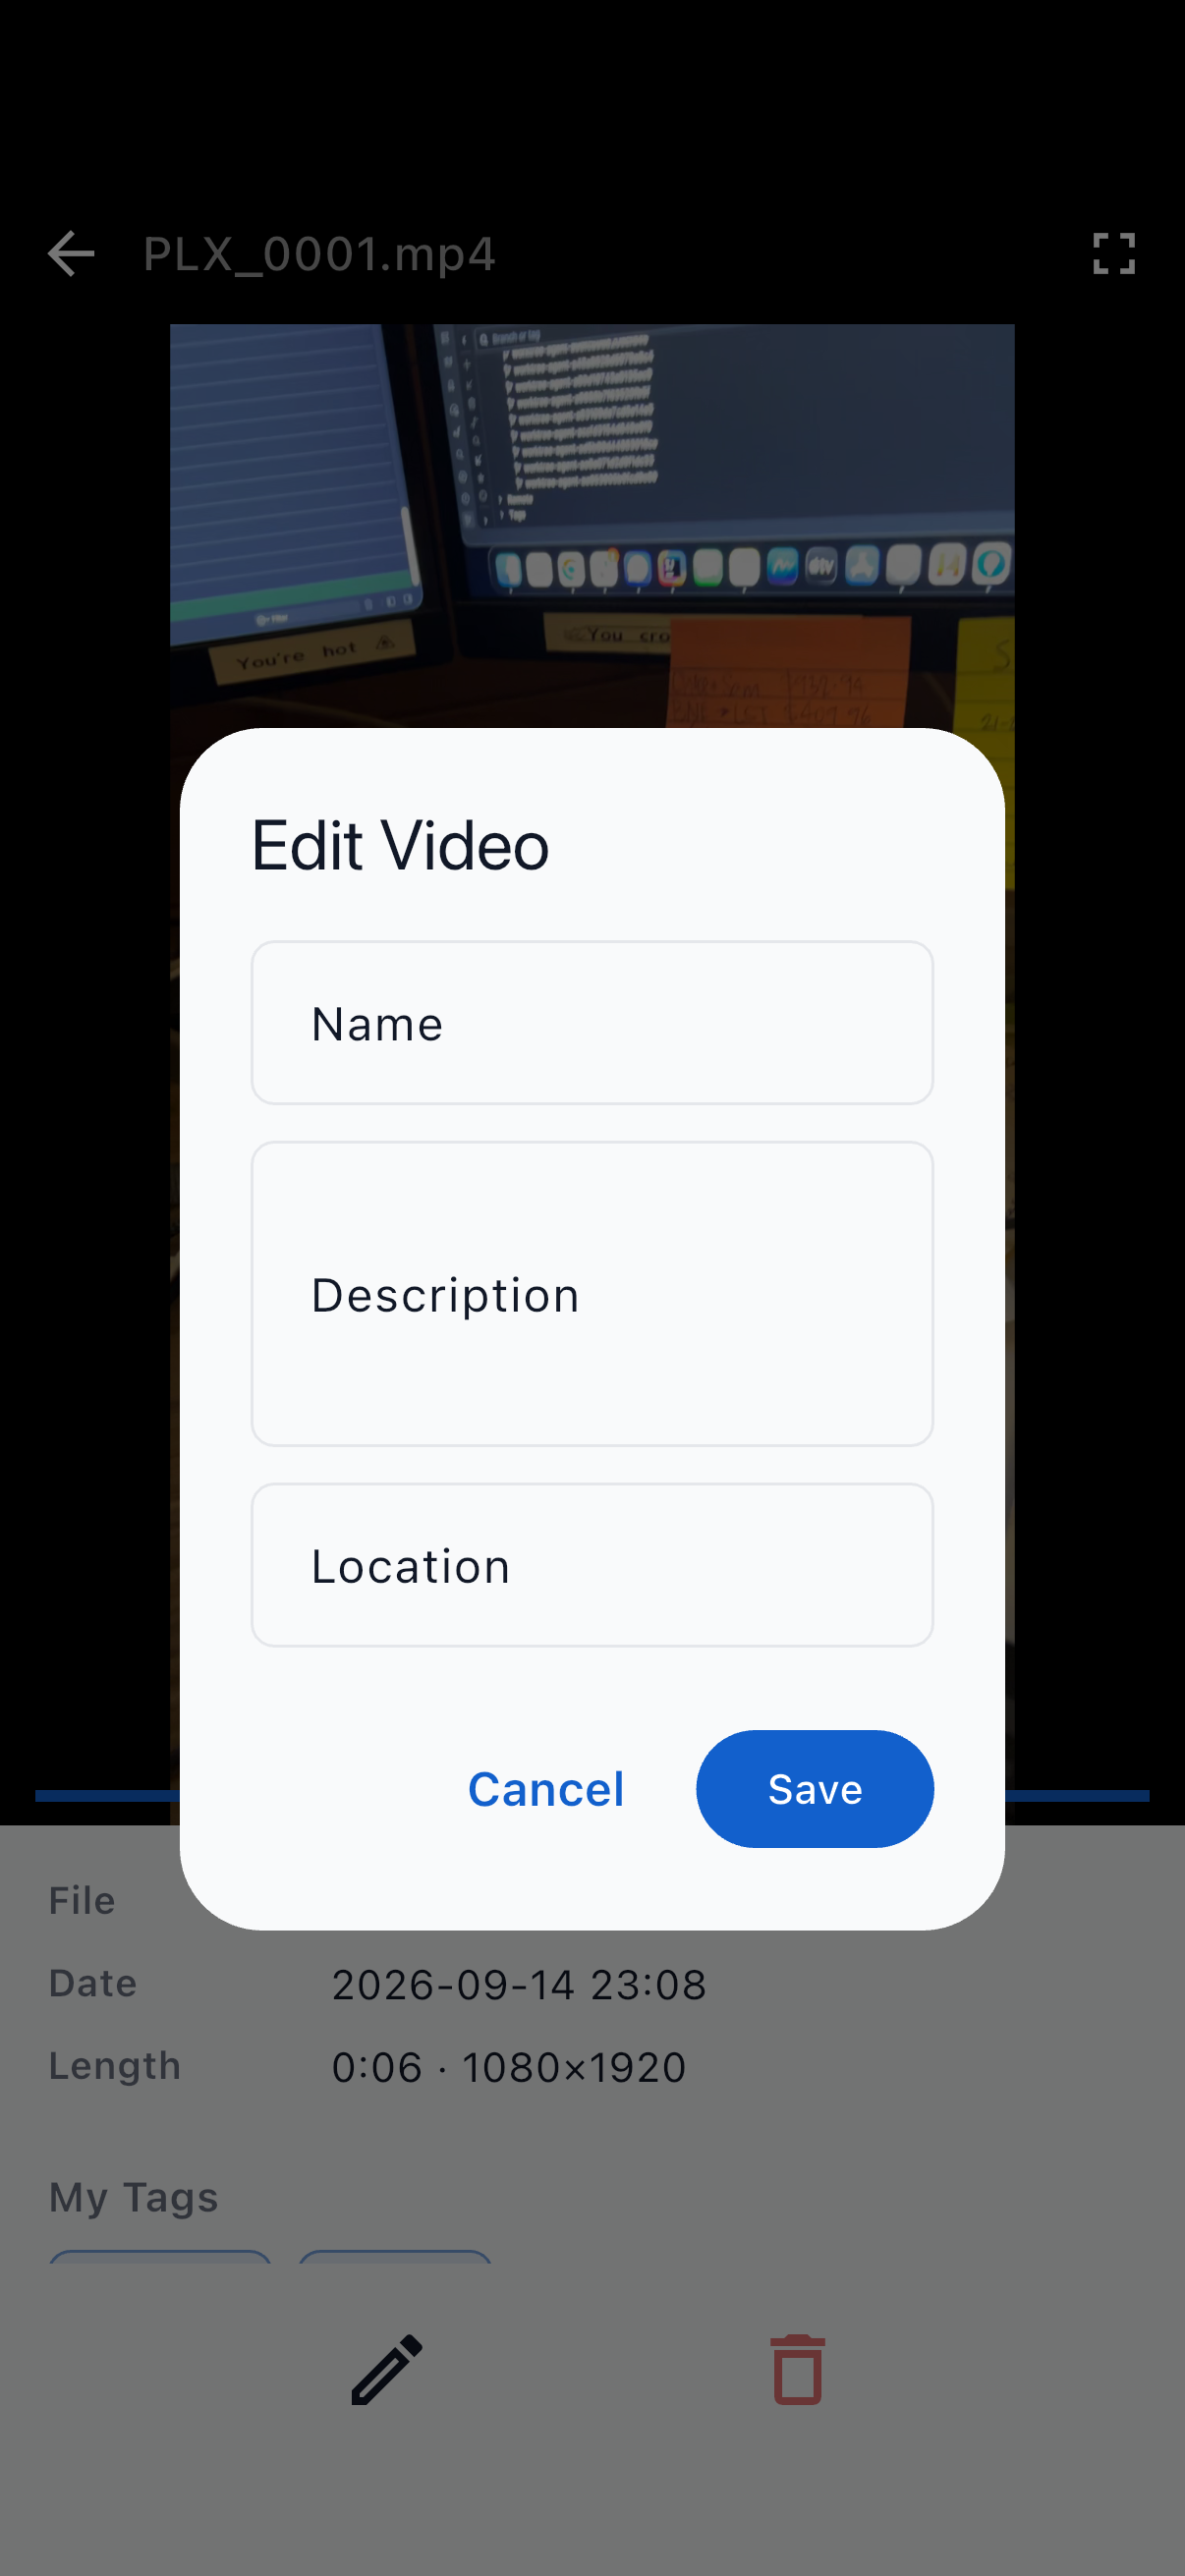
The Edit Picture dialog
5.6 Rotate, Save to Camera Roll and Delete
Rotate
Tap Rotate 90° to turn the photo a quarter turn clockwise. The app shows Rotating picture... then Picture rotated successfully, and the rotation syncs to the website and your other devices. Videos cannot be rotated.
Save to camera roll
Tap Save to camera roll to copy the full-size photo (or a video you recorded on this phone) into your phone's Photos or Gallery app. The first time, allow Palixo to add to your photo library. The photo must be on the phone: if it has not been downloaded yet you will see Image not found locally; open it once with a connection and try again.
Delete
- Tap Delete (bin).
- Confirm Delete Picture — Are you sure you want to delete this picture? This action cannot be undone.
- The photo is removed from the album on every device and on the website.
Who can delete depends on your access to the album (section 8.2): Owners and Admins can delete any photo; Editors can delete only photos they added themselves; Viewers cannot delete. If you cannot delete a photo, the bin is not shown.
5.7 Draw on a Photo (Markup)
You can draw on a photo: pen strokes, lines, arrows, rectangles, ellipses and text. When you save, the drawing is burned into the photo's pixels, so it shows everywhere the photo does and cannot be moved or removed afterwards. Because of that, the default is to save your drawing as a copy and leave the original alone.
Anyone who can add photos to an album (Editor and above) can draw on its photos. Videos cannot be drawn on.
Opening the editor
- Open a photo.
- Tap Draw on picture (pencil) in the toolbar. The Markup editor opens.
Drawing
- Tools: Pen (freehand), Line, Arrow, Rectangle, Ellipse and Text. Pick a tool, then draw on the photo; with Text, tap where you want it and type.
- Colours: six fixed, high-contrast colours: red, yellow, green, blue, white and black. Text gets an outline so it stays readable on any photo.
- Weights: thin, medium and thick. The weight also sets the text size.
- Select: tap Select, then tap something you have drawn to move it, resize it, change its colour or weight, or remove it with Delete selected. Clear all removes everything.
- Undo and Redo step through your changes.
Nothing is saved until you tap Save (top right). The × at the top left discards: it asks Discard drawing?, and Keep drawing takes you back to the editor. Undo and Redo are in the top bar; the tools, colours and weights are along the bottom.
Saving
Tap Save and choose:
- Save as copy (the default) — a new photo is created beside the original in the same album. It carries the original's tags, description, location and timestamp and the same name with a
-1suffix (a second copy gets-2, and so on). The original is untouched. The copy is an ordinary photo you can tag, download or draw on again. - Save over original — the drawing replaces the original photo itself. The photo keeps its name and place in the album and shows the drawing on every device and on the website. The photo without the drawing is gone for everyone and cannot be recovered. You are asked to confirm. This option only appears if you could delete the photo: Owners and Admins on any photo, Editors on photos they took themselves.
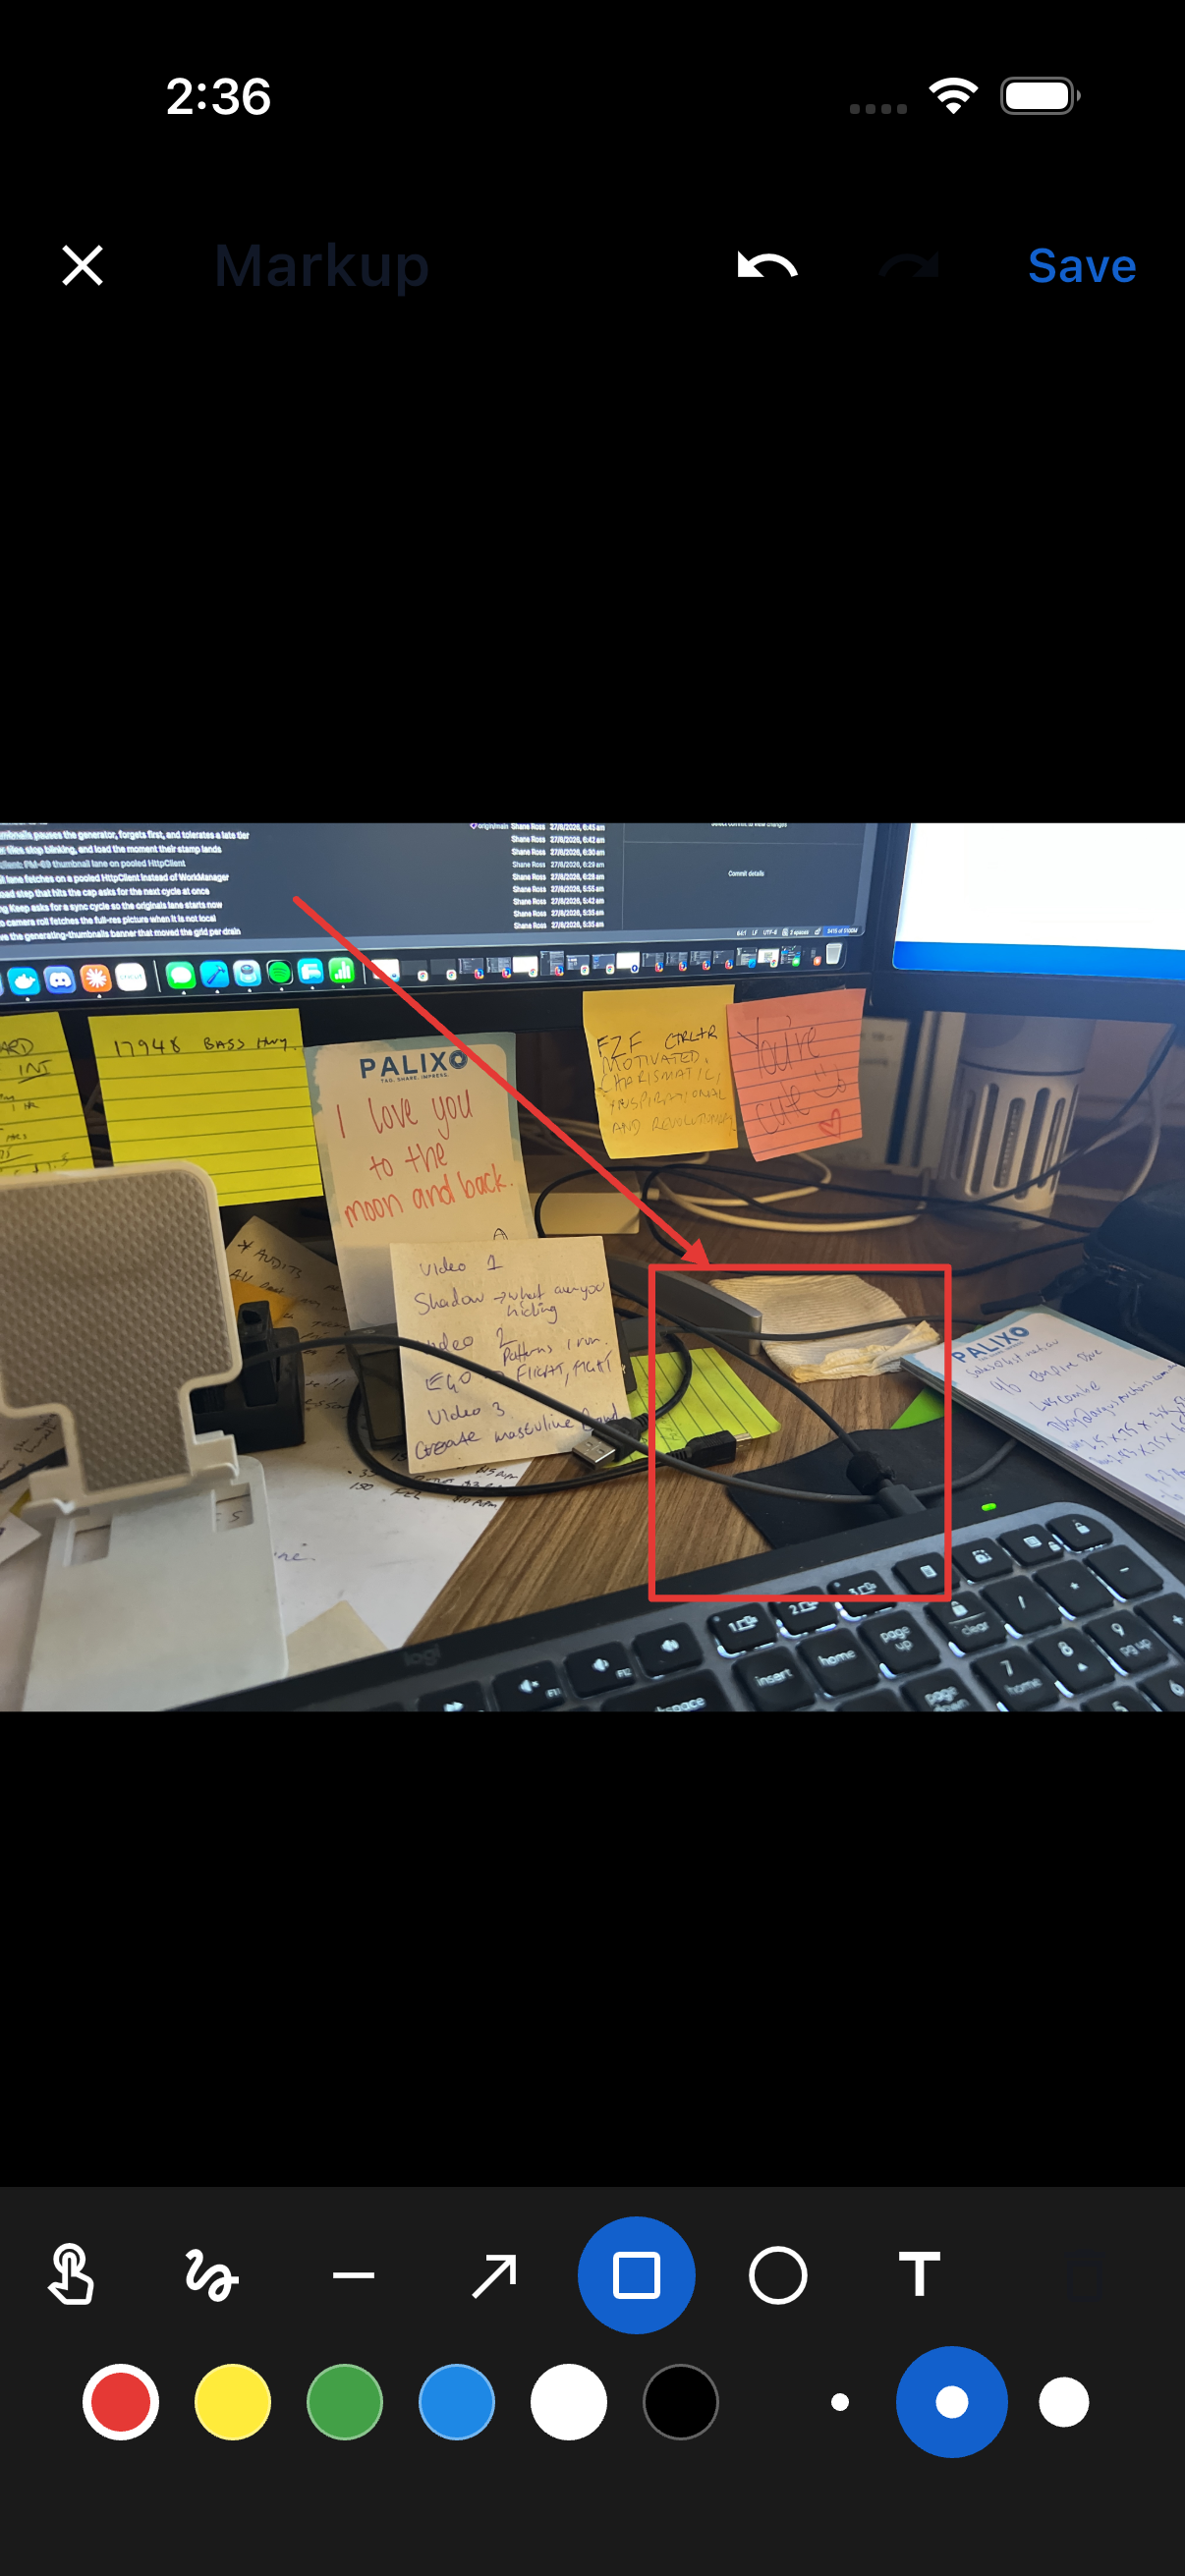
The Markup editor with an arrow and text drawn on a photo
5.8 Viewing Videos
Tap a video tile to open it. The clip plays over its cover frame; use the player controls to play, pause and scrub, and Full screen in the top bar to fill the display.
- Tags, the name, description and location work as they do for photos.
- Save to camera roll is offered for clips recorded on this phone.
- Delete needs Owner or Admin access, or Editor access for your own clip.
- There is no Rotate and no Draw on picture for videos.
Video states you may see
- Still uploading from another device — the clip was recorded on another phone and has not finished uploading. It becomes playable on its own once it has.
- Waiting to upload from this device — your own clip is queued; it still plays locally.
- Not uploaded: the album owner has reached their storage limit (or media item limit) — the clip is kept on your phone but blocked from the album by the plan cap (section 4.9).
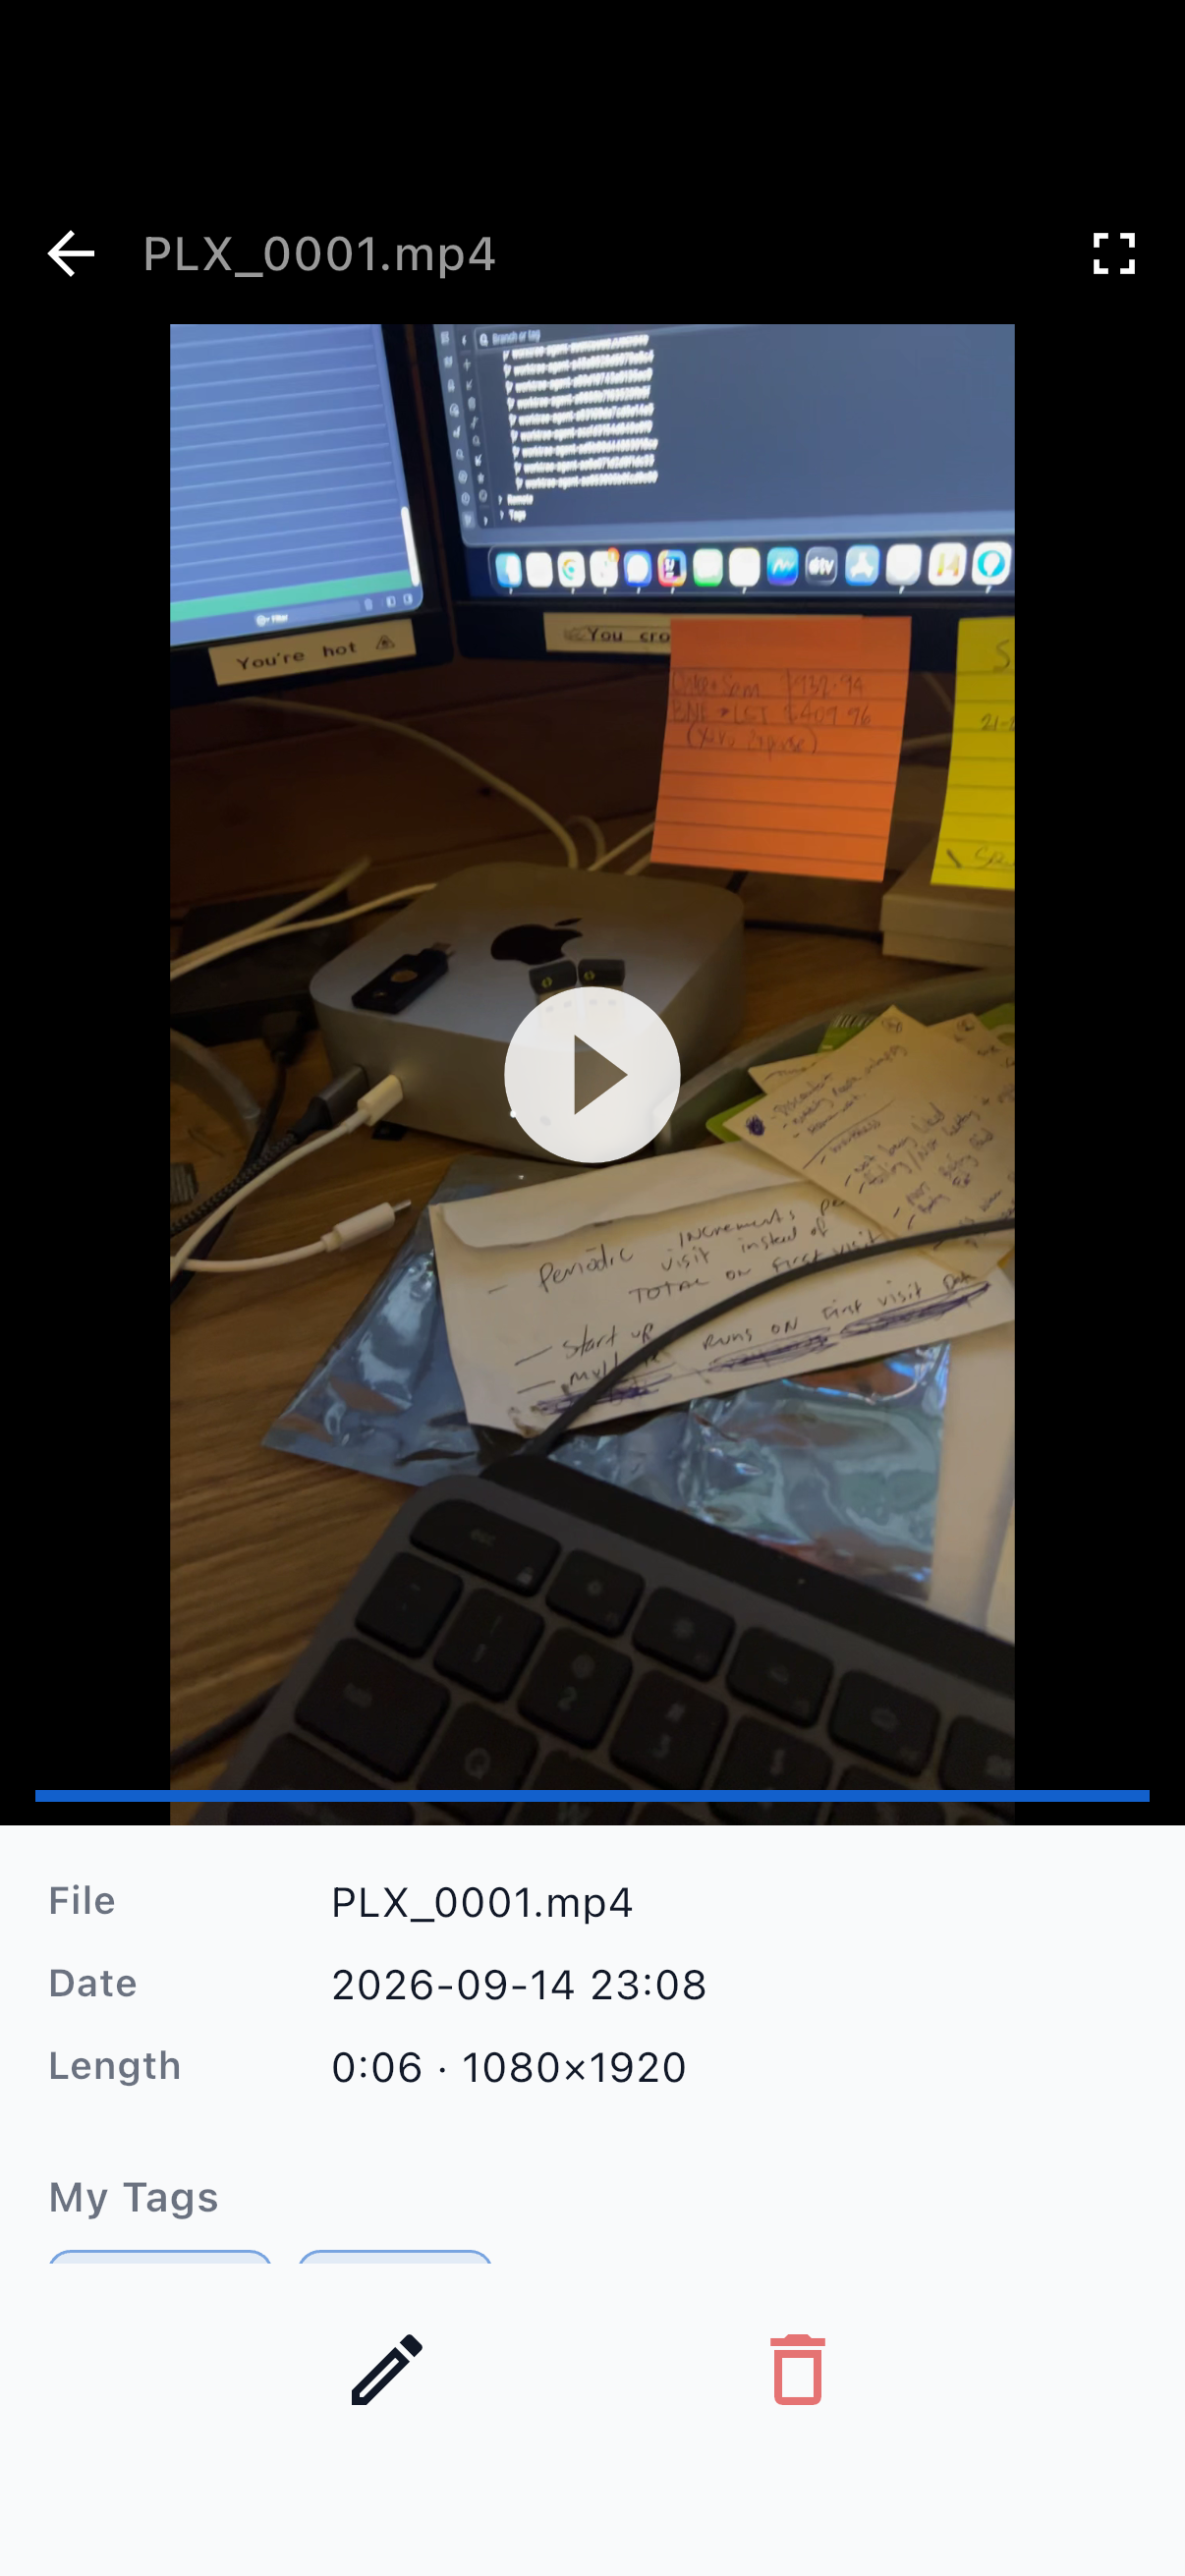
The video page with the player and information panel
5.9 A Photo That Needs Retaking
Very rarely a photo's image is lost between the shutter and the save (for example the app was force-closed at that instant). The album shows a 1 photo needs retaking banner and the photo opens with Photo missing.
Choose Remove to delete the empty photo, or Remove & retake to delete it and go straight back to the camera. Removing it also removes it from your other devices. If the image turns up after all, the app tells you This photo's image is available again.
6. Bulk Actions
When you need to manage many photos at once, select them and act on all of them together.
6.1 What You Can Do in Bulk
| Action | Viewer | Editor | Admin | Owner |
|---|---|---|---|---|
| Select photos | Yes | Yes | Yes | Yes |
| Save to camera roll | Yes | Yes | Yes | Yes |
| Edit name and description | No | Yes | Yes | Yes |
| Rotate | No | Yes | Yes | Yes |
| Add tags | No | Yes | Yes | Yes |
| Remove tags | No | No | Yes | Yes |
| Delete | No | Only your own | Yes | Yes |
Videos can be selected with photos for editing, tags, saving and deleting. A rotate that includes videos skips them.
6.2 Selecting Photos
- Press and hold any tile to enter selection mode. The tile is selected and a toolbar appears at the bottom of the screen: Clear | N selected | × with the actions All, Edit, Rotate, Save, Tags and Delete beneath.
- Tap other tiles to add or remove them.
- Press, hold and drag across the grid to select a whole block; the grid scrolls when you drag near the edge.
- All selects every item currently shown (so a tag filter lets you select exactly the photos you mean).
- Clear deselects everything; × (Exit selection mode) leaves selection mode.
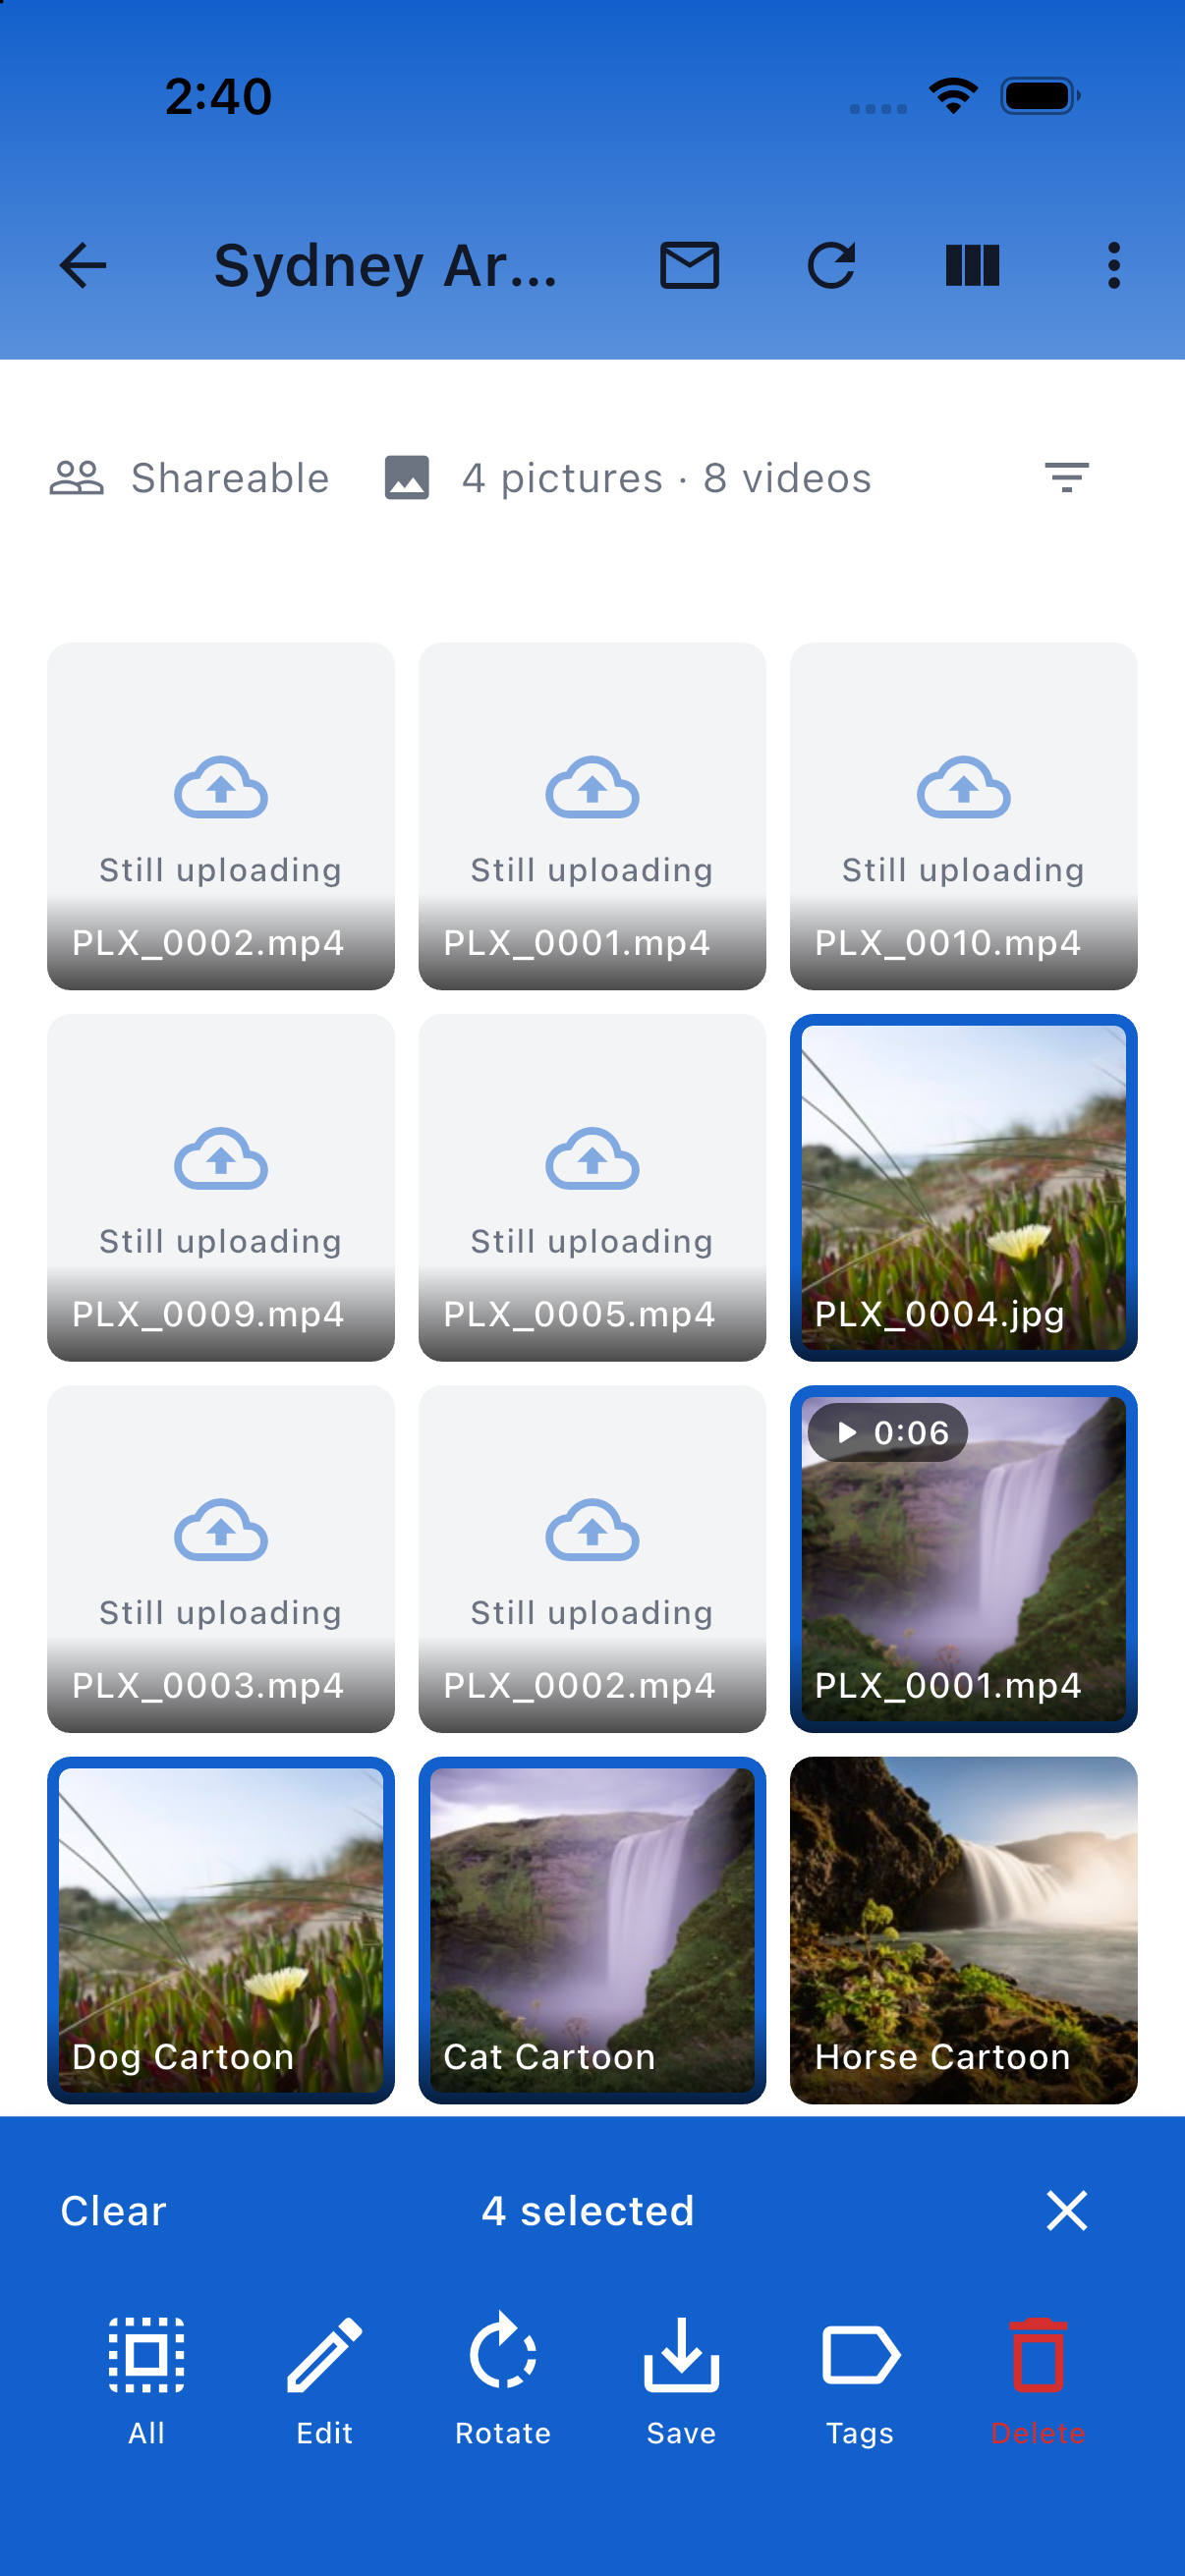
Selection mode with several photos selected and the bulk toolbar
6.3 Bulk Edit Details
- Select photos and tap Edit. The Edit N Pictures dialog opens.
- For Name and Description, type the text and choose how to apply it:
- Replace overwrites the existing value.
- Before adds your text in front of the existing value.
- After adds your text after the existing value.
- Leave a field empty to leave it alone. Tap Save.
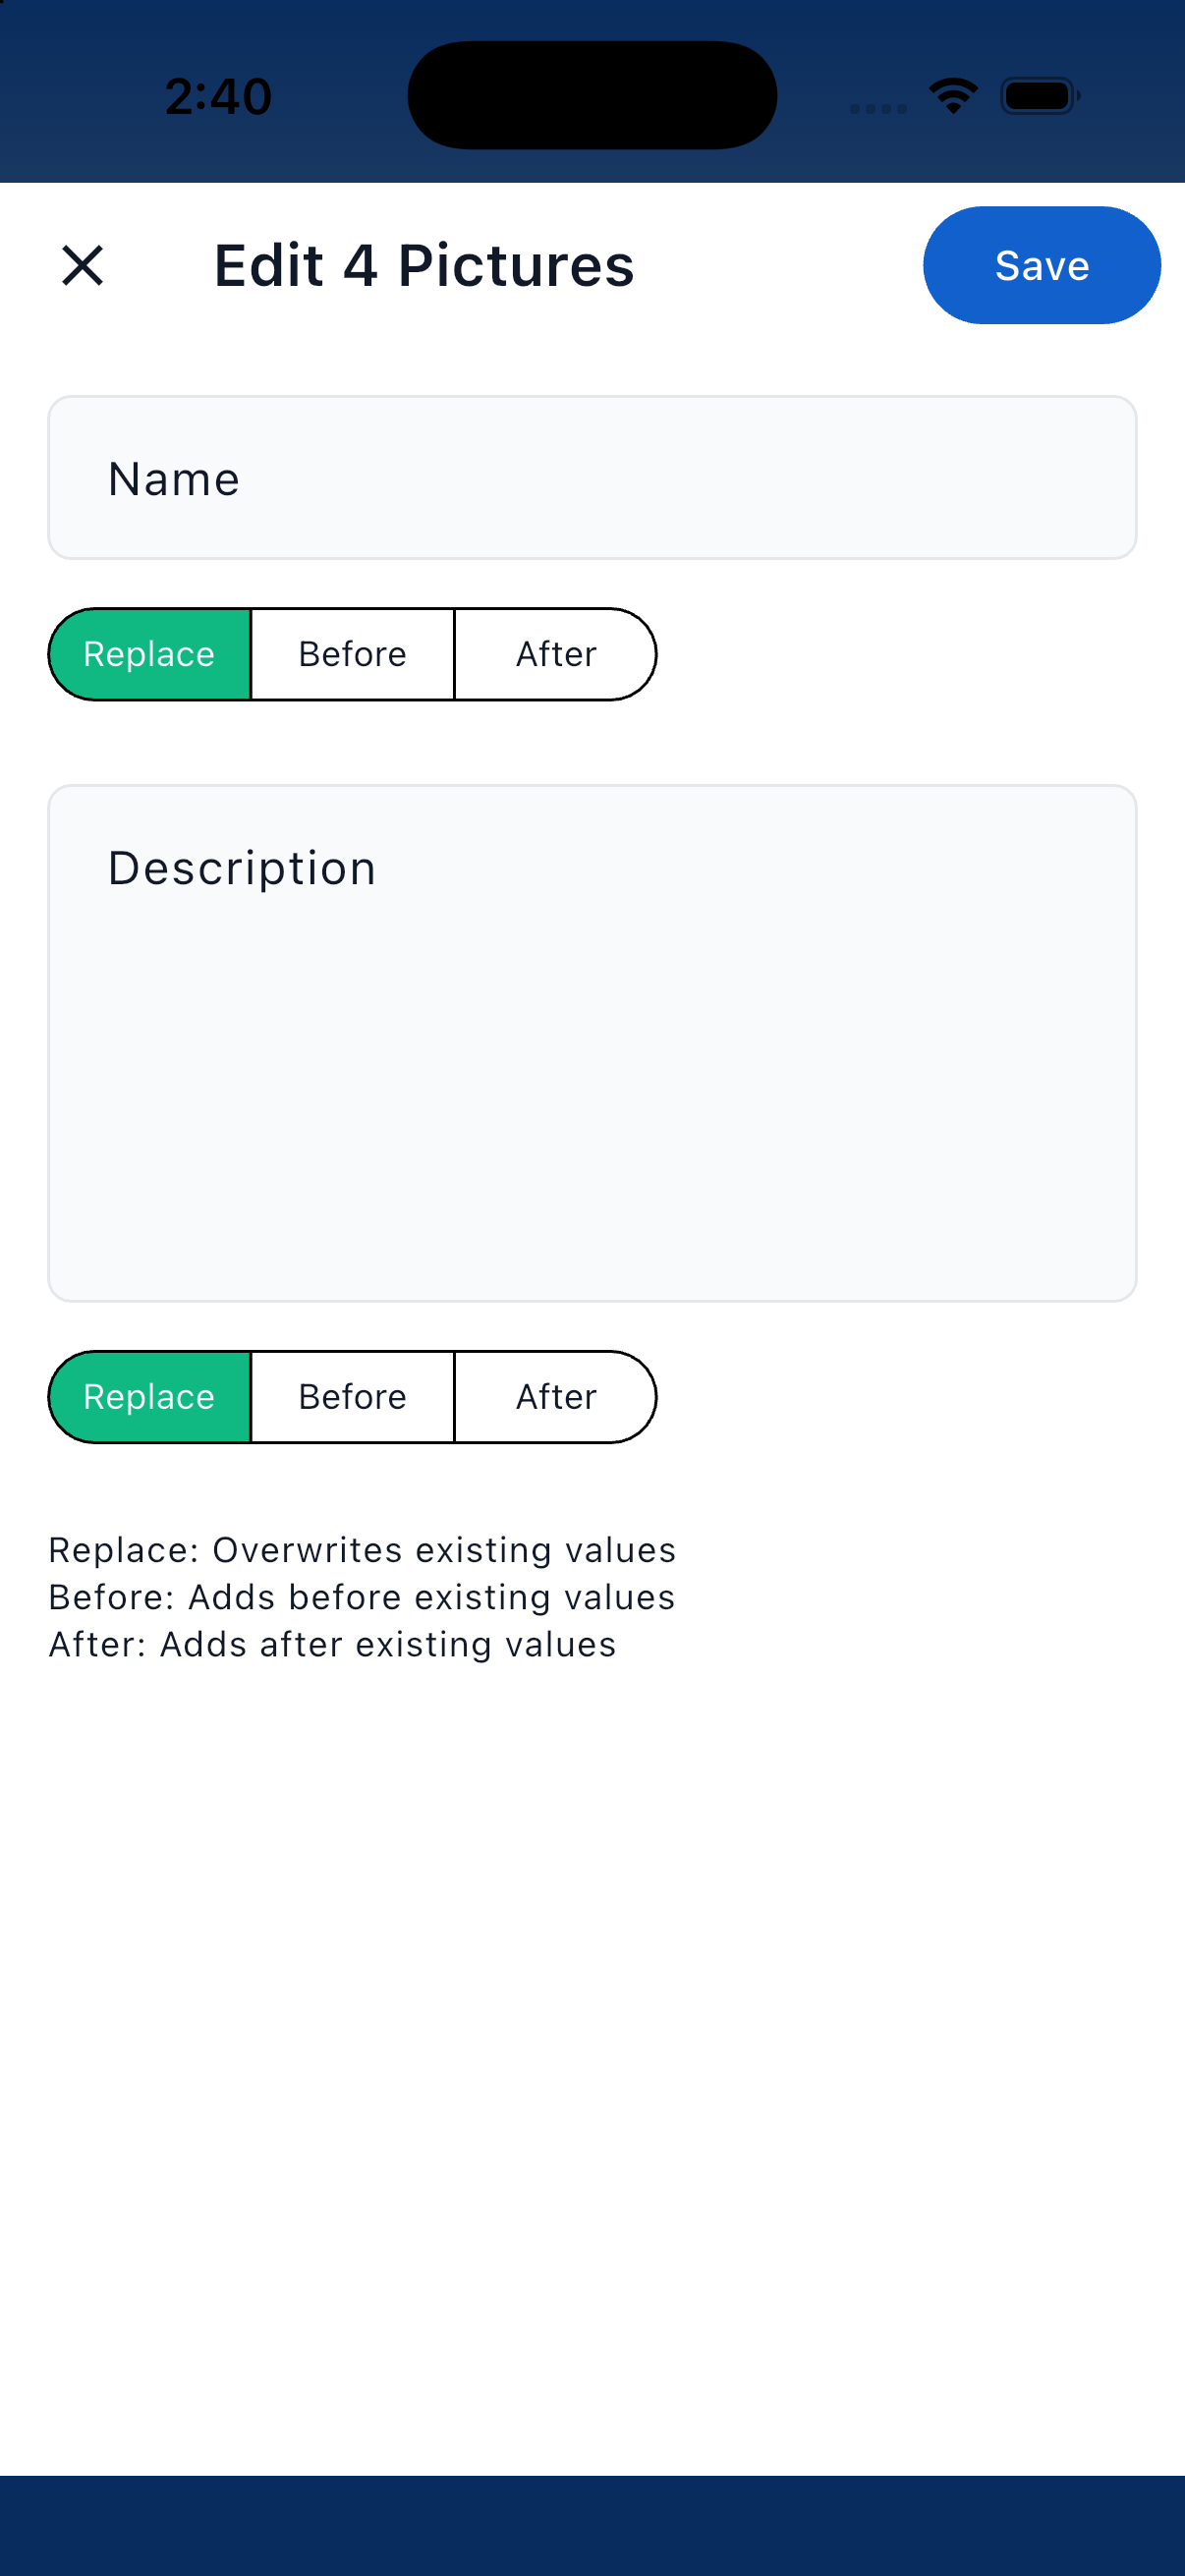
The Edit Pictures dialog with Replace, Before and After
6.4 Bulk Rotate
Select photos and tap Rotate, then confirm Rotate N pictures 90° clockwise?. A progress dialog shows Processing 3 of 12... for large batches and reports how many succeeded.
6.5 Bulk Save to Camera Roll
Select photos and tap Save to copy them all to your phone's Photos or Gallery app. The app reports Saved 12 pictures to camera roll (or how many failed, for example because a photo has not been downloaded yet).
6.6 Bulk Manage Tags
- Select photos and tap Tags. The Edit Tags (N pictures) dialog opens.
- Current Tags lists every tag on any selected photo, with a count showing how many of the selection carry it. Tap a partial tag to add it to all of them, or tap its × to remove it from all of them (Owner or Admin only).
- Add Tags takes new tags: type one or pick a suggestion.
- The Summary shows what will be Adding: and Removing:. Tap Save.
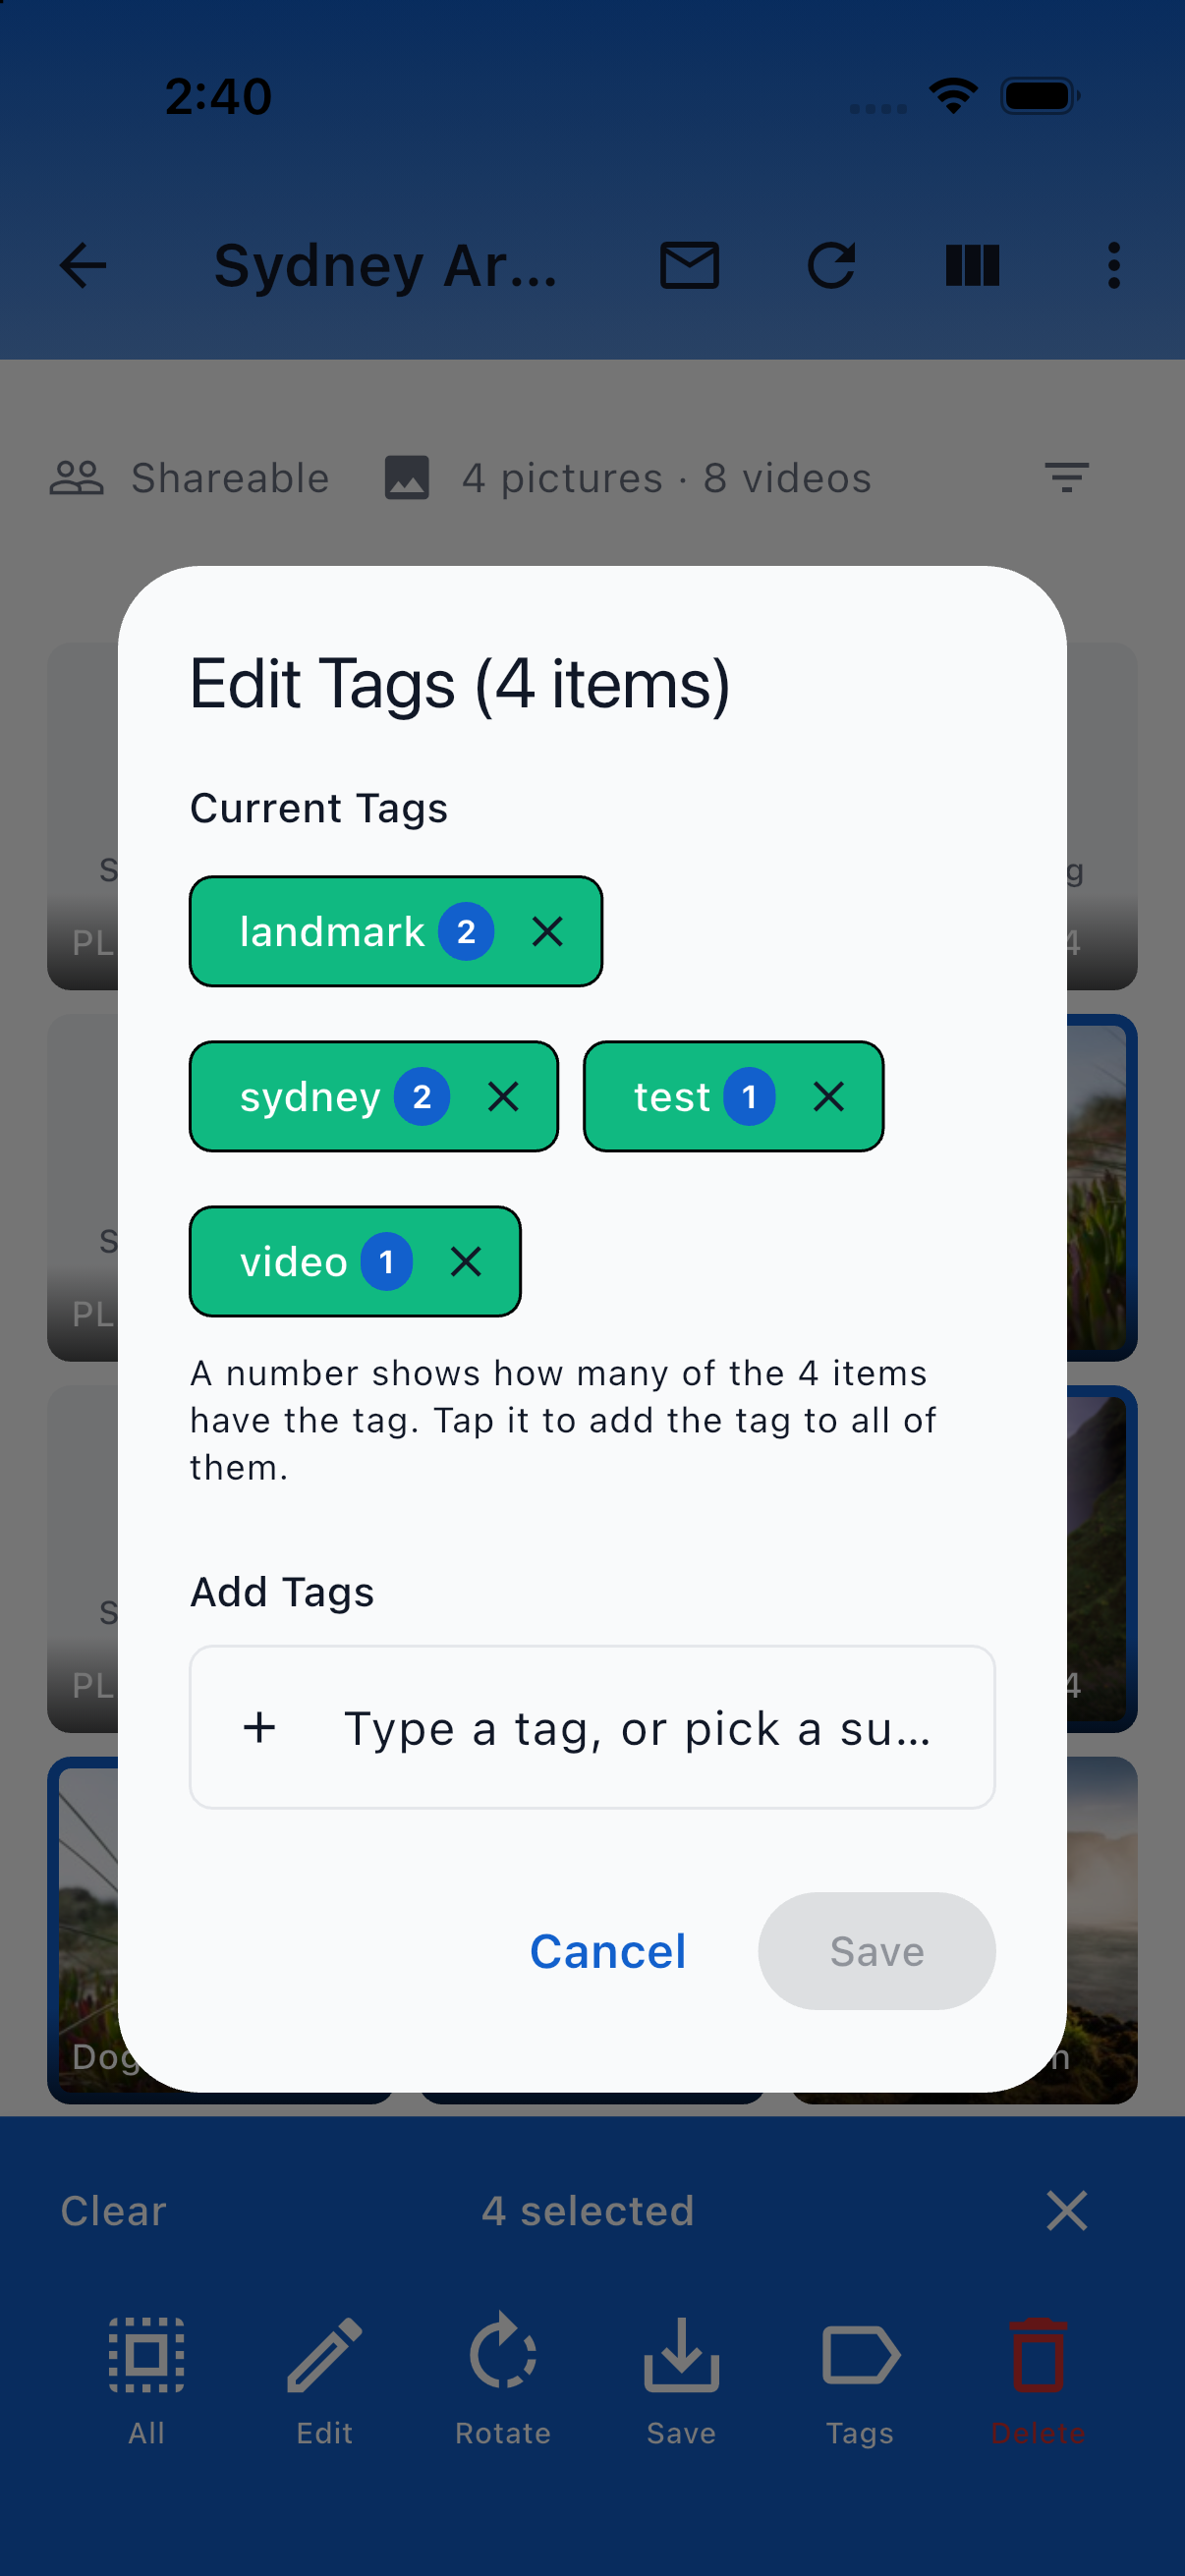
The bulk Edit Tags dialog
6.7 Bulk Delete
Select photos and tap Delete, then confirm Are you sure you want to delete N pictures? This cannot be undone. The app reports Deleted N pictures successfully.
7. Offline Use, Sync and Storage
The app keeps a copy of your library on the phone so it works without a connection, and syncs with the Palixo server in the background. This section explains what is on your phone, how uploads and downloads happen and how to manage the space they use.
7.1 What Is on Your Phone
Every photo in every album you can see is catalogued on the phone, and its thumbnails are downloaded so it shows in the grid and can be filtered and tagged. The full-size original is either kept on the phone permanently or fetched when you open the photo and dropped again a couple of days later, depending on the album's storage setting (section 7.3). Photos and videos you have captured on this phone are always kept until they have uploaded.
7.2 Uploads
Anything you do in the app is saved on the phone first and then sent to the server: new photos and videos, tags, names, descriptions, rotations, markups and deletions.
- The upload pill on the Albums screen and album screens shows the state of your photo uploads: Uploading 3 photos, 3 photos to upload, or in amber 3 photos not uploaded if they are stuck. Tap a stalled pill to open Settings.
- The Sync icon's badge counts every change still waiting, and its tooltip reads Sync Now (N pending).
- Uploads continue while the app is in the background and after it is closed. Force-quitting the app pauses them until it is next opened.
- Uploads are never blocked by the Wi-Fi-only or Auto Sync settings.
If an upload is refused by the server (for example because the album owner is over their plan limit), Settings shows a Retry Blocked Uploads tile.
7.3 Keeping Photos on Your Phone
Full-size photos use far more space than thumbnails, so you decide where they are kept.
For one album
- Open the album and tap ⋮ → Storage. The subtitle shows the current state, for example Kept on this device or App default — not kept.
- Choose Keep photos on this device to download and keep every full-size photo in the album, so they open instantly and work offline. Choose Don't keep photos on this device to fetch photos only when you open them and remove them again after a couple of days. Or pick Use app default.
- Storage Usage on the same sheet shows the space used by full-resolution images and thumbnails and how many of the album's photos are kept (All 48 photos kept, 12 of 48 kept). If keeping is paused it says why: Waiting for Wi-Fi, Waiting for a connection, Not enough space on this device or Auto Sync is off.
Turning keep off asks Remove kept photos from "Album"? and tells you how much space is freed. The photos stay browsable and download again when opened; photos waiting to upload are never removed.
For the whole app
Settings → Storage → Keep photos on this device sets the default for albums that have no setting of their own. New installs default to not keeping full-size photos.
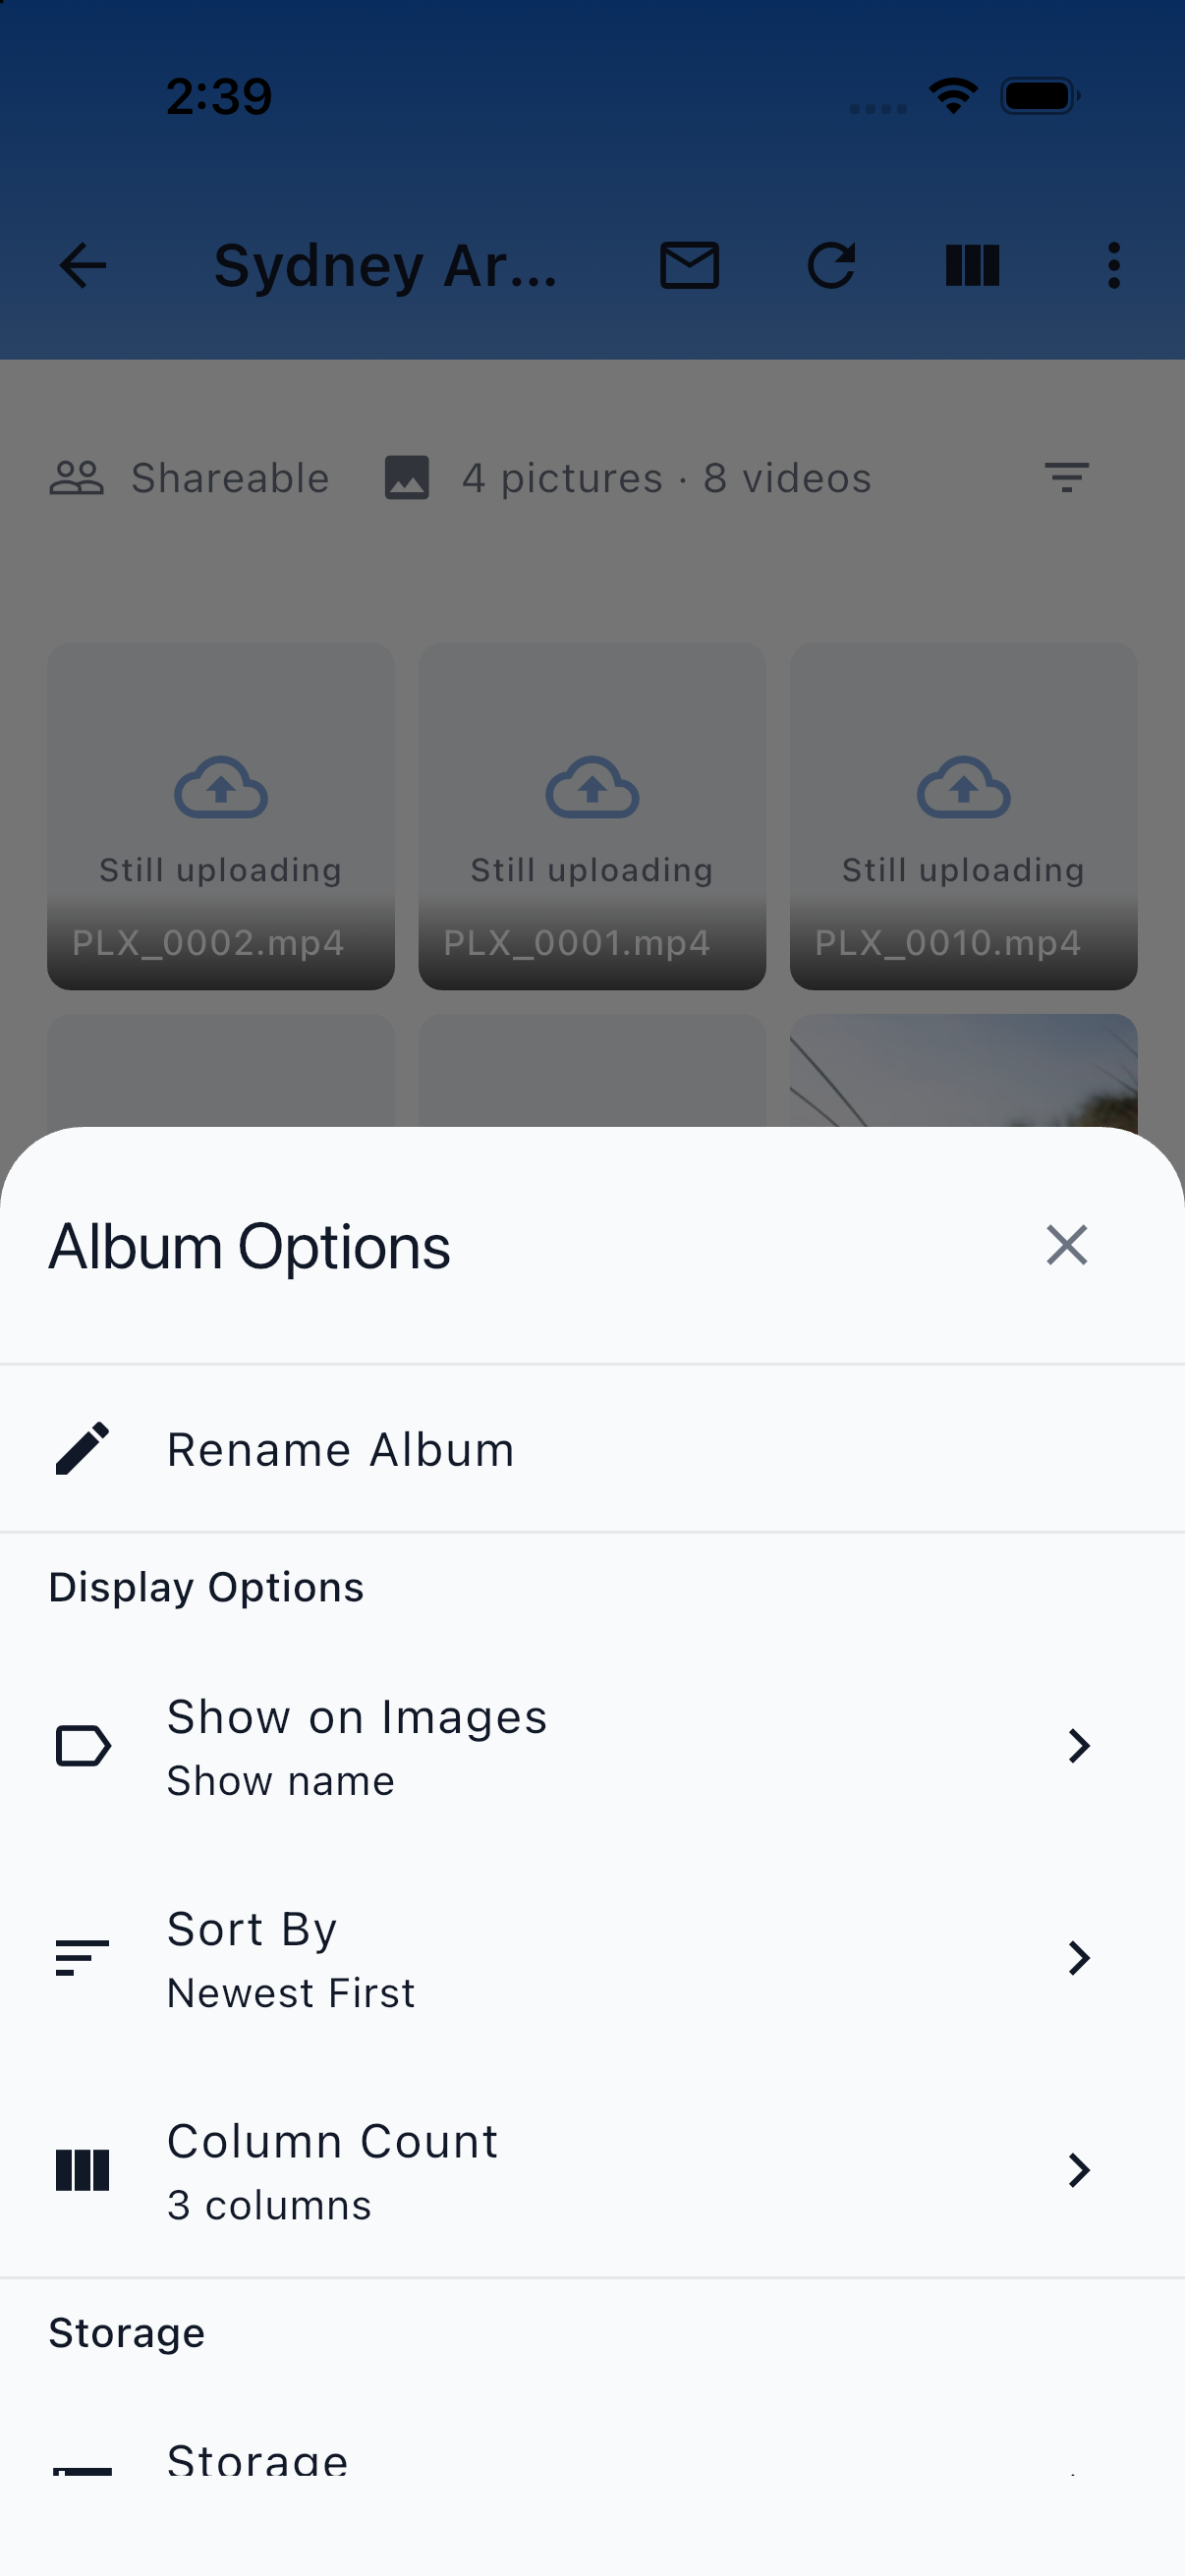
The album Storage sheet
7.4 Sync Settings
Settings → Sync Settings controls what the app fetches and when.
- Auto Sync — automatically look for new photos on the server. Photos already found finish arriving either way, your own photos still back up, and pull-to-refresh always syncs.
- Sync Interval — how often Auto Sync checks: 5, 10, 15, 30 or 60 minutes (default 15).
- WiFi Only Downloads — only download photos over Wi-Fi, including the thumbnails the grid needs. New photos still back up on mobile data.
- Sync Queue — see section 7.5.
- Photos ready to browse — shows progress while a large library is still arriving after sign-in.
- Resync From Date — re-download everything changed since a date you pick. Use it if your phone seems to be missing changes made elsewhere. It can take several minutes and use significant data.
- Re-send From Date — re-queue your own changes from the last 24 hours, 7 days, 30 days or 12 months in case the server never received them. Changes that synced normally are left alone, so it is safe to run more than once.
To sync right now, tap the Sync icon or pull down on the Albums screen.
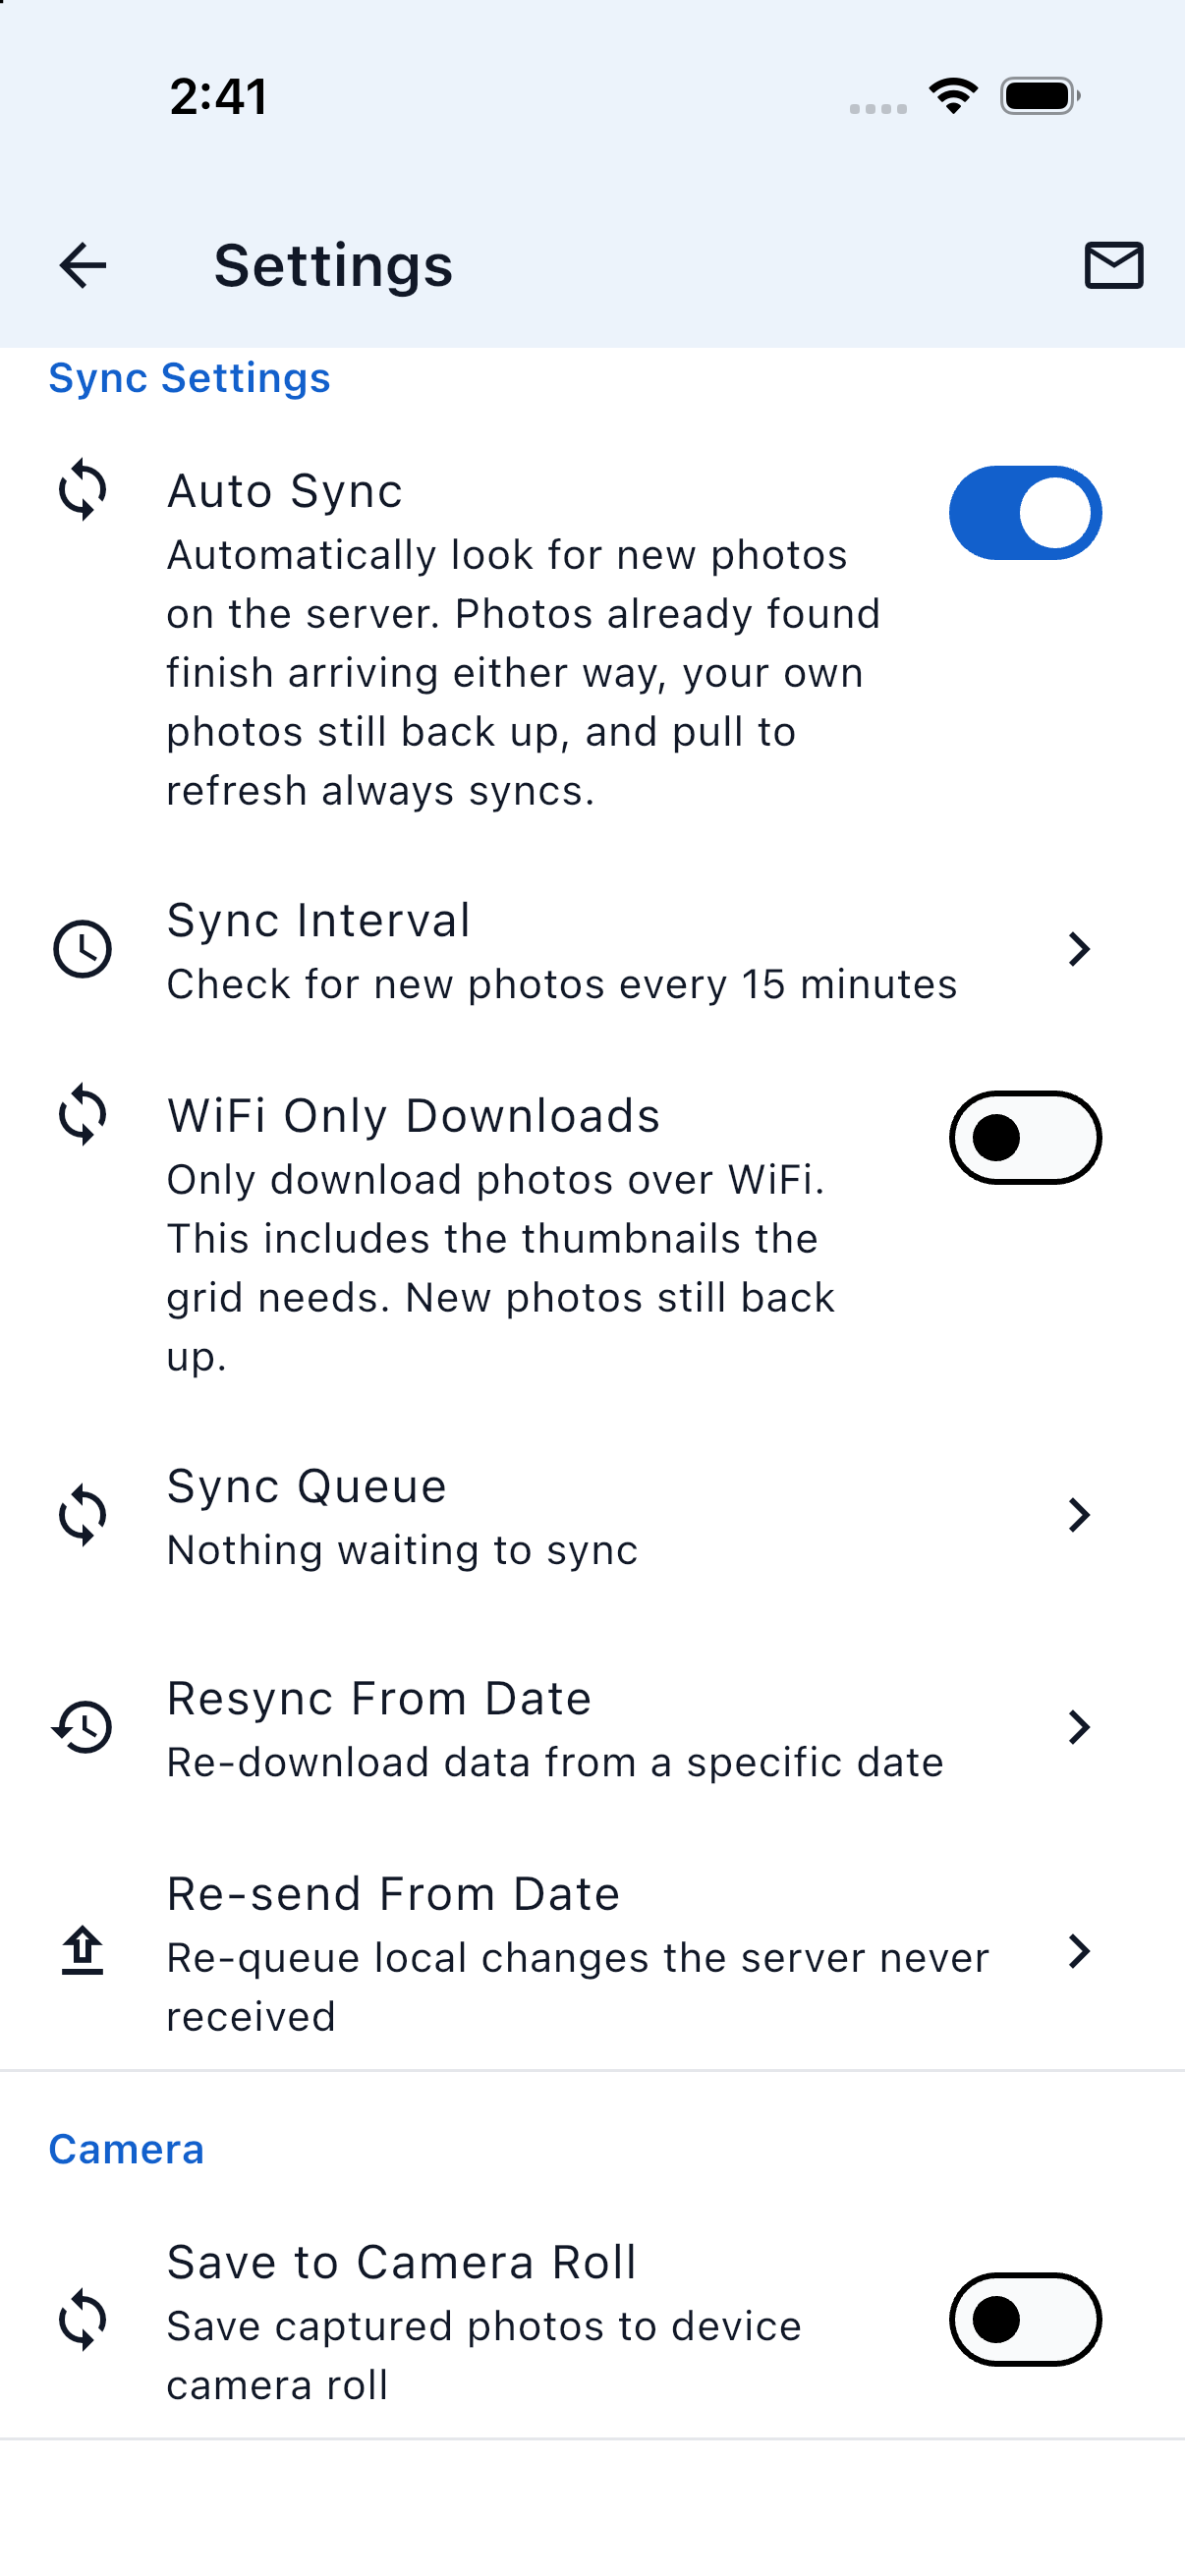
The Sync Settings section
7.5 The Sync Queue
Settings → Sync Settings → Sync Queue lists every change that has not yet reached the server. When nothing is waiting it reads Everything is synced.
- Each row shows the change, what it applies to, its status and how long it has been queued. Tap a row for details including What the server said and Technical details, and a Discard this change action.
- A change that keeps failing is marked stuck. ⋮ → Discard stuck changes removes changes that have failed repeatedly and are holding up everything behind them. Discarded changes never reach the server.
- ⋮ → Re-send changes from... is the same as Re-send From Date above.
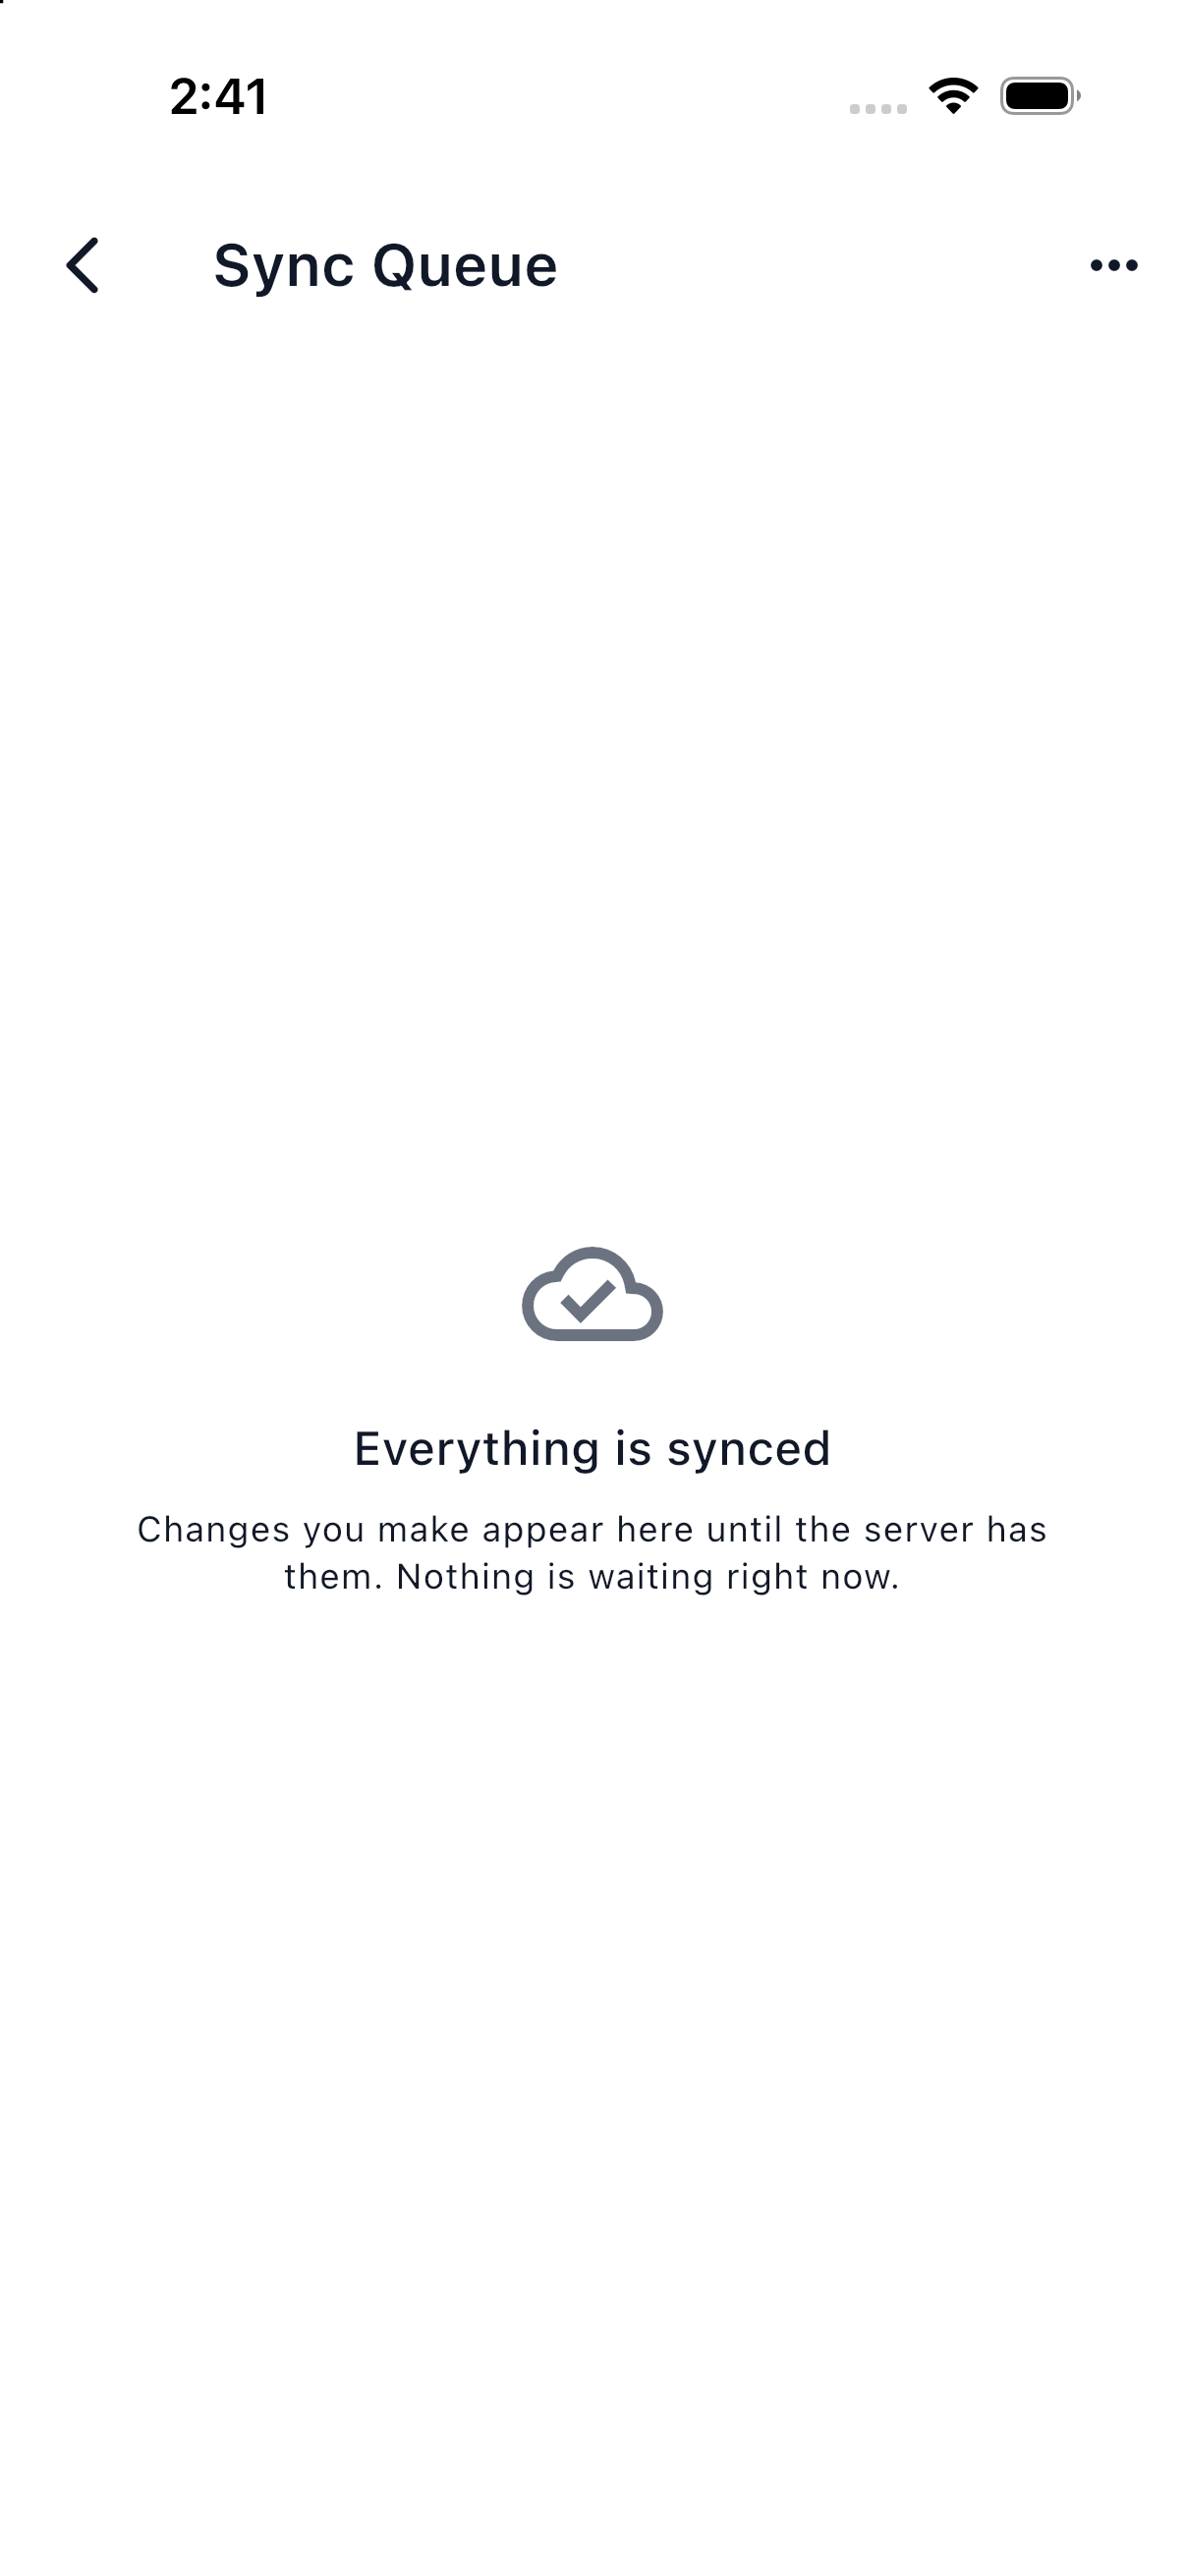
The Sync Queue screen
7.6 Storage and Clearing the Cache
Settings → Storage shows Total Storage, Cache Size, Database Size and Local Pictures (pictures stored on this device).
Clear Cache lets you free space by ticking any of:
- Downloaded photos — full-size photos fetched when you opened them.
- Photos kept for offline use — full-size photos in albums set to Keep. Those albums download them again; to free the space for good, set the album to Don't keep.
- Thumbnails — regenerated in the background afterwards.
- Local Database — albums, pictures and tags. The app re-downloads them on the next sync. Any photos still waiting to upload are discarded with the database and cannot be recovered; the dialog warns you with the count.
Tap Clear Selected to proceed.
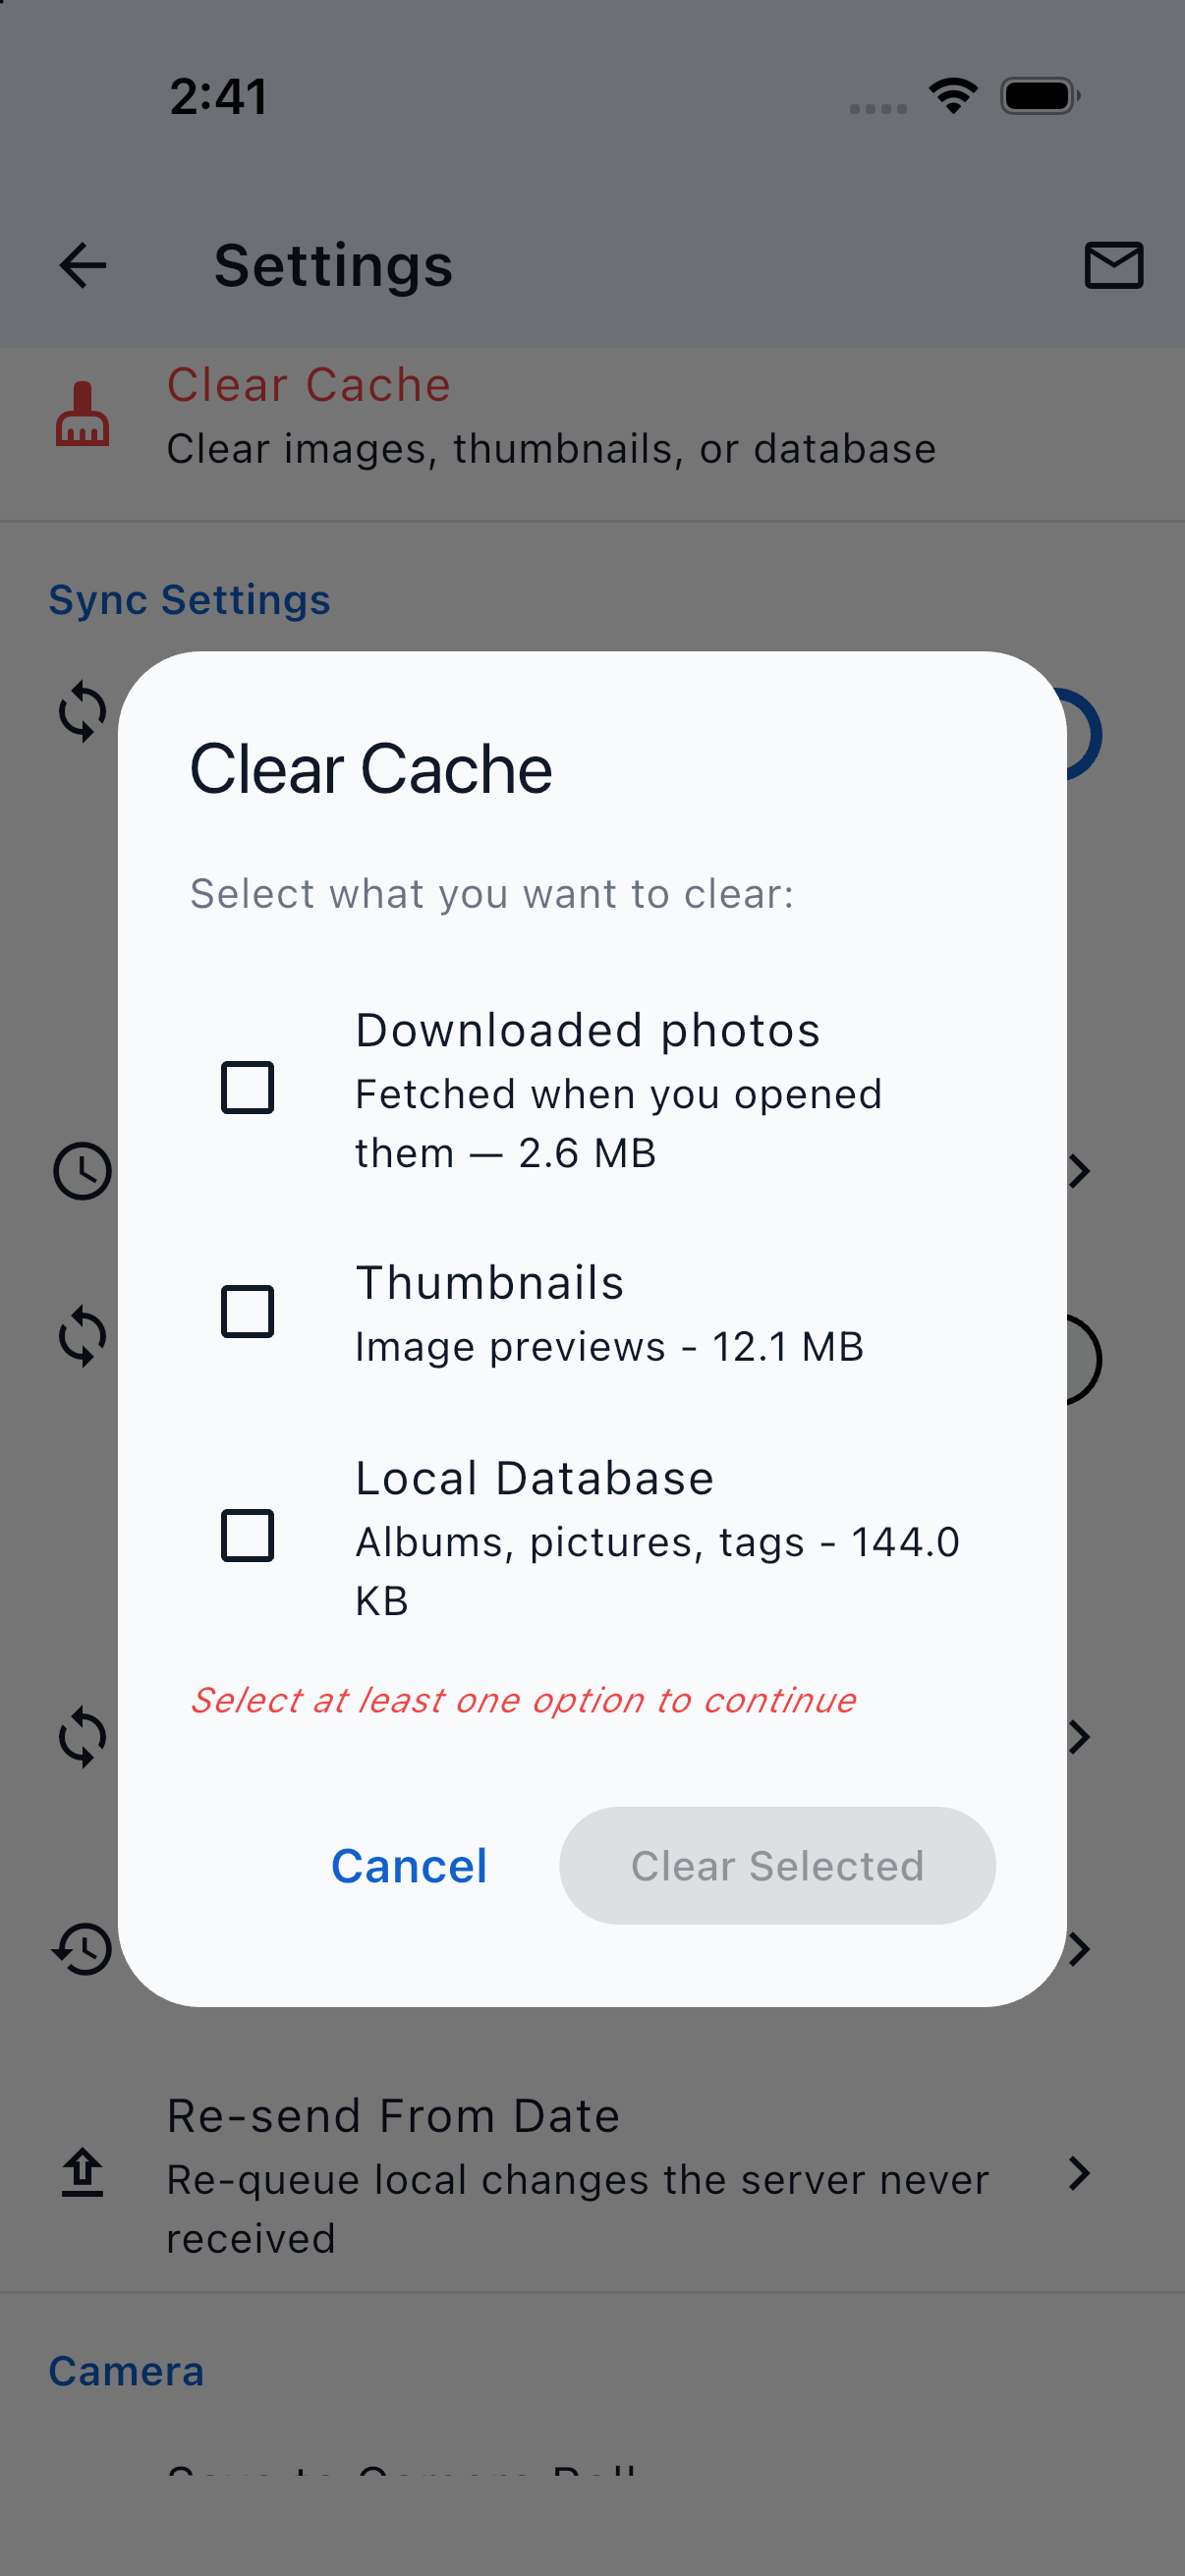
The Clear Cache dialog
8. Sharing Albums With Your Team
Palixo has two ways to share photos: album sharing with colleagues who have Palixo accounts, and Collections, time-limited links for people without an account. The app manages album sharing; Collections are created on the website (see the website user guide, section 10).
8.1 Album Sharing vs Collections
| Album sharing (in the app) | Collections (website only) | |
|---|---|---|
| Best for | Ongoing collaboration with your team | Sending photos to clients or suppliers |
| Recipients need an account | Yes | No, anyone with the link |
| Access | Viewer, Editor or Admin, until revoked | View only, until the link expires |
| New photos | Visible to everyone automatically | The collection must be edited |
Only Shareable albums can be shared. A Private album is yours alone.
8.2 Levels of Access
When you invite someone you choose their access level. The app calls the middle level Editor; the website calls it Contributor.
| Viewer | Editor | Admin | Owner | |
|---|---|---|---|---|
| View and save photos | Yes | Yes | Yes | Yes |
| Take, record and import | No | Yes | Yes | Yes |
| Edit names, descriptions and add tags | No | Yes | Yes | Yes |
| Draw on photos | No | Yes | Yes | Yes |
| Remove tags (including System Tags) | No | No | Yes | Yes |
| Rotate | No | Yes | Yes | Yes |
| Delete photos | No | Only their own | Yes | Yes |
| Save a markup over the original | No | Only their own | Yes | Yes |
| Rename the album | No | No | Yes | Yes |
| Invite people and change access | No | No | Yes | Yes |
The Owner is the person whose account holds the album. An Admin on someone else's album uses a collaborator slot on the owner's plan when inviting.
8.3 The My Collaborators Screen
Palixo counts collaborators as people, not grants: each person you share with uses one slot on your plan no matter how many of your albums they can see. My Collaborators is where you manage them.
- Open Settings → My Collaborators. The row appears only if you own or administer at least one shareable album.
- The Collaborator slots banner shows used / limit and how many invitations are pending. Plans without collaborator slots show Not included in your plan.
- Each collaborator is listed with their email, how many of your albums they can see and their status: Active, Pending (invited, not yet accepted) or Inactive.
- Use Search by name or email to find someone quickly.
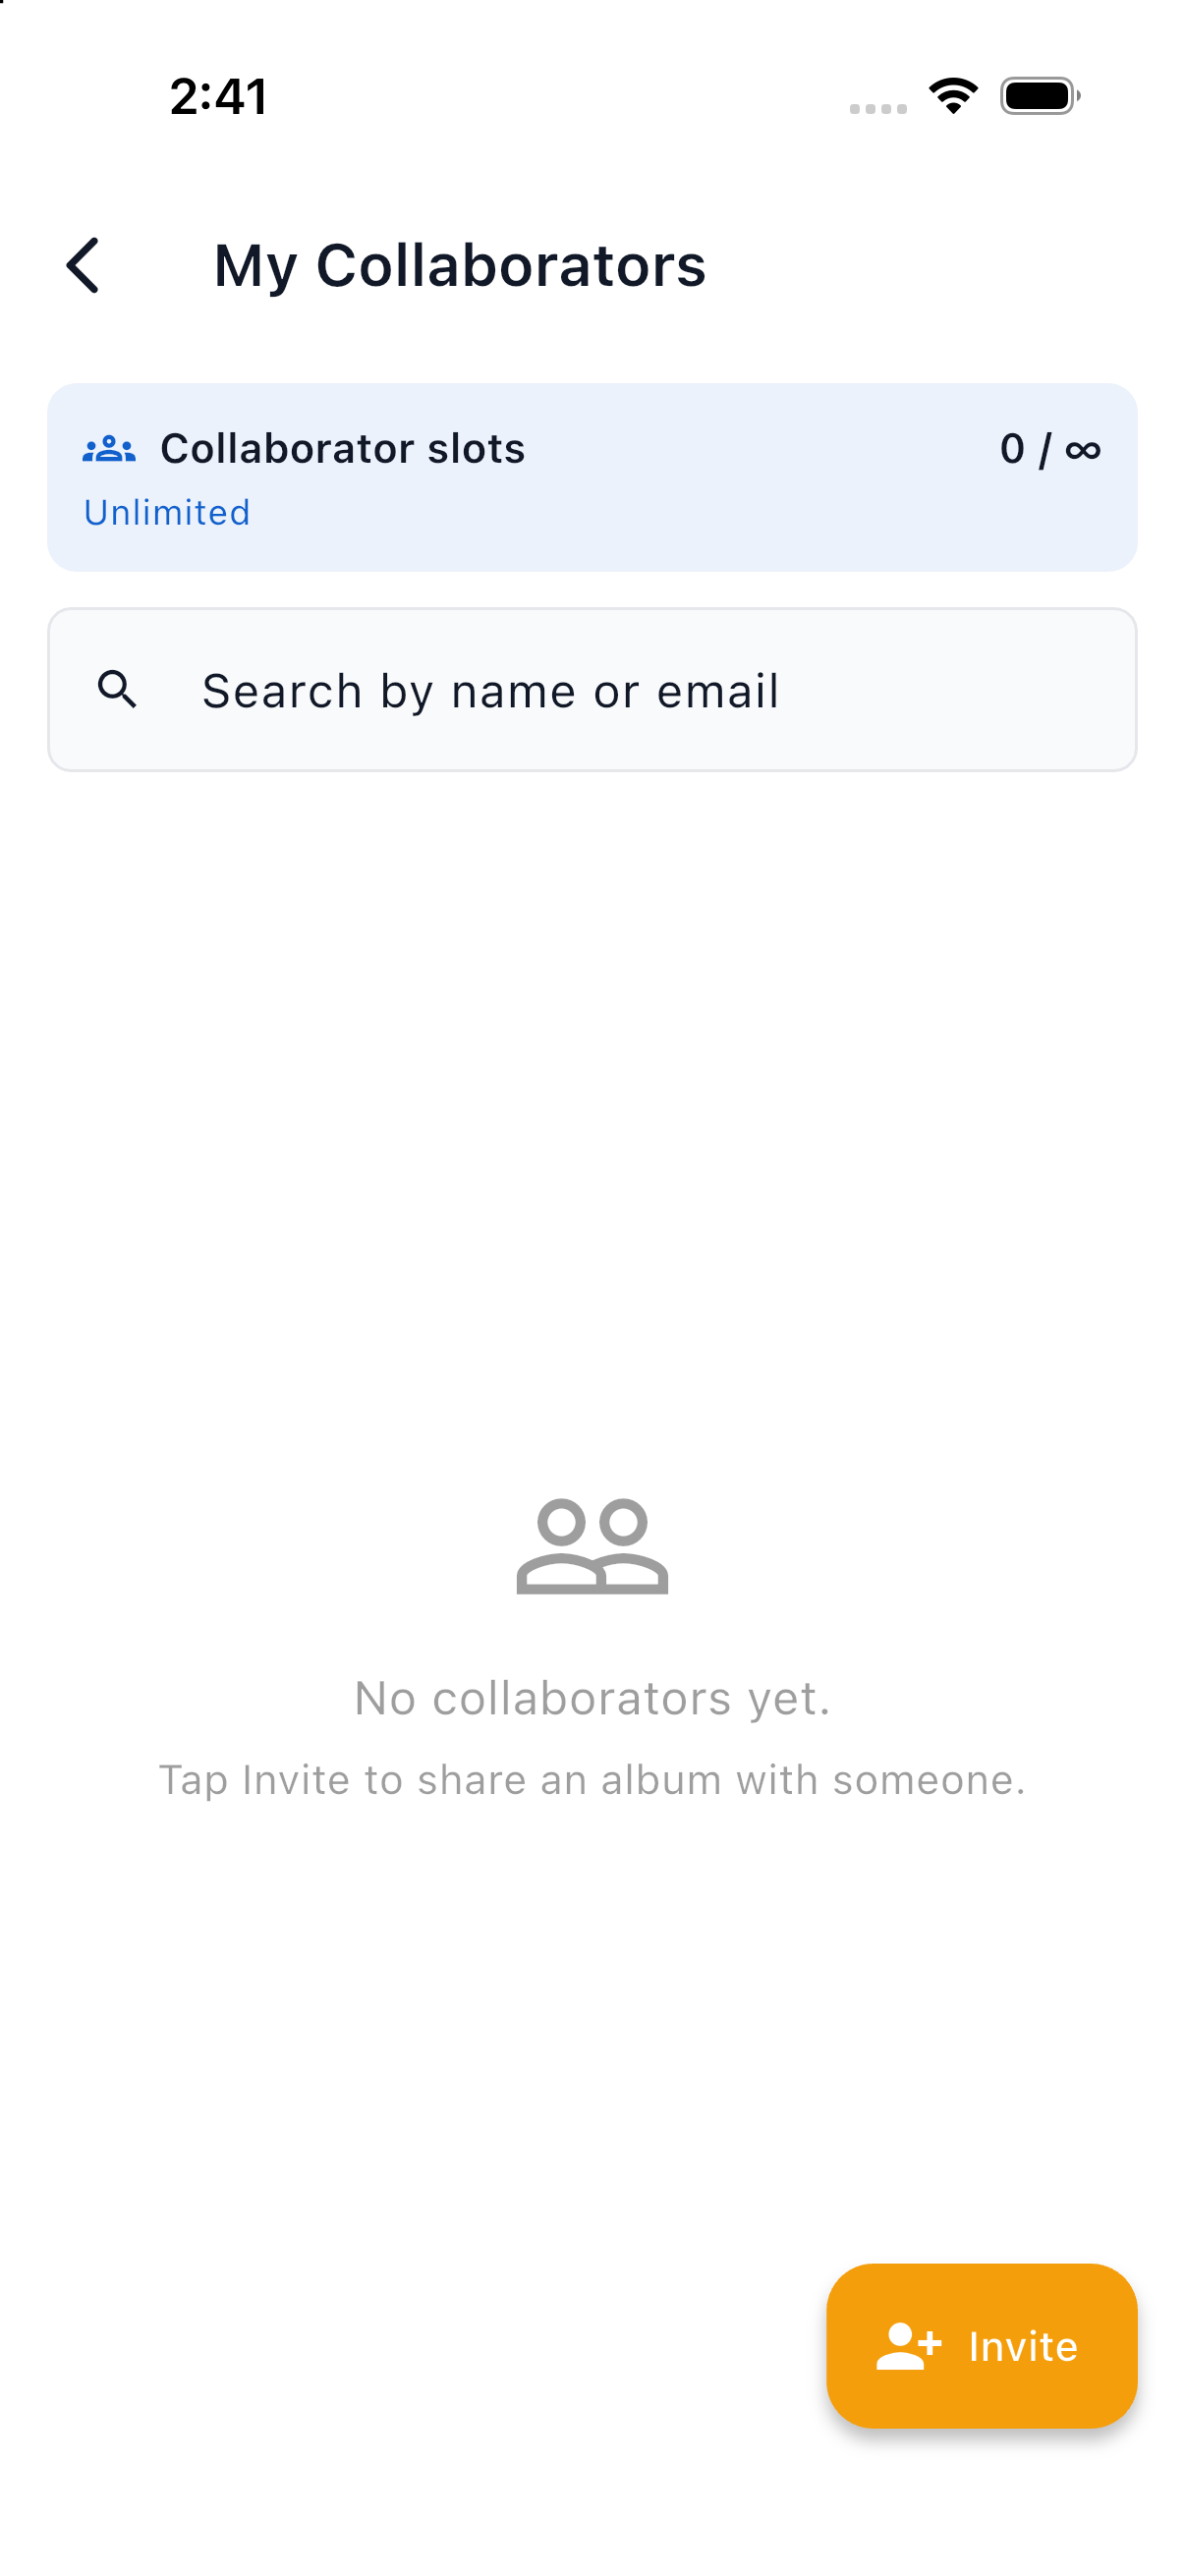
The My Collaborators screen
8.4 Inviting Someone
- On My Collaborators, tap Invite.
- Enter their Email and, optionally, their Name.
- Choose the Access level: Viewer, Editor or Admin. The level applies to every album in this invitation.
- Under Share to albums, tick one or more of your shareable albums.
- Read the note above the button: New collaborator will use 1 slot (2/3 after invite). or Already in your pool — no slot consumed.
- Tap Send invitation.
They receive an email and, if they use the app, the invitation appears in their Invitations inbox. The albums show up for them as soon as they accept.
If you are at your collaborator cap
The Invite button reads No slots and is disabled, and the form explains Slot limit reached. Upgrade your plan or remove someone first. Pending invitations occupy a slot until they are accepted, declined or cancelled. Inviting someone who is already a collaborator on one of your albums does not use another slot.
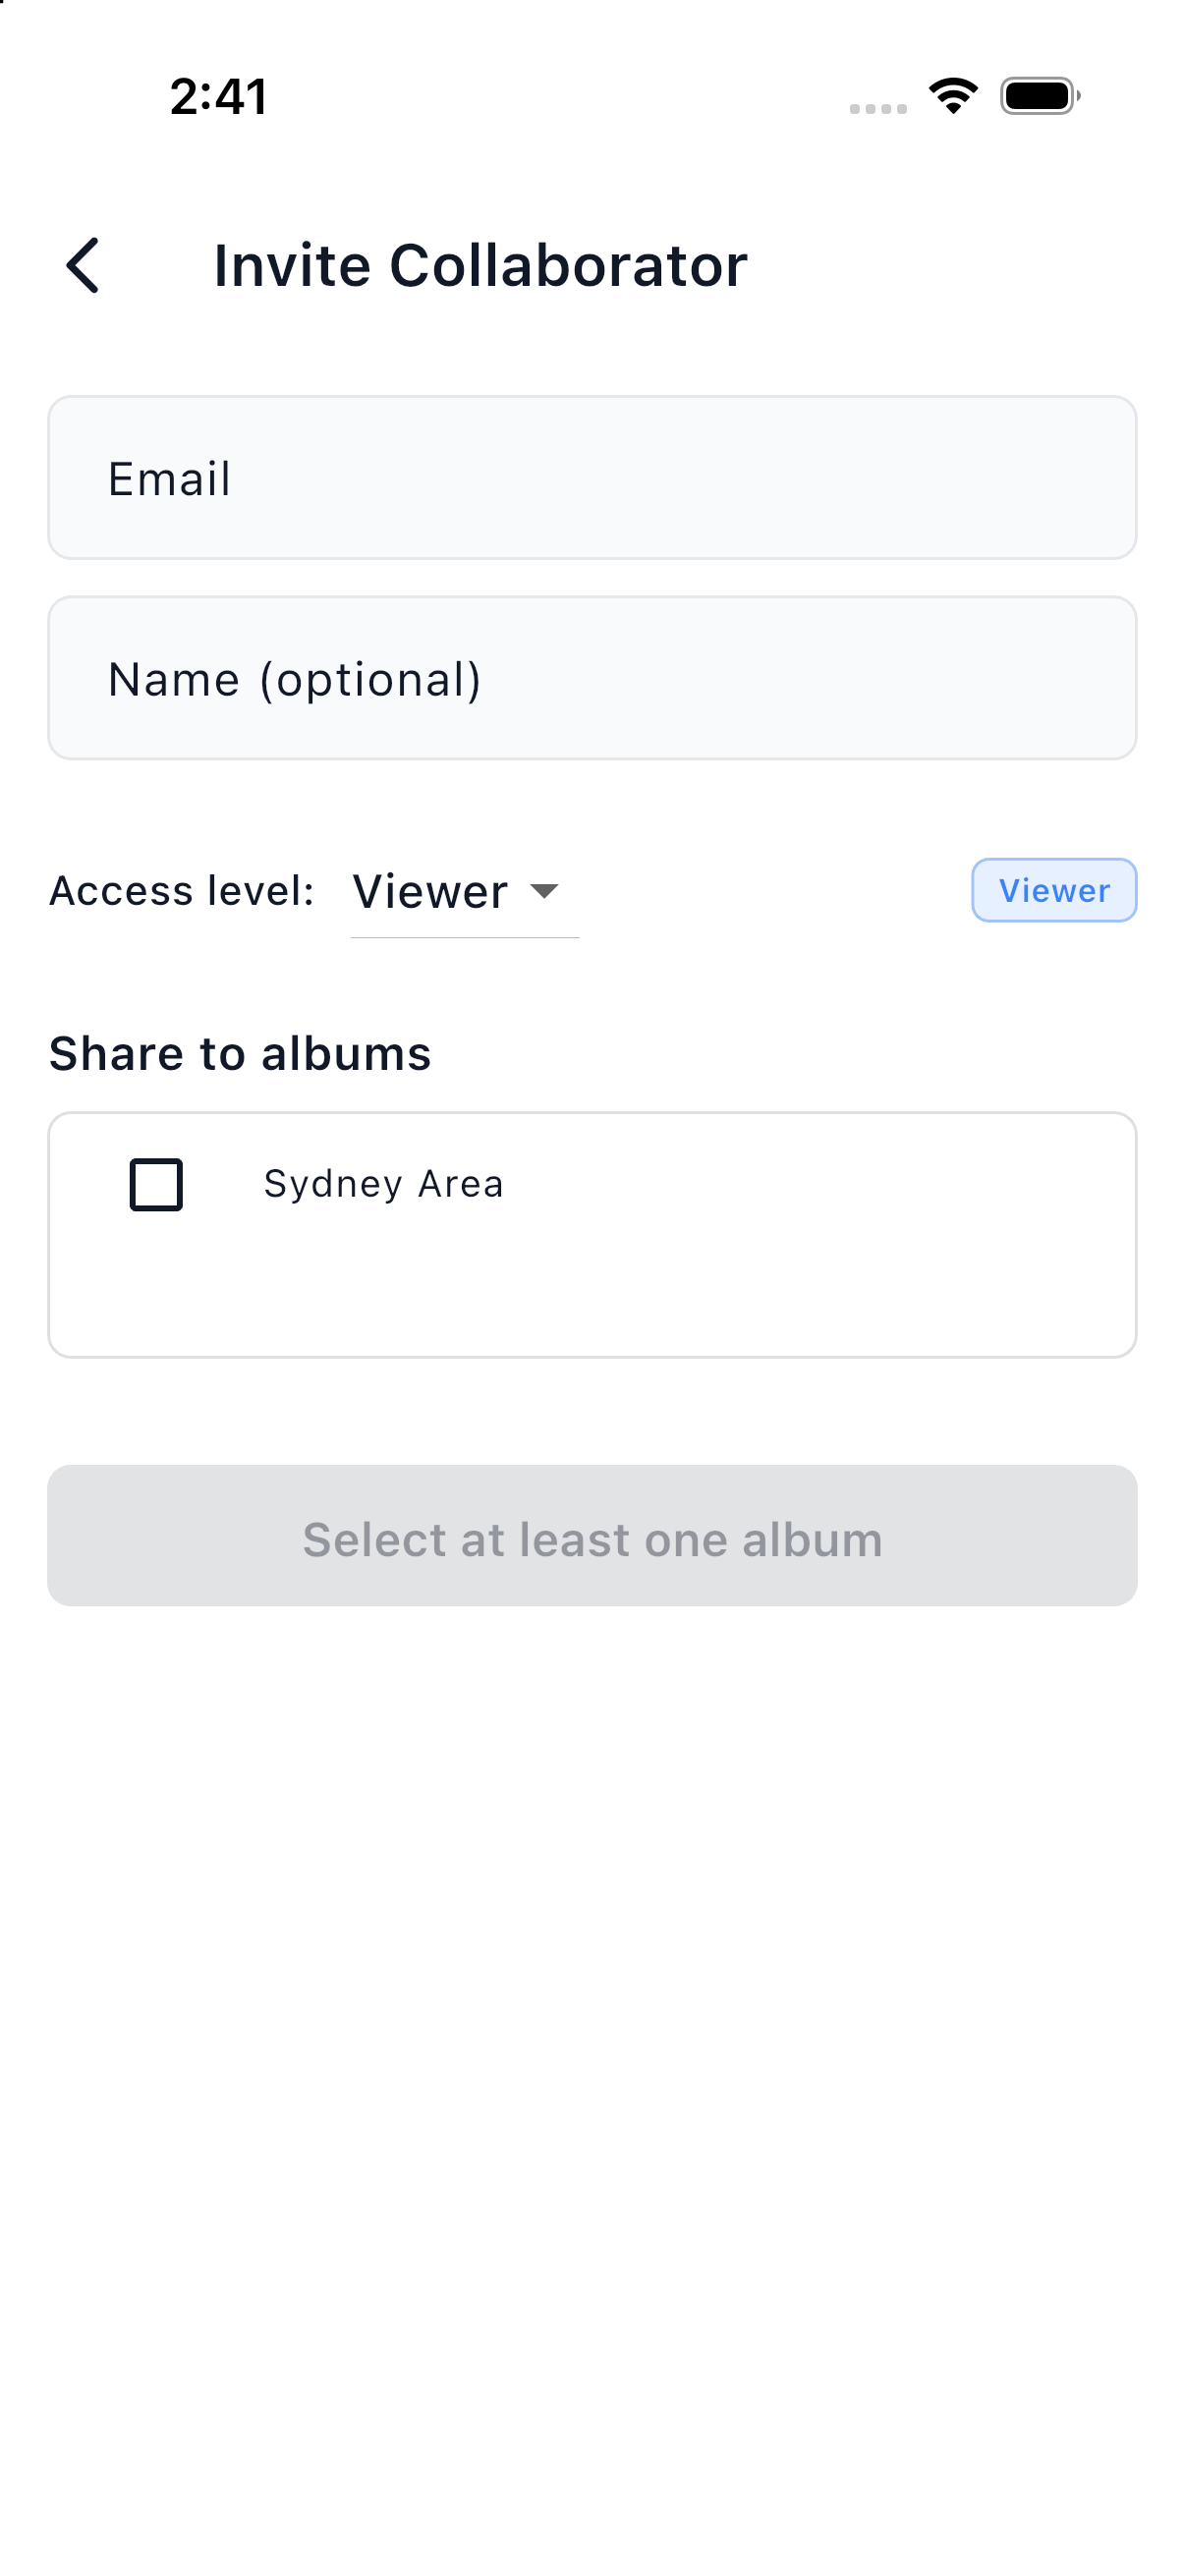
The Invite Collaborator screen
8.5 Changing, Revoking and Removing Access
Tap a collaborator on My Collaborators to open their detail screen.
- Albums lists every album of yours they can see with their access level. Tap the level to change it.
- Revoke next to an album removes their access to that album only. Their other albums are unchanged and their slot stays used until they have no albums left.
- Add to more albums grants them access to more of your albums without using another slot.
- Remove from pool revokes every album, cancels any pending invitation and frees their slot. The app asks you to confirm.
8.6 Accepting Invitations
When someone invites you to an album you can accept it in two ways.
In the app
- Tap the envelope icon on the Albums screen (a red badge shows the number waiting). The app icon also shows the count if you allowed notifications.
- Each invitation shows the album, who it is from and the access level offered.
- Tap Accept or Decline. Accepted albums appear on your Albums screen after the next sync; open one before then and you will see Album not available yet for a moment.
From the email
Open the Accept Invitation link on your phone. The app opens on an Invitation screen, accepts it and takes you to the album. If you are signed out, sign in first and then open the link again. Sign in with the email address the invitation was sent to.
If the link cannot be accepted the screen explains why, for example This invitation has expired. Ask whoever shared the album to send a new invitation. or that you already have the album.
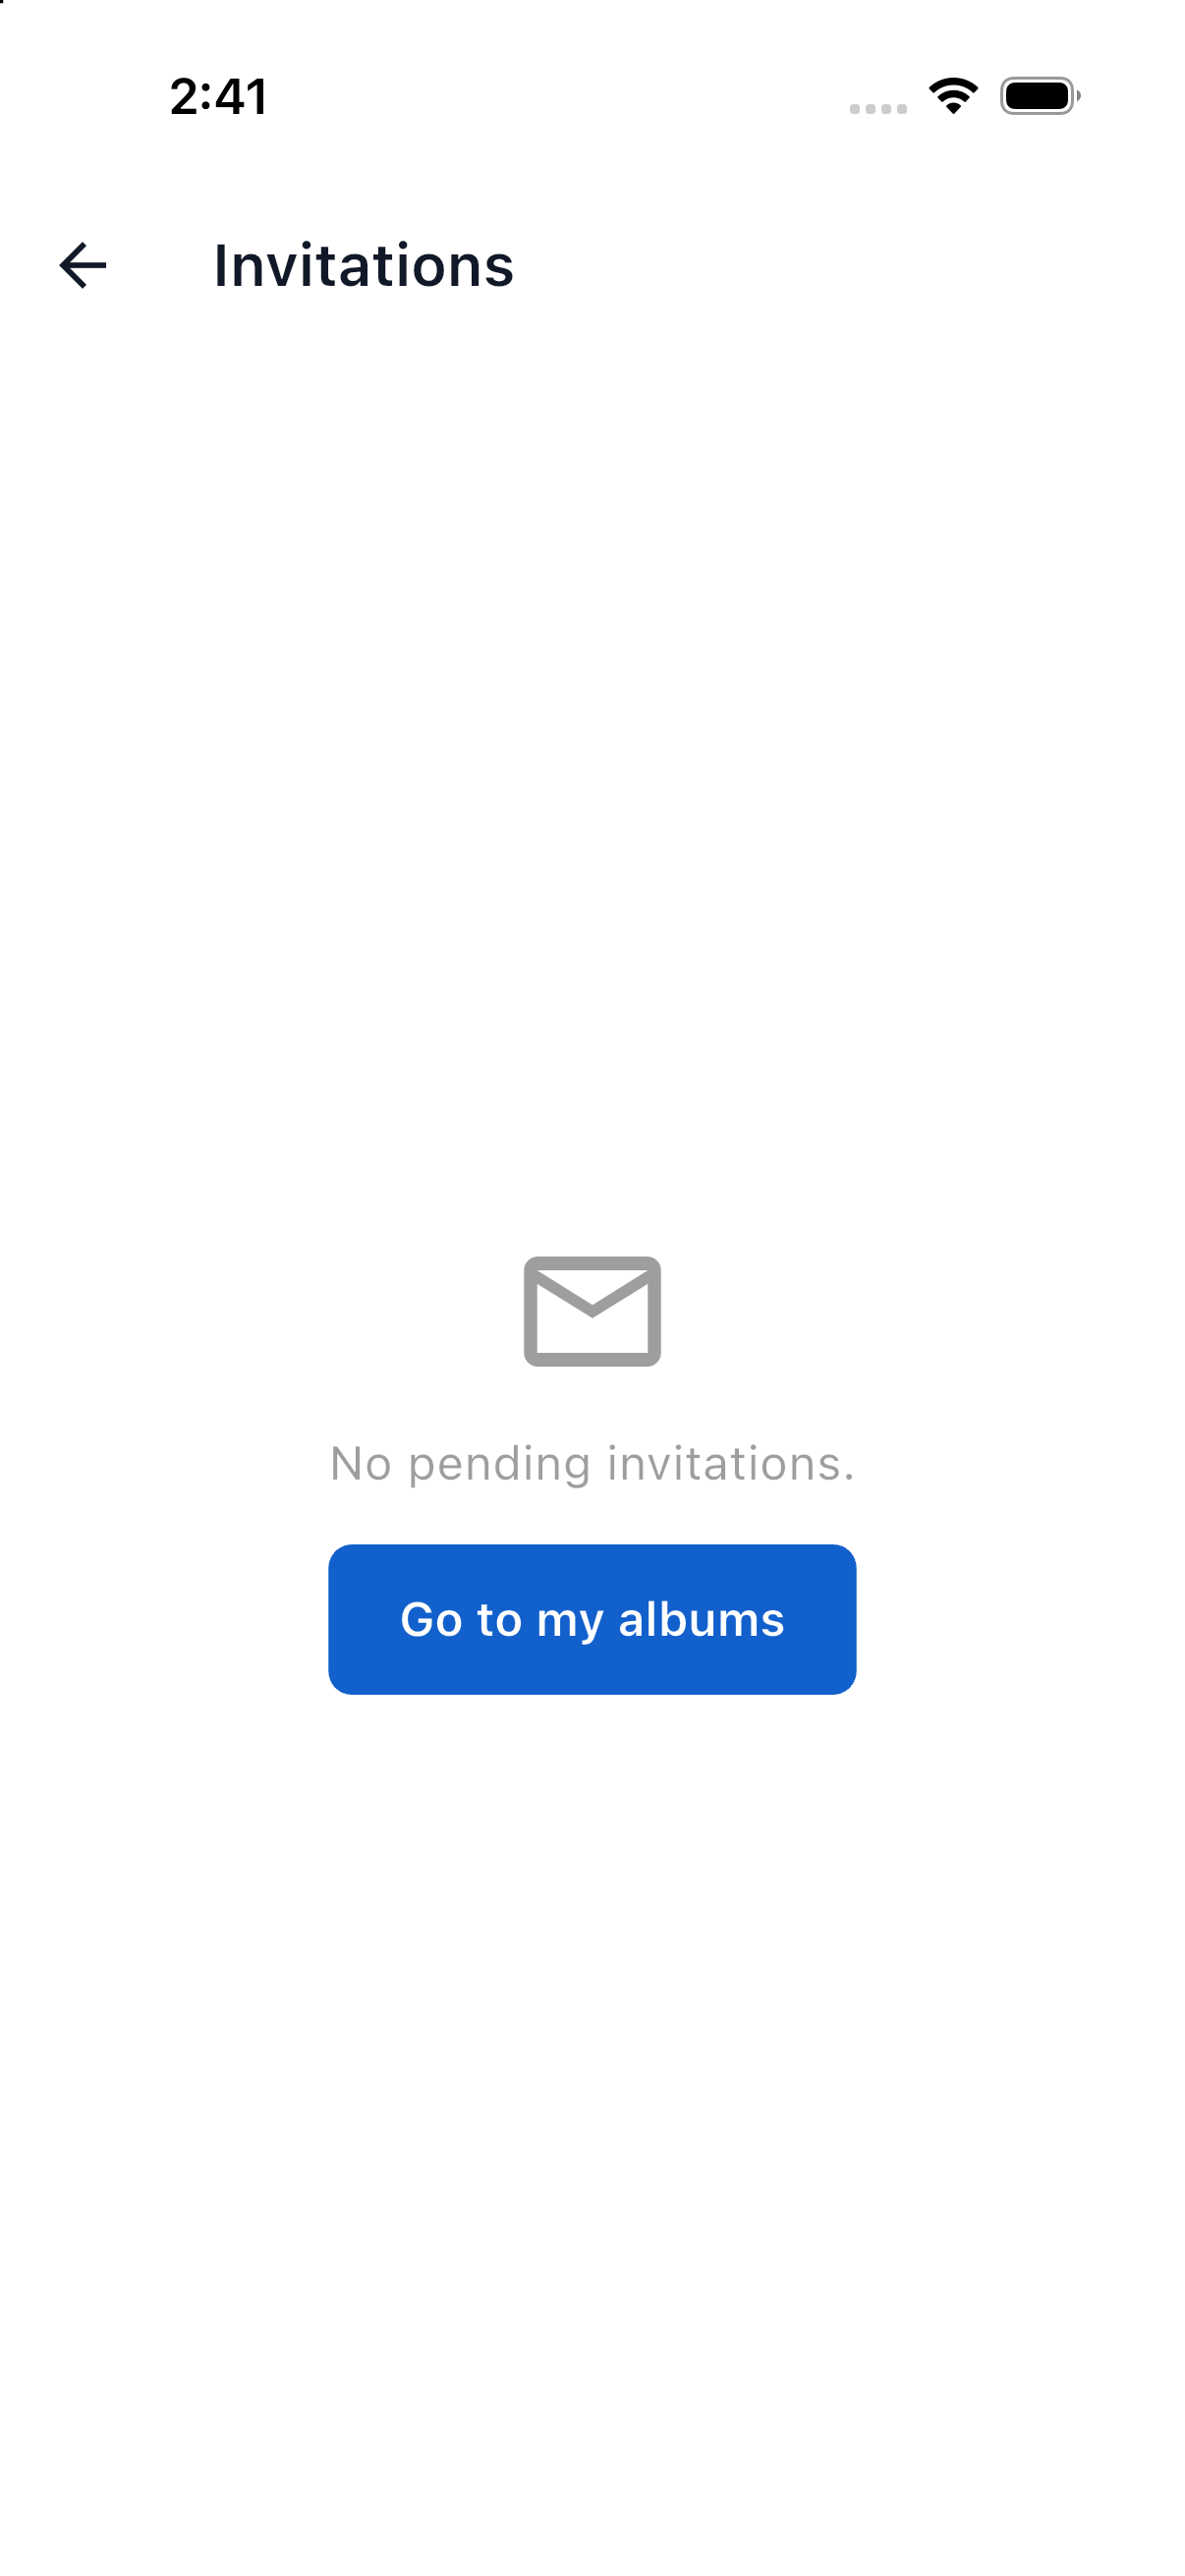
The Invitations inbox
8.7 Collaborator Slot Limits
Each plan includes a fixed number of collaborator slots (section 10.2).
- One person = one slot, no matter how many albums you share with them.
- Pending invitations count until they are accepted, declined or cancelled.
- At the cap, new invitations are blocked until you remove someone or cancel a pending invitation.
- The Collaborators meter on Plan & Usage shows used / limit and +N pending.
9. Opening Palixo From Links
The app opens directly from Palixo links, so other systems, emails and messages can send you to the right place. The Salesforce Cloud Images component uses these links from Salesforce Mobile.
| Link | What the app does |
|---|---|
https://palixo.media/app/camera?tags=job-12345 | Opens the camera with the tags filled in. If more than one album qualifies you choose one first (section 4.7). |
https://palixo.media/app/album?tags=job-12345 | Opens an album filtered by the tags, after you choose the album. |
https://palixo.media/app/album/<album id>?tags=before | Opens that album with the filter applied. |
https://palixo.media/app/invite/<token> | Accepts an album invitation (section 8.6). |
Older palixo:// links still work. Tags in links keep their punctuation, so R&D and site survey arrive intact.
- If the app is locked, the link waits until you unlock.
- If the app is signed out, sign in and the link is followed afterwards.
- If a link was made for a different server (for example a UAT link while the app is on Production) the app says so: This link came from uat.palixo.media but the app is connected to palixo.media. Switch the server in Settings, then open the link again.
10. Account and Settings
Tap the gear on the Albums screen to open Settings.
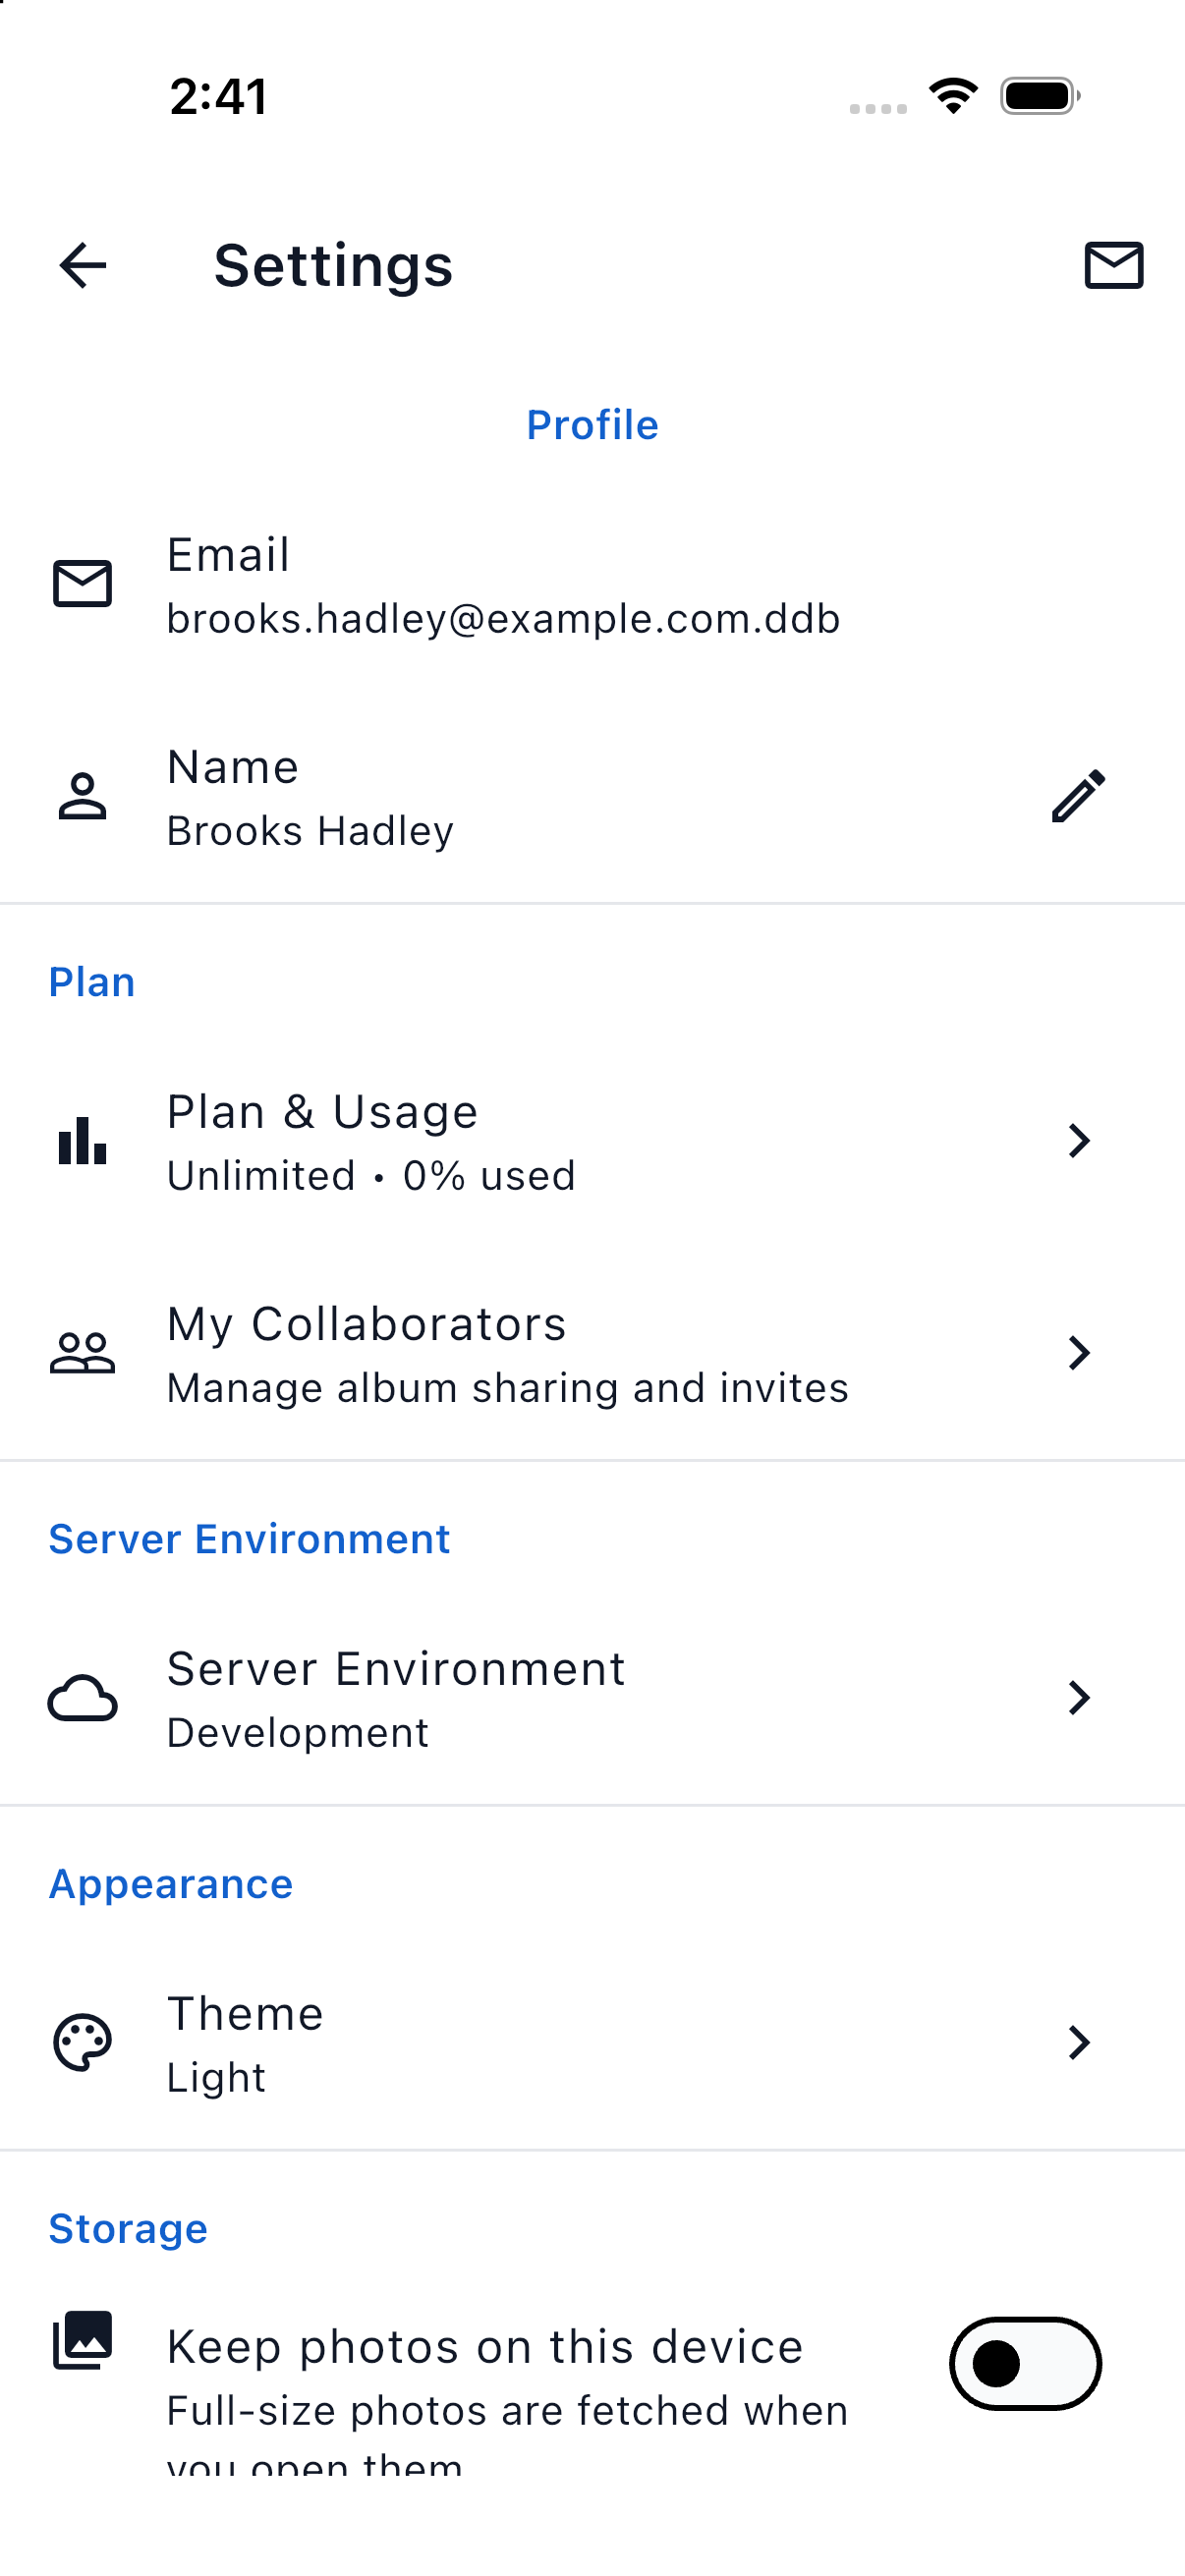
The Settings screen
10.1 Your Profile
The Profile section shows the email address your account uses and your name.
- Tap Name to open Edit Name, change your first and last name and tap Save. The app confirms Name updated.
- Your email address cannot be changed. Contact support if you need to update it.
- To change your password, sign out and use Forgot password? on the sign-in screen (section 3.3).
10.2 Plan & Usage
Settings → Plan & Usage shows how much of your plan you are using.
The three meters
| Meter | What it counts |
|---|---|
| Media items | Photos and videos across all your albums |
| Storage | Total size of your originals, videos and their cover frames |
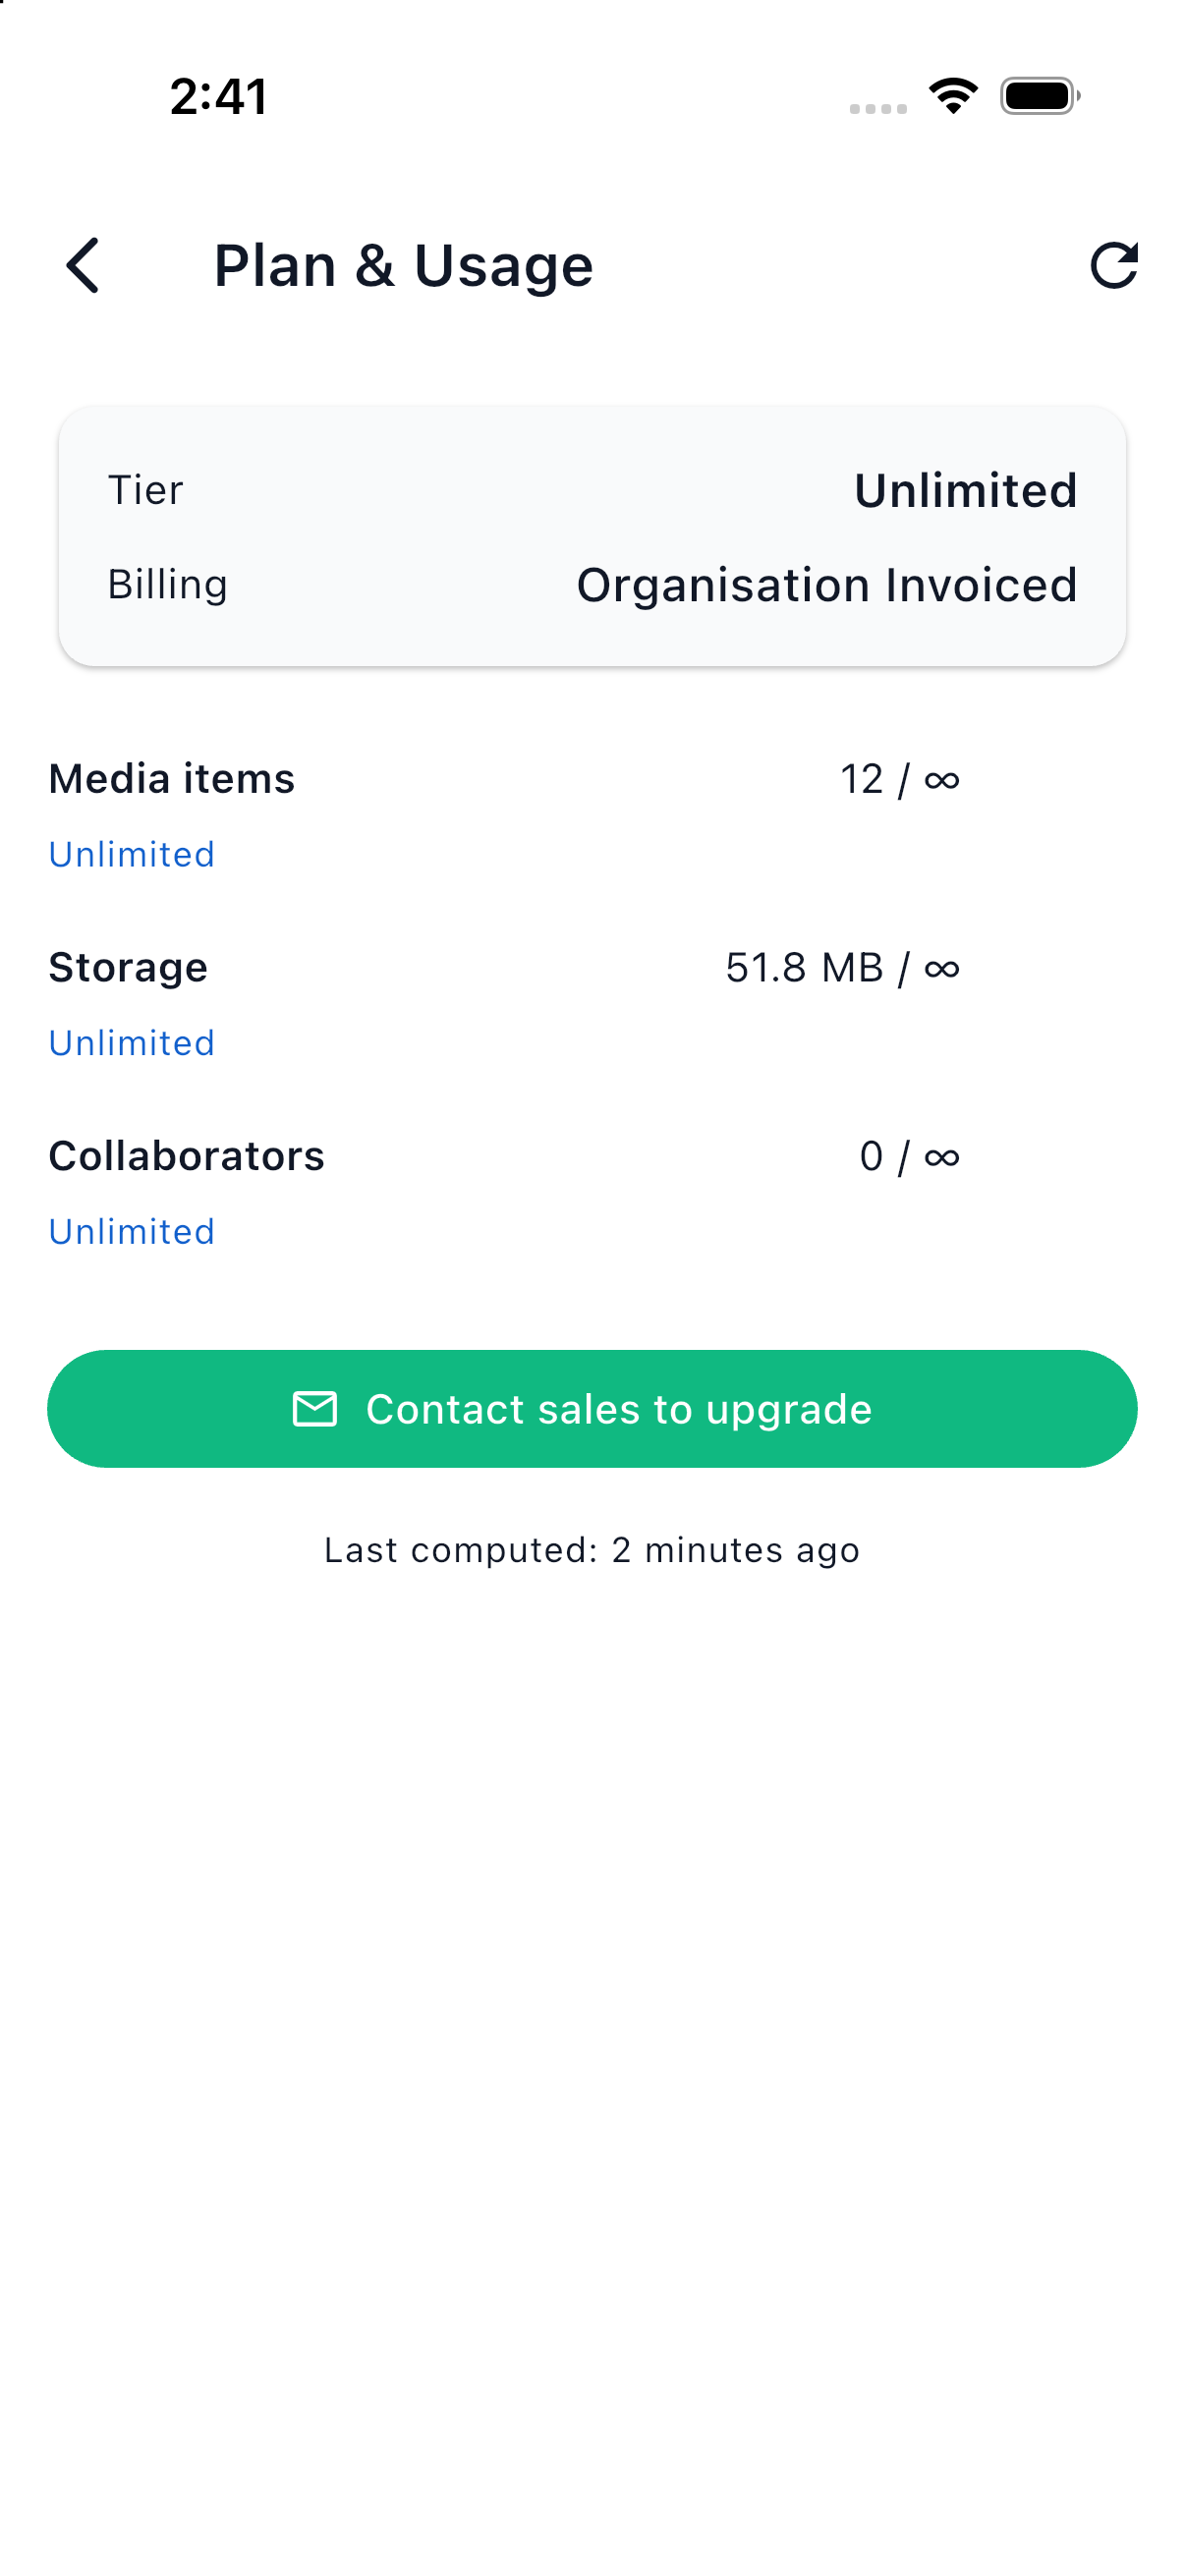
| Collaborators | Unique people you have shared with, plus +N pending invitations |
Each meter shows current / limit and a percentage. Plans with no cap read Unlimited; a plan that includes no collaborator slots reads Not included.
Below the meters, Tier names your plan, Billing shows Free, Trial, Direct or Organisation Invoiced, and on a trial Trial ends counts down the days. Last computed tells you how fresh the figures are; tap Refresh in the top bar to update them.
The plans
| Plan | Media items | Storage | Collaborators |
|---|---|---|---|
| Personal | 1,000 | 5 GB | 0 |
| Business | 3,000 | 20 GB | 3 |
| Enterprise | 10,000 | 75 GB | 5 |
| Unlimited | No limit | No limit | No limit |
Upgrading
Self-serve upgrades are not available yet. Tap Contact sales to upgrade to see the sales email address and copy it; tell sales how many photos, how much storage and how many collaborators you expect.
The Plan & Usage screen
10.3 The Plan Usage Banner
When you are near or over a cap, a banner appears at the top of the Albums screen and in Settings:
- Amber — You are approaching your plan limits. One of your meters is at 80% or more.
- Orange — You are over your plan limits. Uploads still work for now.
- Red — You've exceeded your plan — further uploads may be blocked.
Tap View to open Plan & Usage, or Dismiss to hide the banner for this session (it returns if the situation gets worse).
10.4 Appearance
Settings → Appearance → Theme: Light, Dark or System (follow the phone's setting). The change applies immediately.
10.5 Camera
Save to Camera Roll — also save every photo you take in the app to your phone's Photos or Gallery app. Off by default. The first time it is used the phone asks for permission to add to your photo library.
10.6 Security
Lock Timeout — how long you can leave the app before biometrics are required again: 30 seconds, 1, 2, 5, 15 or 30 minutes, 1, 4, 8 or 24 hours, or Never. Never still asks for biometrics after the app restarts. See section 3.4.
10.7 Server Environment
Shows which Palixo server the app is connected to: Production for everyday use, UAT for testers. Changing it shows Clear Data & Restart Required: the app clears its local albums, pictures and tags and restarts. Tick Keep cached images to avoid re-downloading images if you switch back later.
10.8 Debug and About
- Debug Logging — enable detailed logging when support asks you to.
- Version — the app version and build number, for example 1.0.3 (14). Include it when contacting support.
10.9 Signing Out
Settings → Account → Sign Out asks Are you sure you want to sign out?. The Sign Out icon on the Albums screen and the lock screen sign out immediately. Signing out clears your session; photos still waiting to upload are kept on the phone and upload after you sign in again.
11. Troubleshooting and FAQs
11.1 Troubleshooting
Camera shows "Camera access needed" or a black screen
- Allow the camera in your phone's settings (section 4.1); the Open Settings button on the camera screen takes you there.
- Close any other app that is using the camera.
- Go back to the album and open the camera again; if it persists, restart the app.
- On a work-managed phone the camera may be disabled by policy (Camera unavailable). Import from your gallery instead.
Photos are not uploading
- Look at the upload pill (section 7.2). N photos to upload means the app is waiting for a connection; N photos not uploaded in amber means uploads have stalled: tap it to open Settings.
- Check Settings → Sync Settings → Sync Queue for changes marked stuck and read What the server said.
- If Settings shows Retry Blocked Uploads, the server refused the upload, usually because the album owner is over their plan limit. Free space or upgrade, then tap it.
- Do not clear the Local Database while photos are waiting to upload; they would be discarded.
Photos I took elsewhere are not on my phone
- Pull down on the Albums screen to sync now.
- Check Auto Sync is on and, if WiFi Only Downloads is on, that you are on Wi-Fi.
- Use Resync From Date to re-download everything changed since a date.
An album I was invited to is empty or says "Album not available yet"
- It fills in after the next sync; pull to refresh.
- Check your tag filters: Clear in the filter bar shows every photo again.
A photo opens blurry or says "Image not found locally"
- The full-size original has not been downloaded yet. Open the photo with a connection, or set the album to Keep photos on this device (section 7.3).
- If the phone is low on space, the app pauses downloads below about 500 MB free.
A photo says it needs retaking
- Its image was lost before it finished saving. Open it and choose Remove & retake (section 5.9).
The app keeps asking for Face ID / fingerprint
- Increase Settings → Security → Lock Timeout, or disable biometrics for Palixo in your phone's settings.
An invitation link does not work
- Invitation links expire; ask the sender to invite you again.
- Sign in with the email address the invitation was sent to.
- If the app says the link is for a different server, switch the server on the sign-in screen or in Settings.
I'm on the wrong server / I see a yellow UAT banner
- Switch Server on the sign-in screen (or Settings → Server Environment) back to Production. This clears local data and restarts the app.
11.2 FAQs
Q: Can I use the app offline? A: Yes. Everything except fetching a photo that is not yet on the phone works offline: the camera, importing, tagging, editing, rotating, drawing and deleting. Changes upload when you next have a connection, even if the app is closed.
Q: Where do my photos go? A: Into the album you took them in, on the Palixo server, and from there to the website, your other devices and Salesforce. They are stored inside the app on your phone, not in your camera roll, unless you turn on Save to Camera Roll.
Q: Can I record long videos? A: No. Clips stop at ten seconds. Record another clip for more.
Q: Can I upload a video from my camera roll? A: No. Videos can only be recorded in the app. Photo imports are images only.
Q: How do I share photos with someone who does not have Palixo? A: Create a Collection on the Palixo website. The app does not create Collections. Alternatively save the photos to your camera roll and share them from your phone.
Q: How do I create or delete an album? A: Albums are created and deleted on the Palixo website. The app shows every album you own or have been invited to, and Owners and Admins can rename an album in the app (⋮ → Rename Album).
Q: How do I move photos between albums? A: Photos cannot be moved. Save them to your camera roll and import them into the other album with the right tags.
Q: Can I turn AI Tagging off in the app? A: No. AI Tagging is switched on or off in your settings on the website. In the app you can remove individual System Tags (Owner or Admin) and filter by them.
Q: How much space does the app use? A: See Settings → Storage. Thumbnails for your whole library are small; full-size originals are only kept for albums set to Keep photos on this device. Clear Cache frees space at any time.
Q: What happens if I delete a photo by accident? A: Deleted photos cannot be recovered. Save any photo you need before deleting it.
Q: Why was my upload blocked? A: The account that owns the album is over its media item or storage cap. Check Plan & Usage, delete photos to free space, or contact sales@palixo.media about upgrading.
Q: My trial has ended, what now? A: The app shows Trial expired. Your photos are preserved. Accepting an invitation to a colleague's album moves you to the free Personal plan; otherwise contact sales@palixo.media to continue on a paid plan.
12. Contact and Support
12.1 Palixo Help
If you need assistance with the Palixo app:
Email Support: support@palixo.media
Response Time: We aim to respond to all support requests within 24 hours during business days.
When contacting support, include:
- Your email address (account identifier)
- A description of the issue and the steps to reproduce it
- Screenshots if applicable
- Your phone model and operating system version
- The app version from Settings → About (for example 1.0.3 (14))
- If asked, turn on Settings → Debug Logging before reproducing the problem
12.2 We Love Your Feedback
Your feedback helps us improve Palixo. We want to hear about features you love, pain points in your workflow, confusing parts of the app and success stories.
Send Feedback: feedback@palixo.media
12.3 Send Us Your Feature Requests
Have an idea that would make Palixo better for your team? Email feedback@palixo.media and tell us the problem you are trying to solve, your current workaround, how you would like it to work and how many people on your team would benefit.
Last Updated: September 2026 (app version 1.0.3)
Palixo is a product of Cloud Gallery Pty Ltd. For support: support@palixo.media